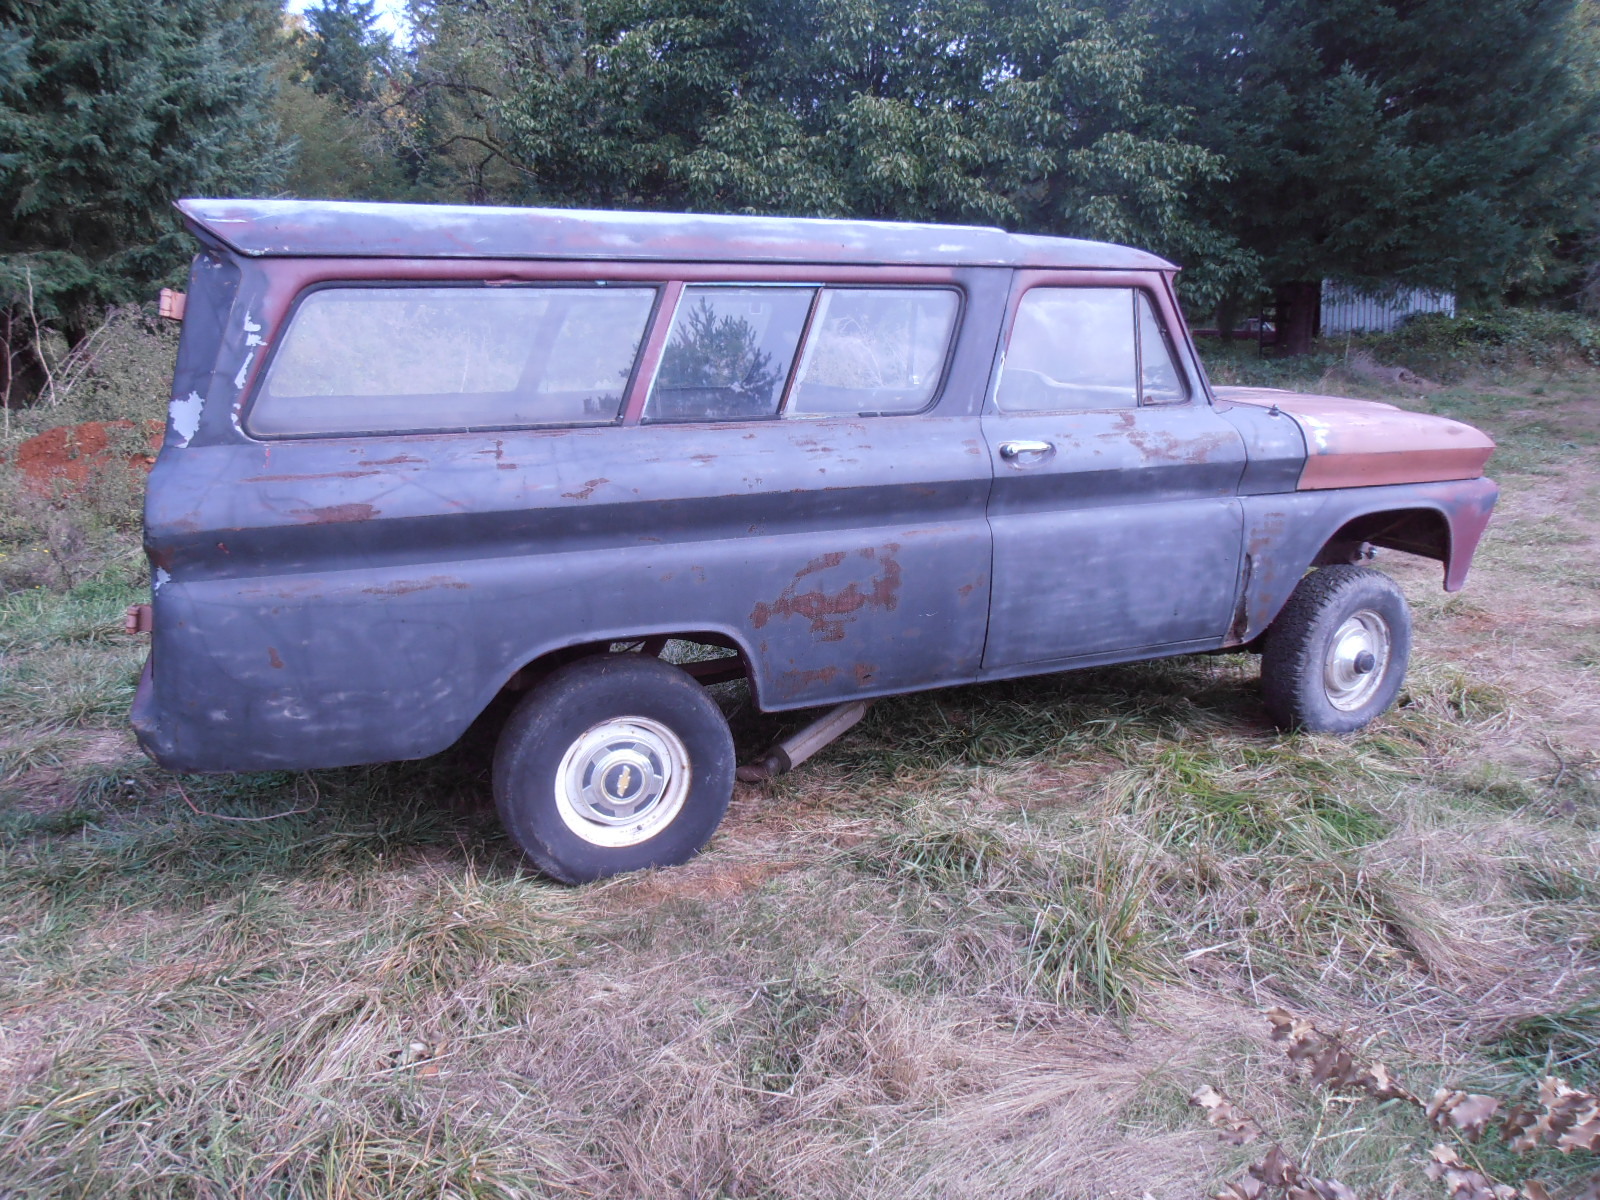
Here is the beast that Battlefind.com has rescued from obscurity.
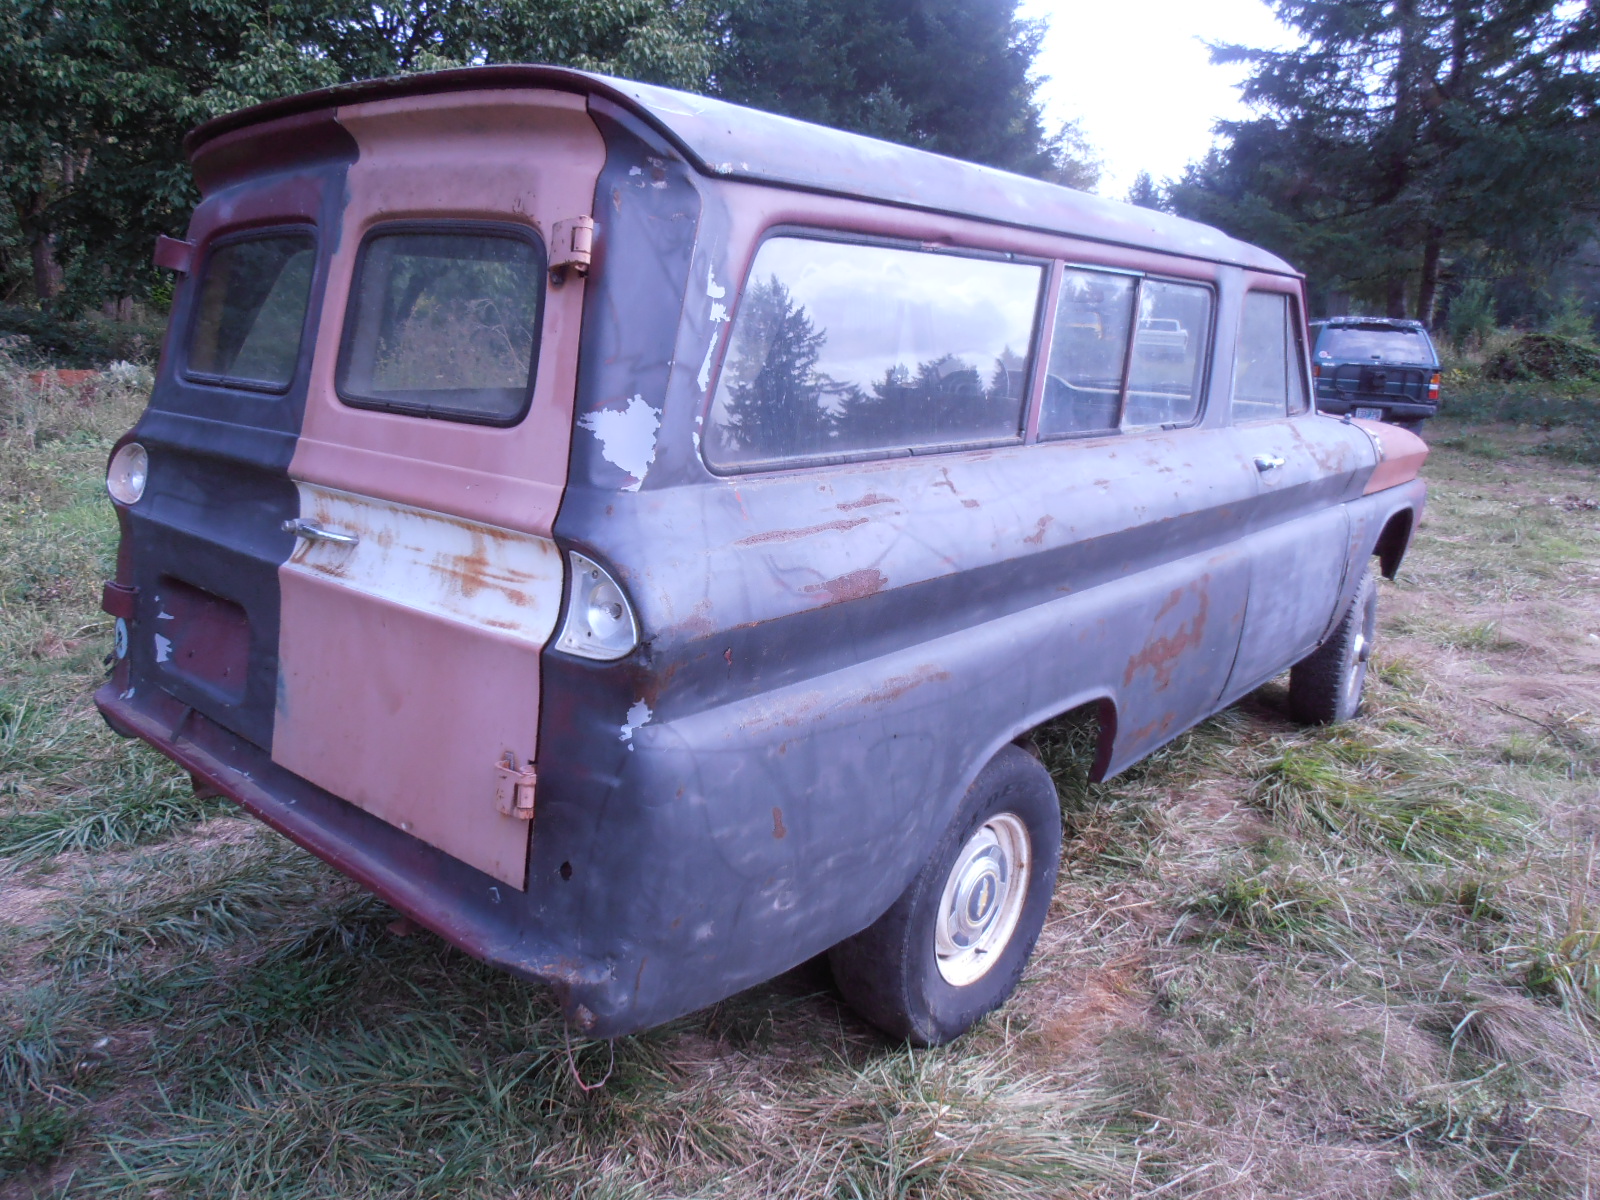
It is a 1966 GMC K-10 4X4 Suburban 1/2 Ton, and is very very rust free, short of the passenger front fender. There are some blips here and there, and the rear quarters look better in photos than in person, but even then, it looks pretty super. (years later, when this came back to our shop for restoration, we learned the reality of the rear quarters, as you will see further along in this post. We began the frame off restoration in Spring of 2023


 AFTER SOME TIME SITTING IN THE FIELD, WE ARE READY
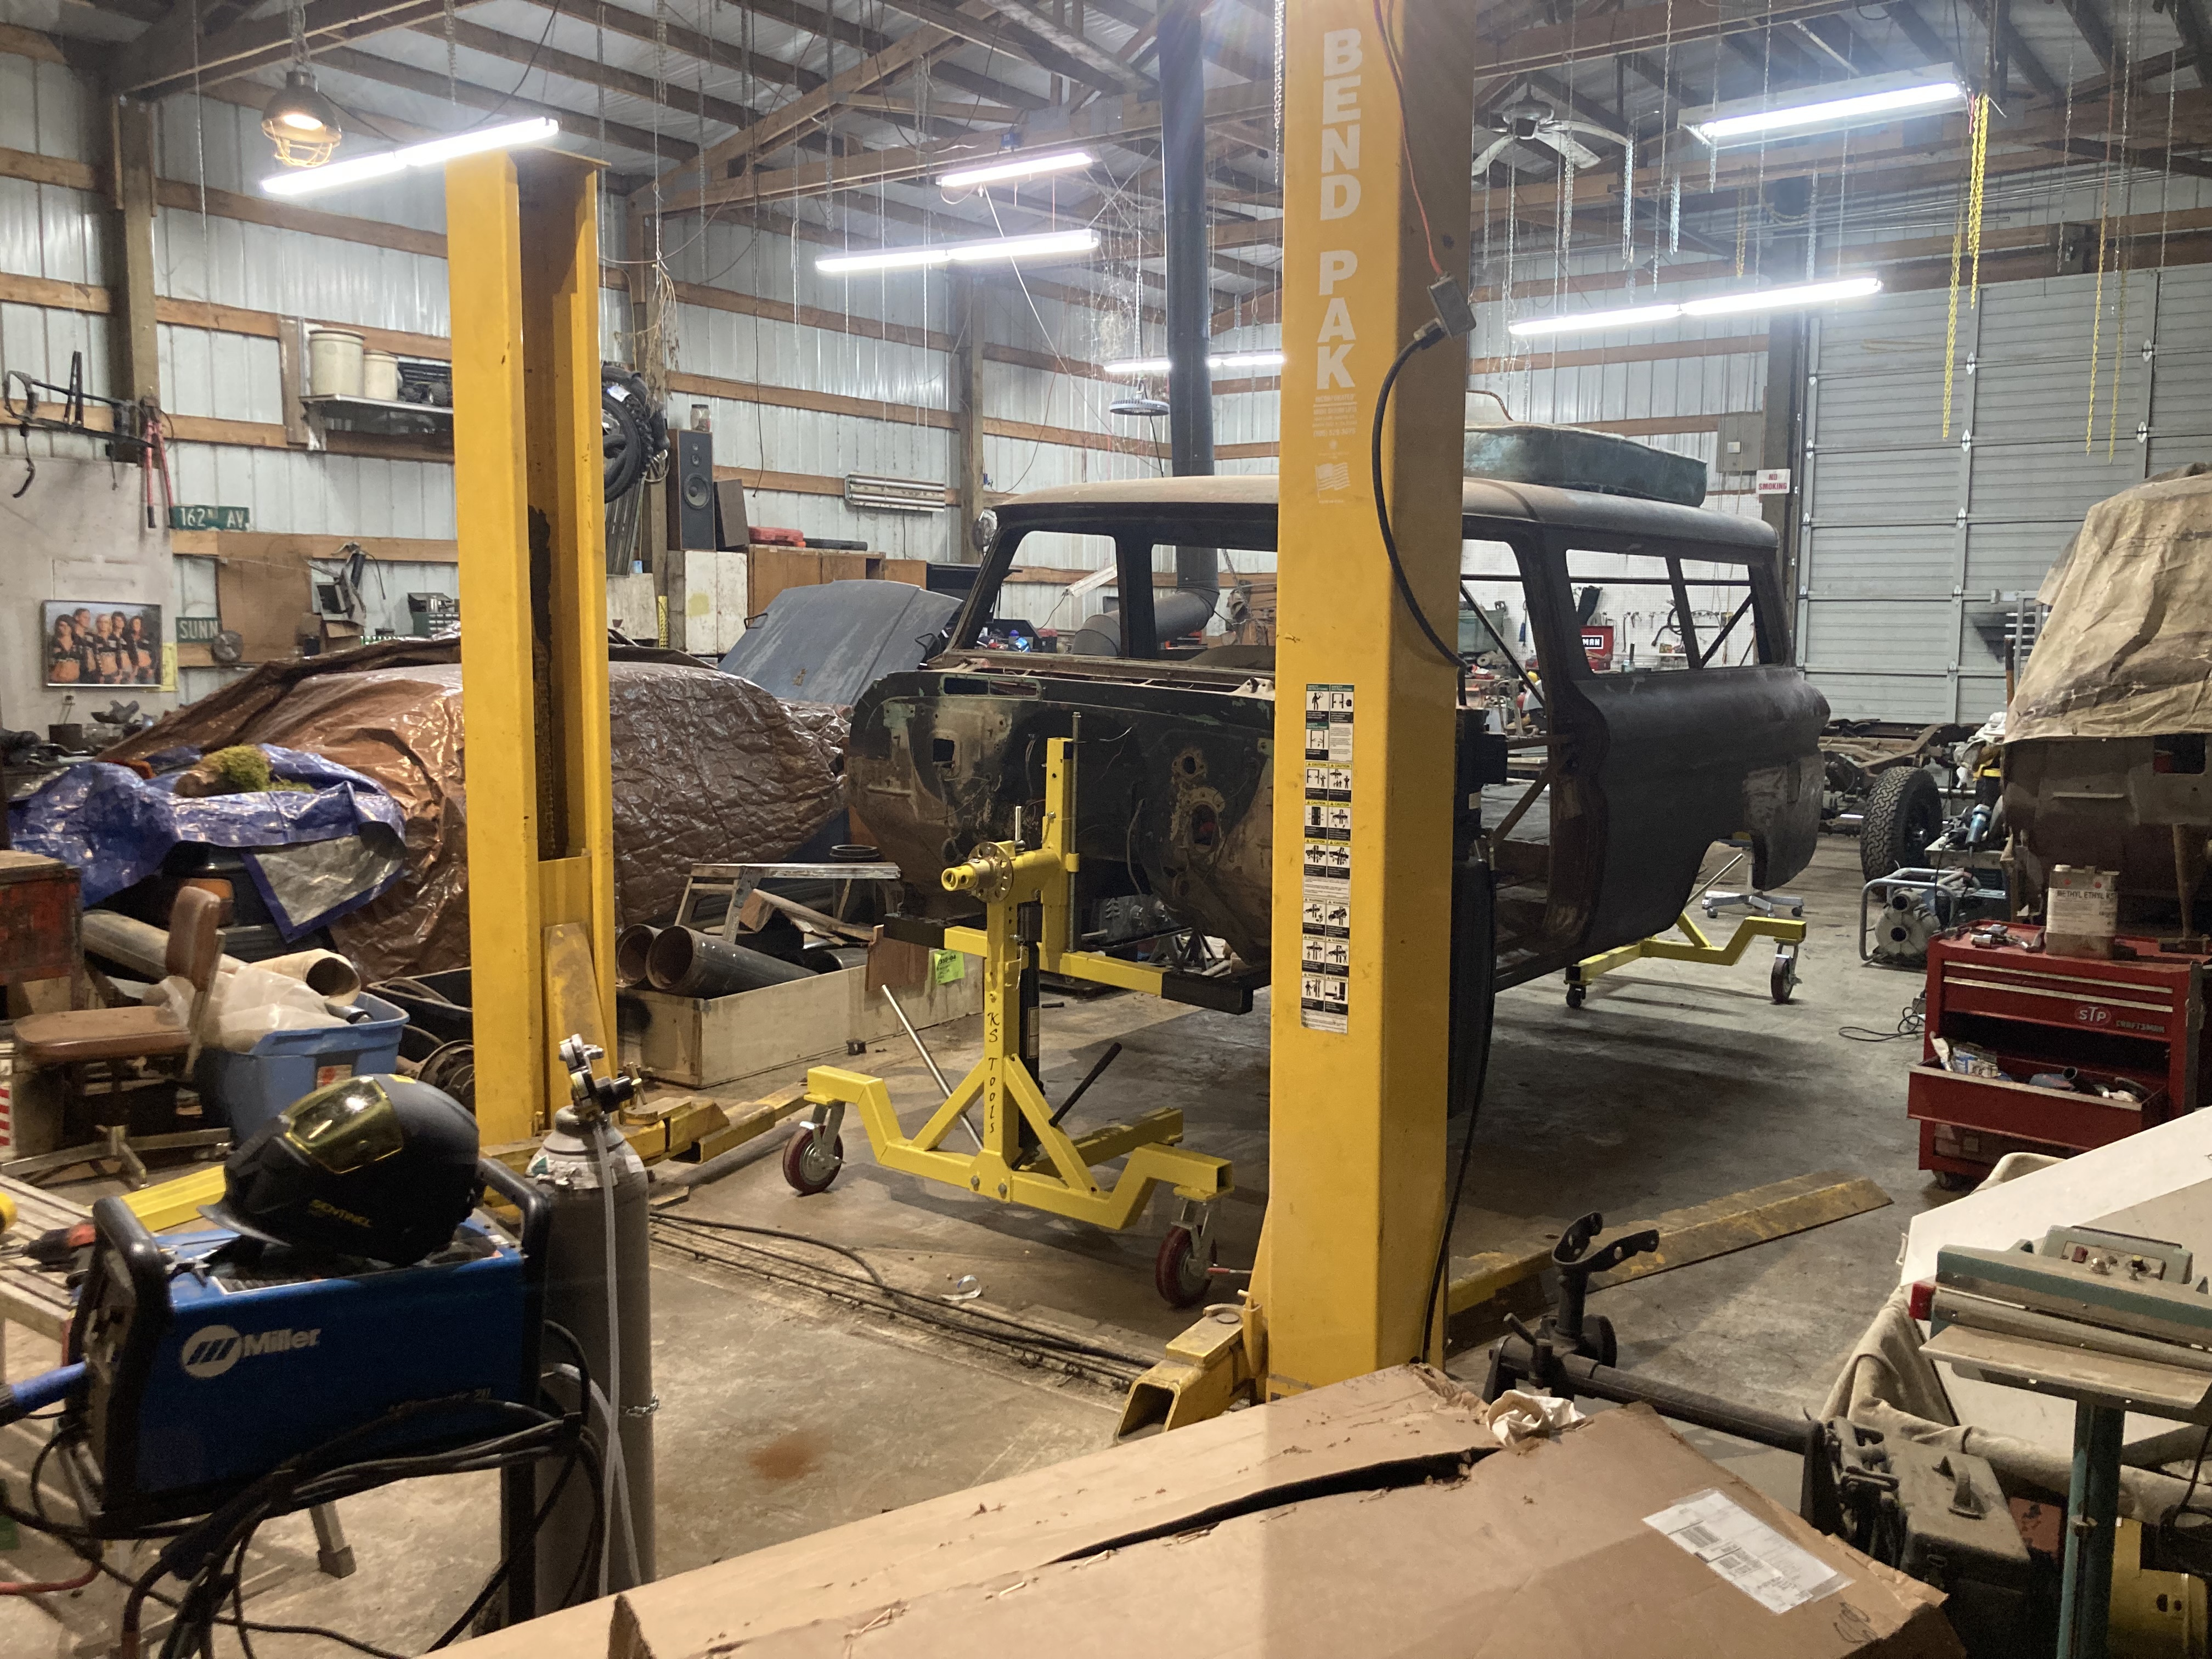
It is now inside the shop and ready to have the 6.2 Turbo Diesel engine fitted into the engine bay. As of now, there is no crossmember, so to fabricate or use a pre-fabricated aftermarket crossmember is to be decided.

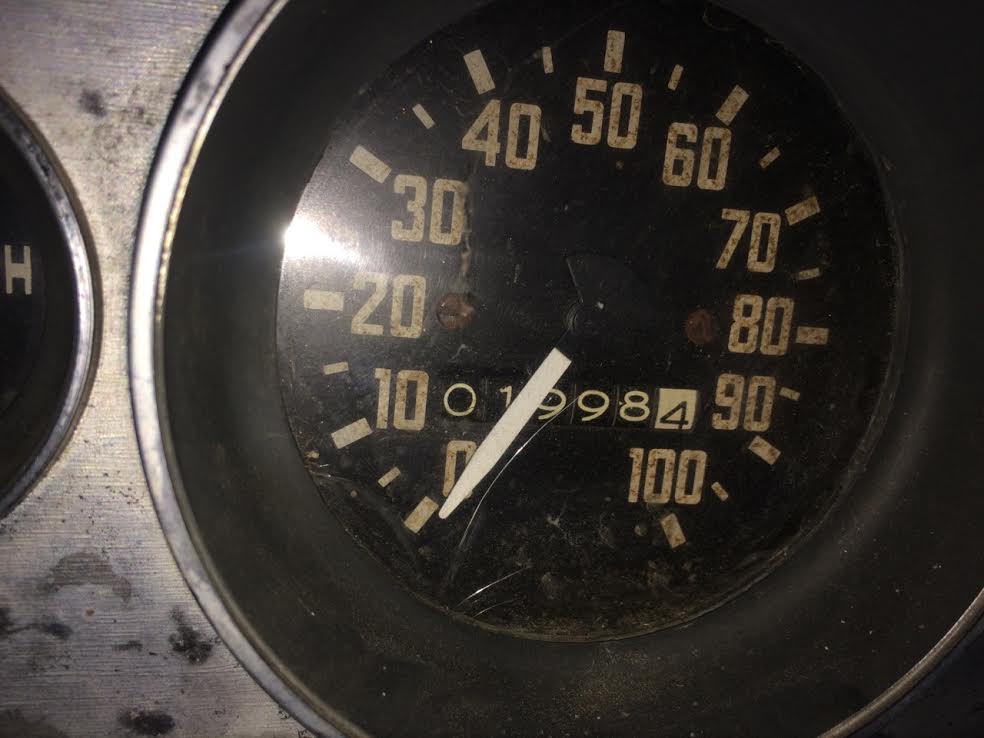
The mileage on the chassis is rather high. It is likely that more will be done to this than initially planned.
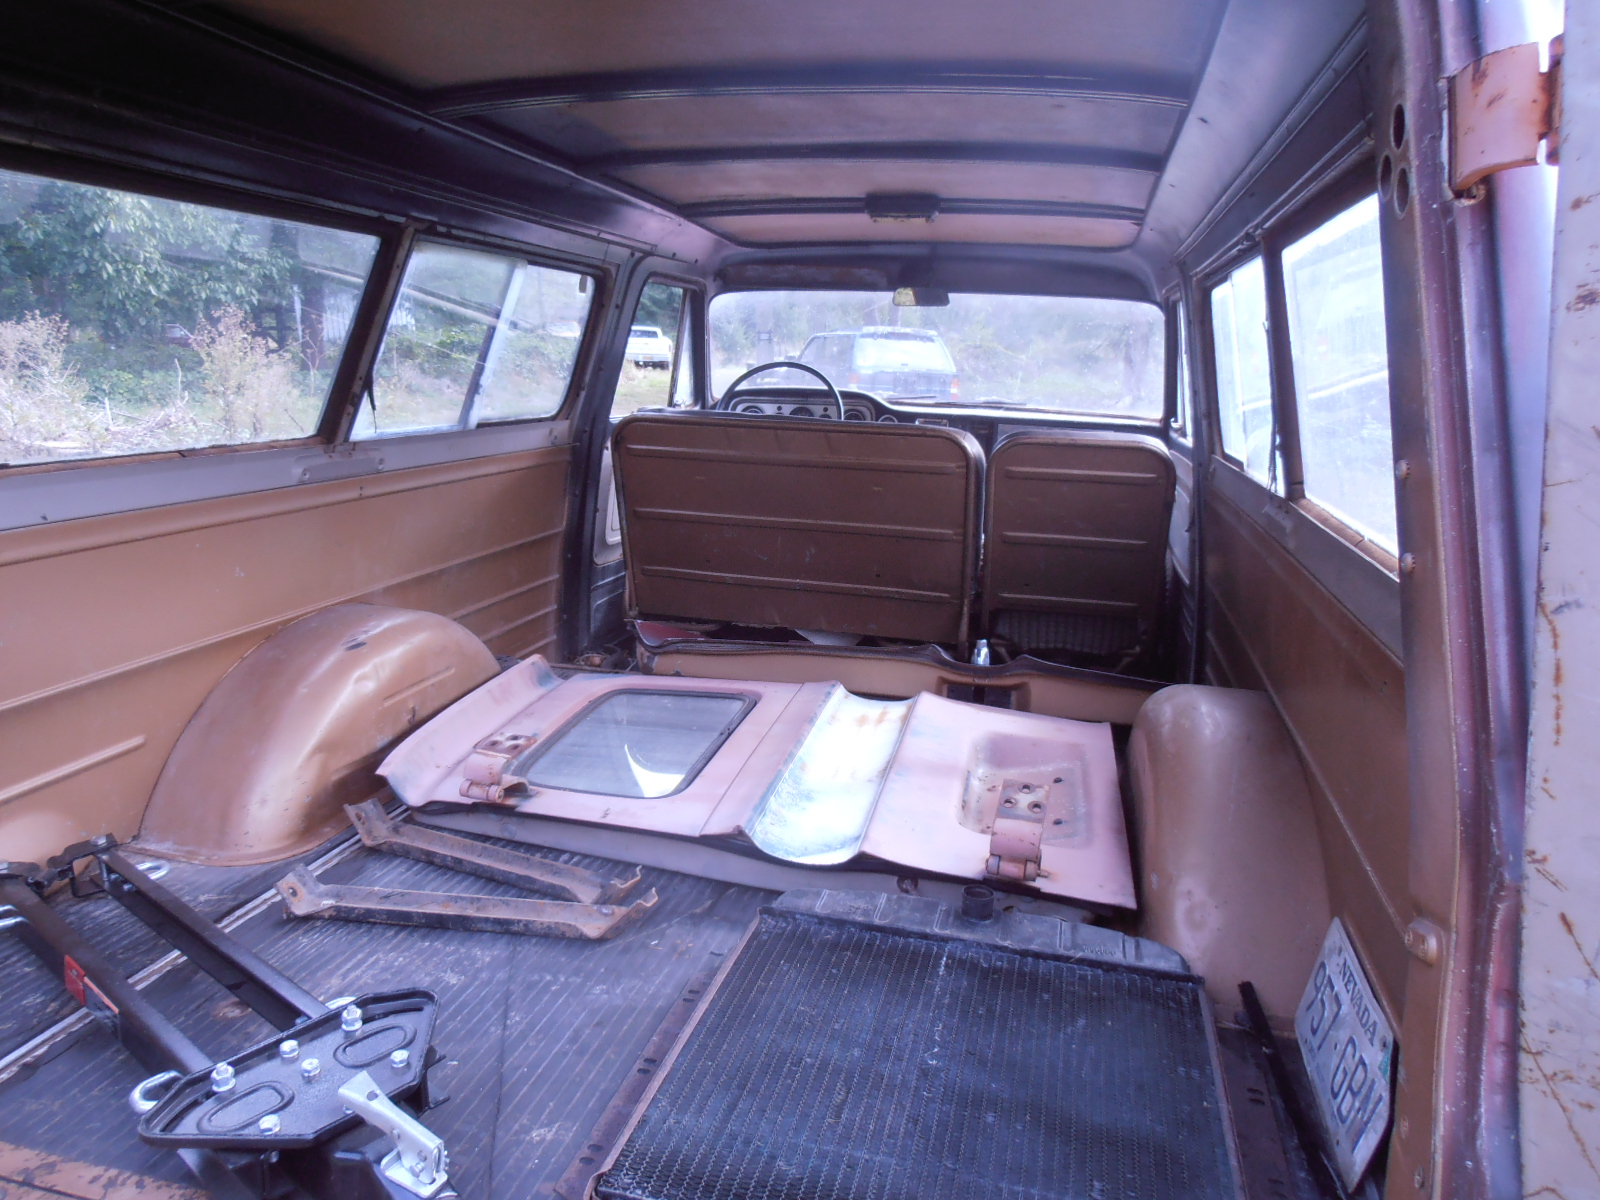
But, overall, it is a nice starting point for a modified beast, that looks a bit rough on the outside. All of the seats are inside, all the way back too!


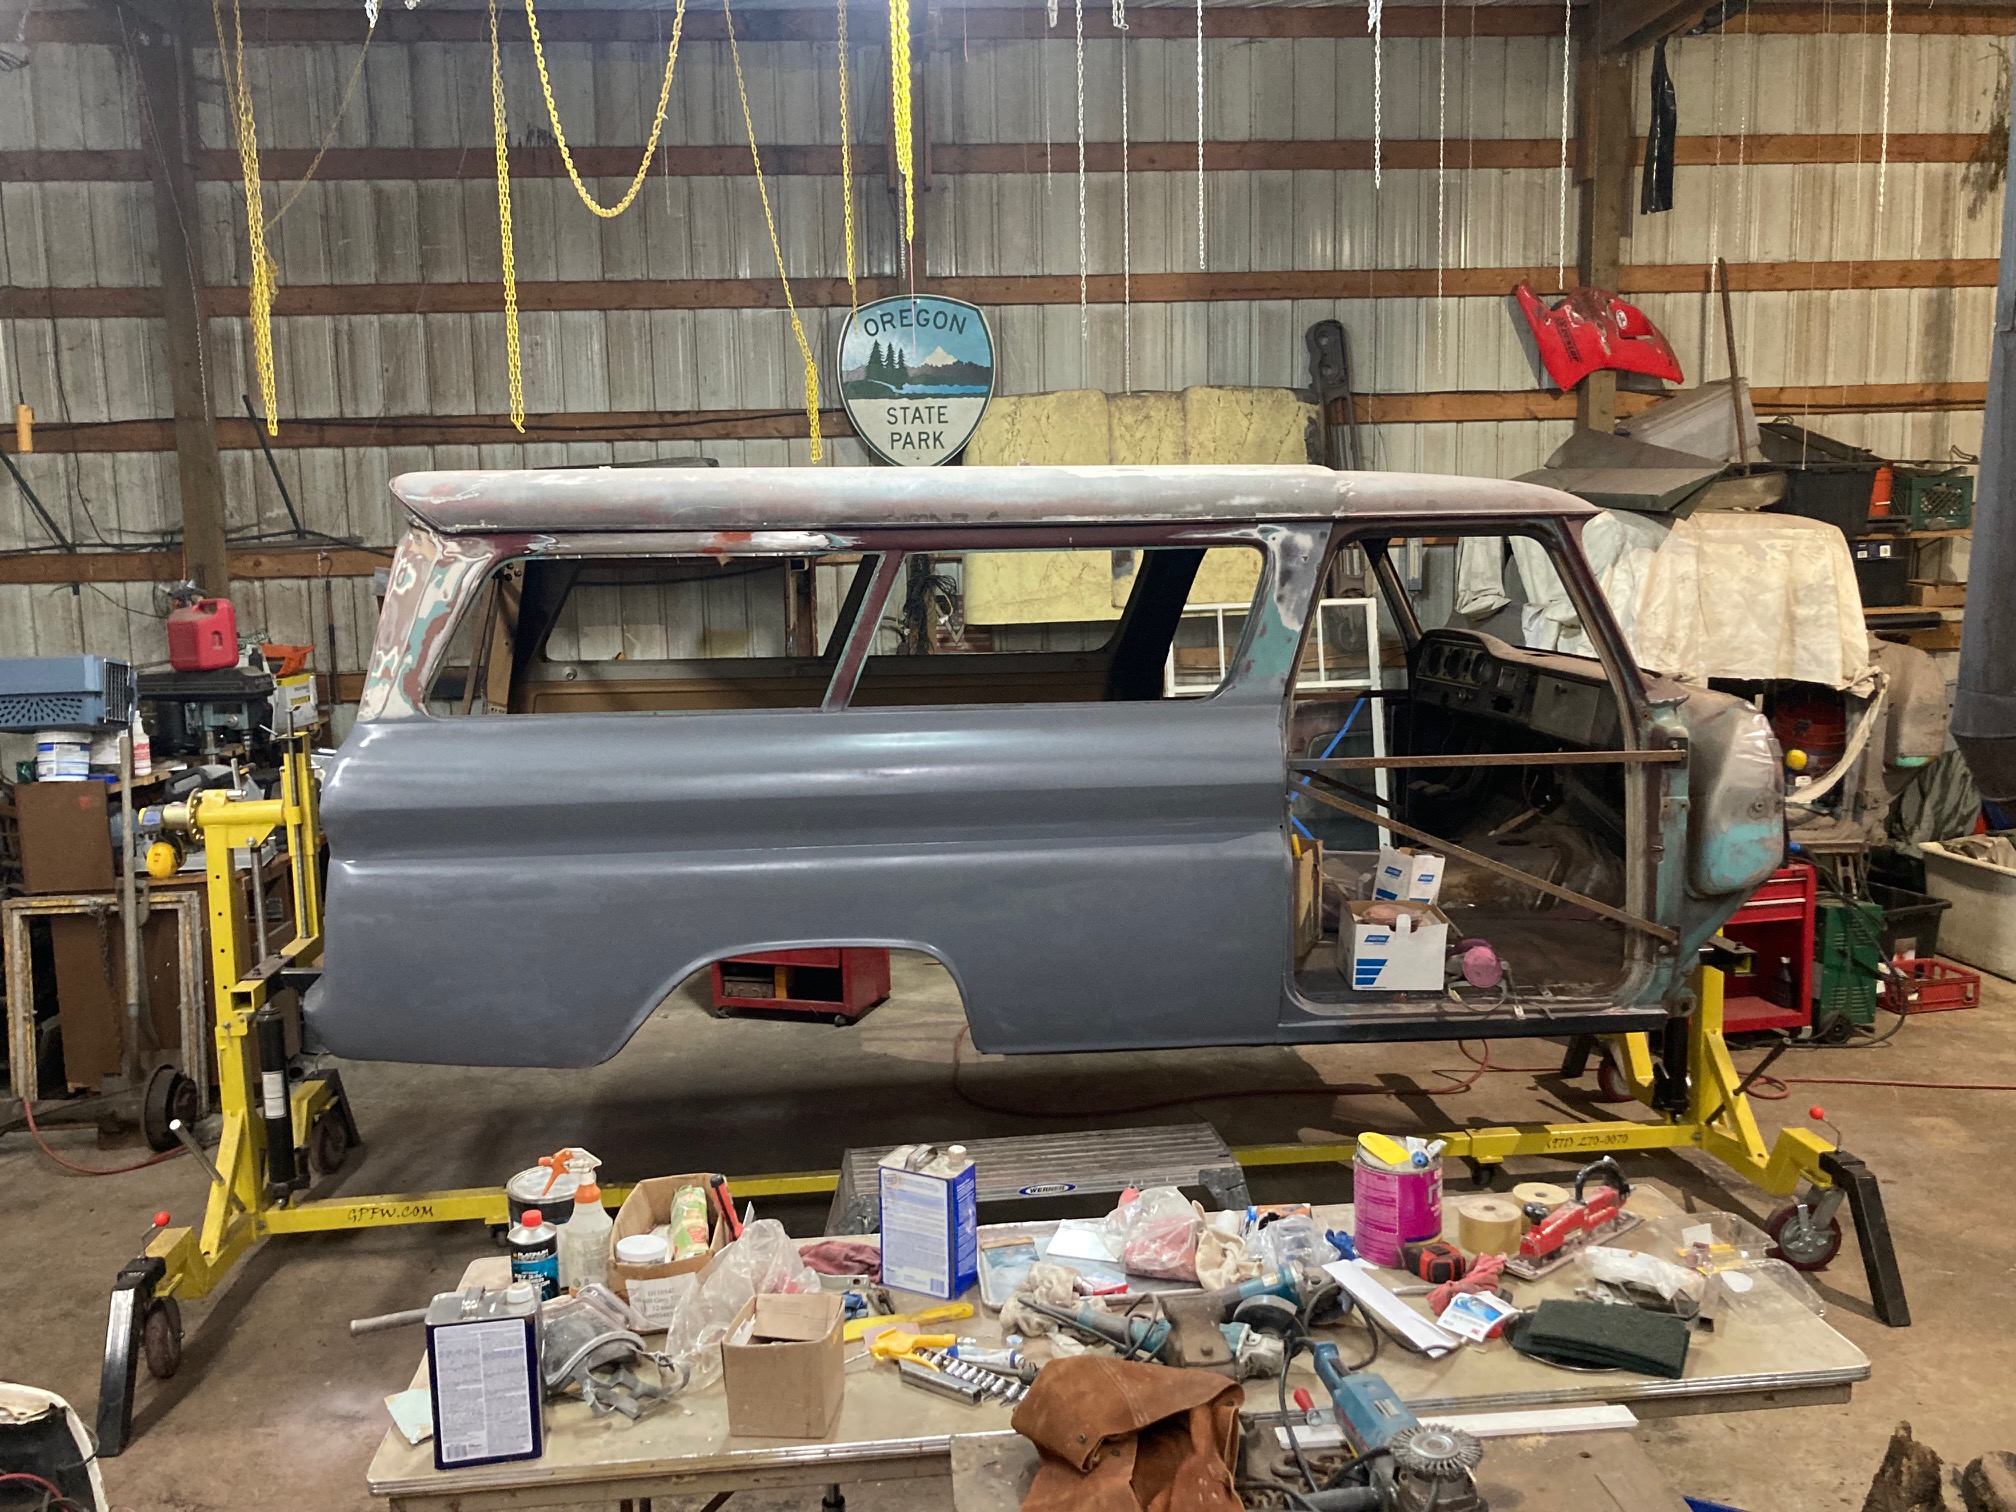
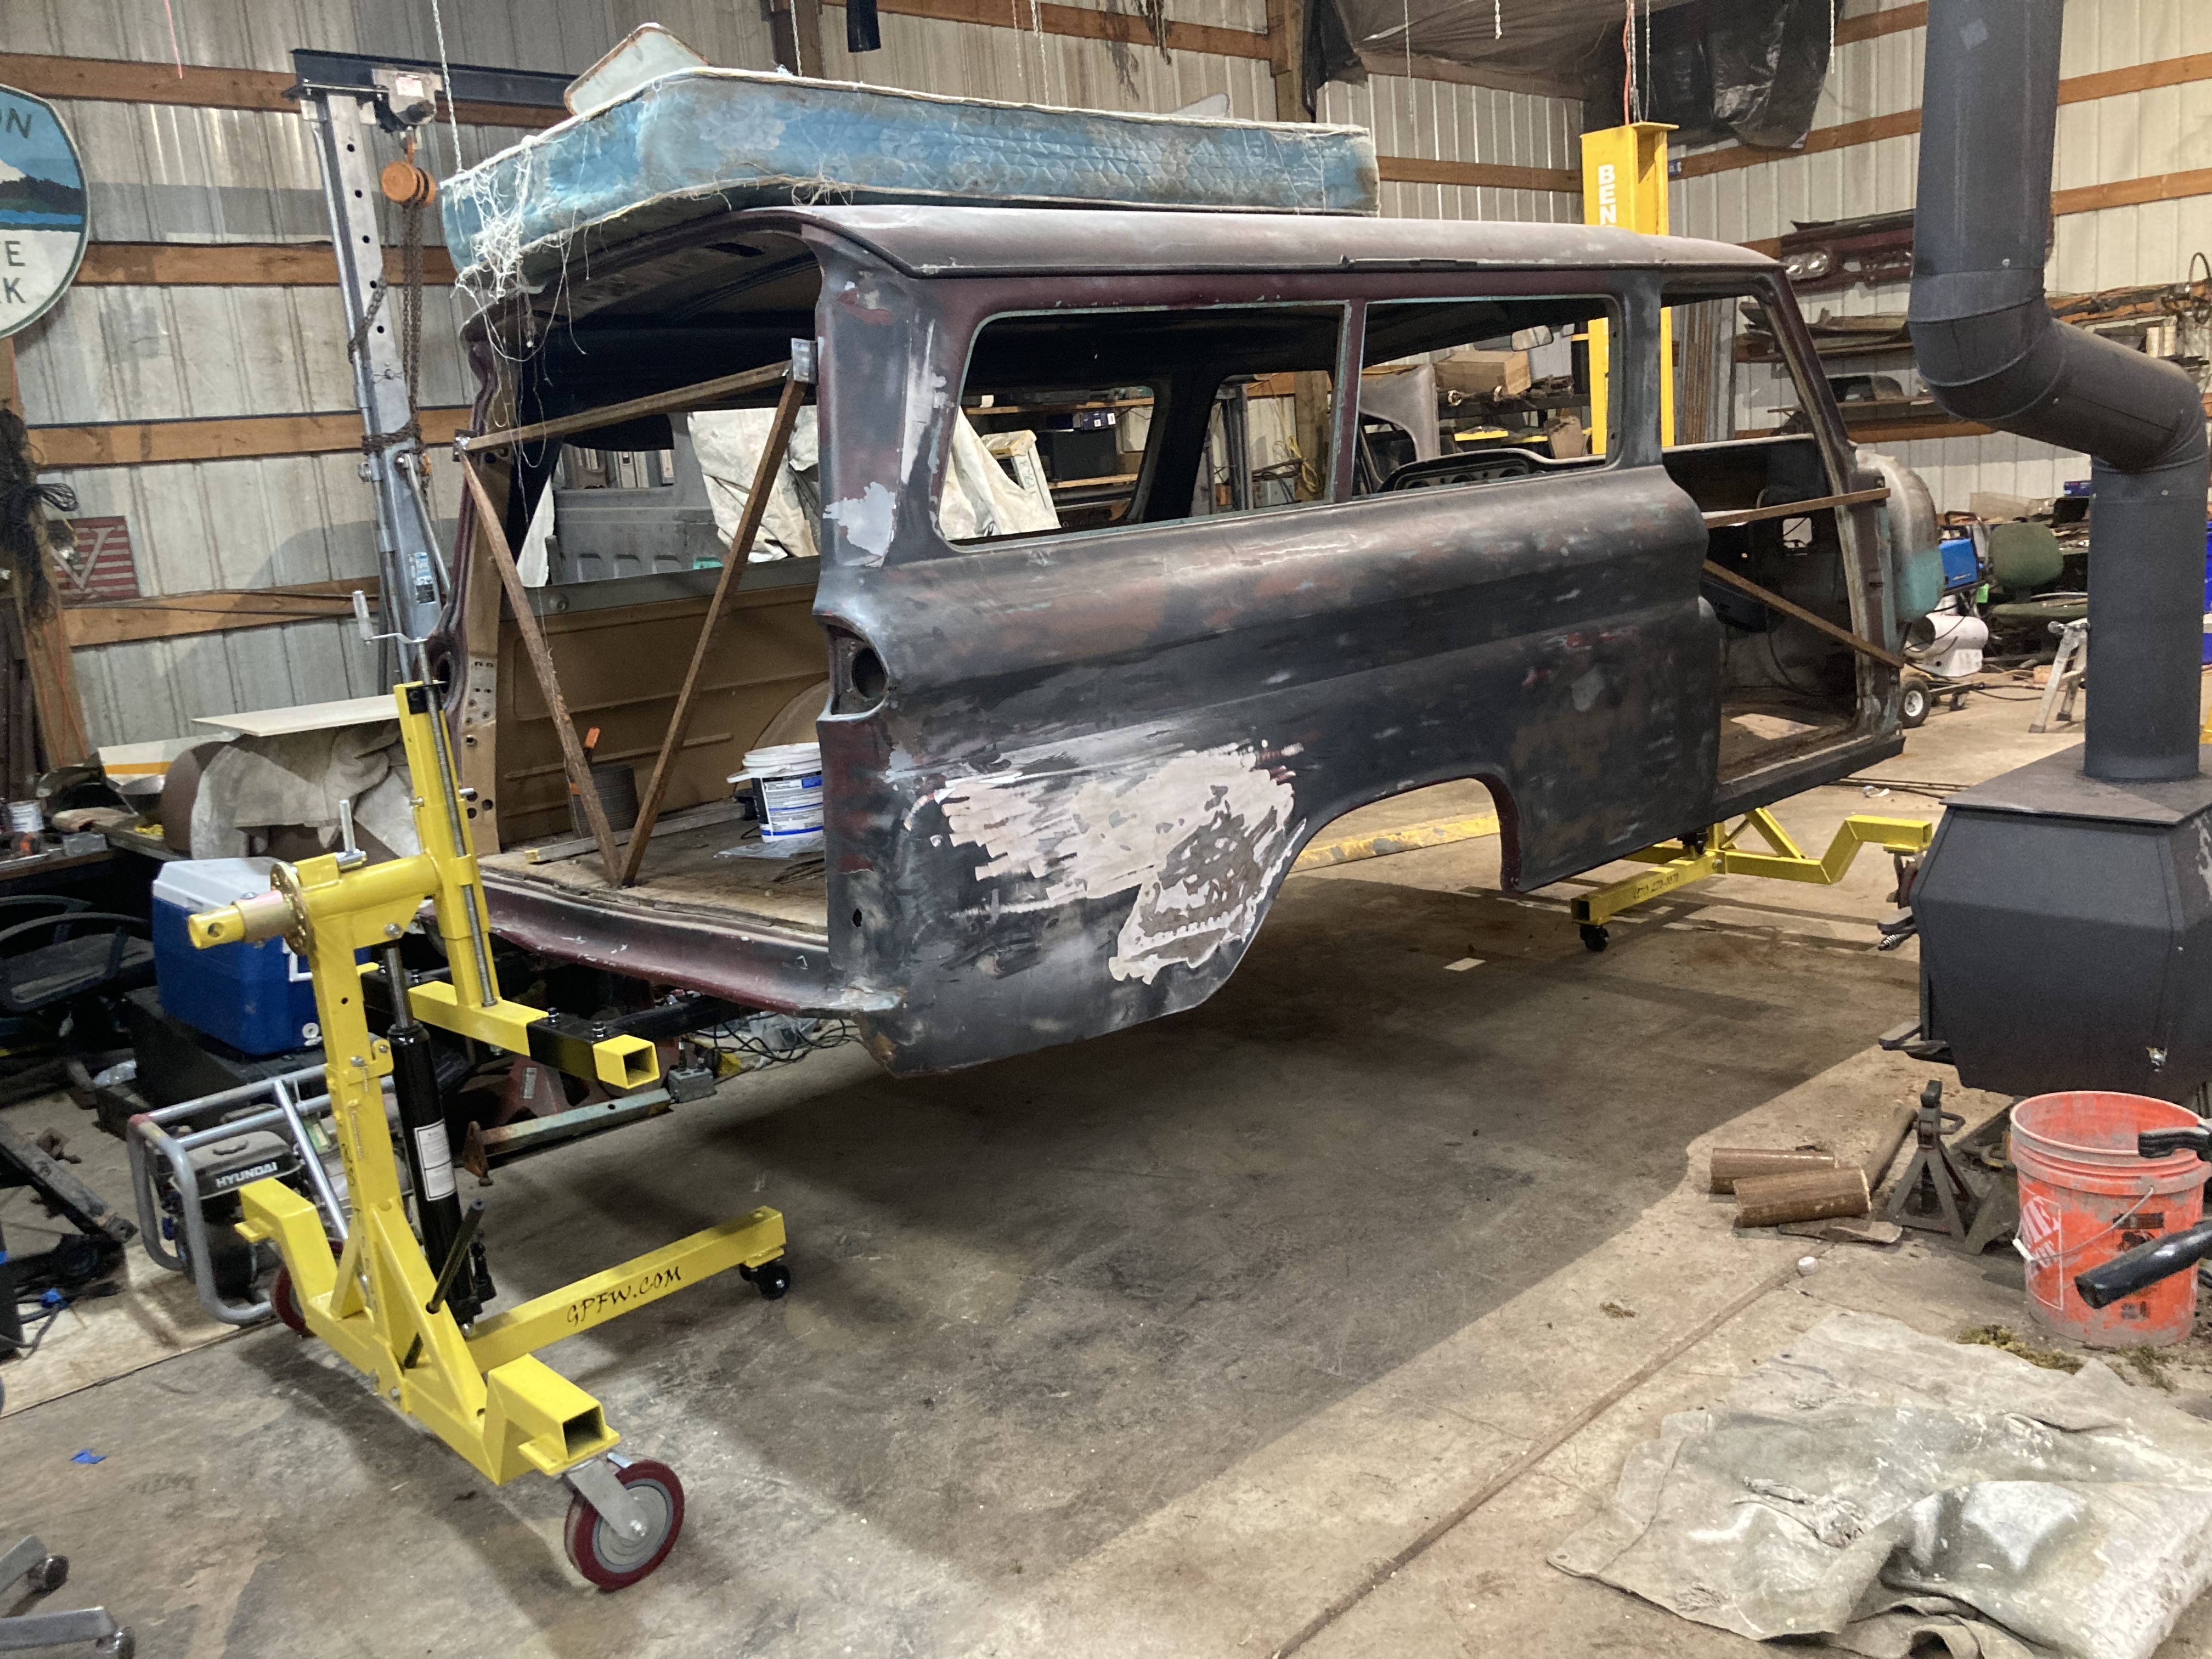
After some time having the front and rear differentials rebuilt, as well as the new Trans and 6.2 Turbo Diesel engine, Spring of 2023 sees beginning of the frame-off body restoration and paint.
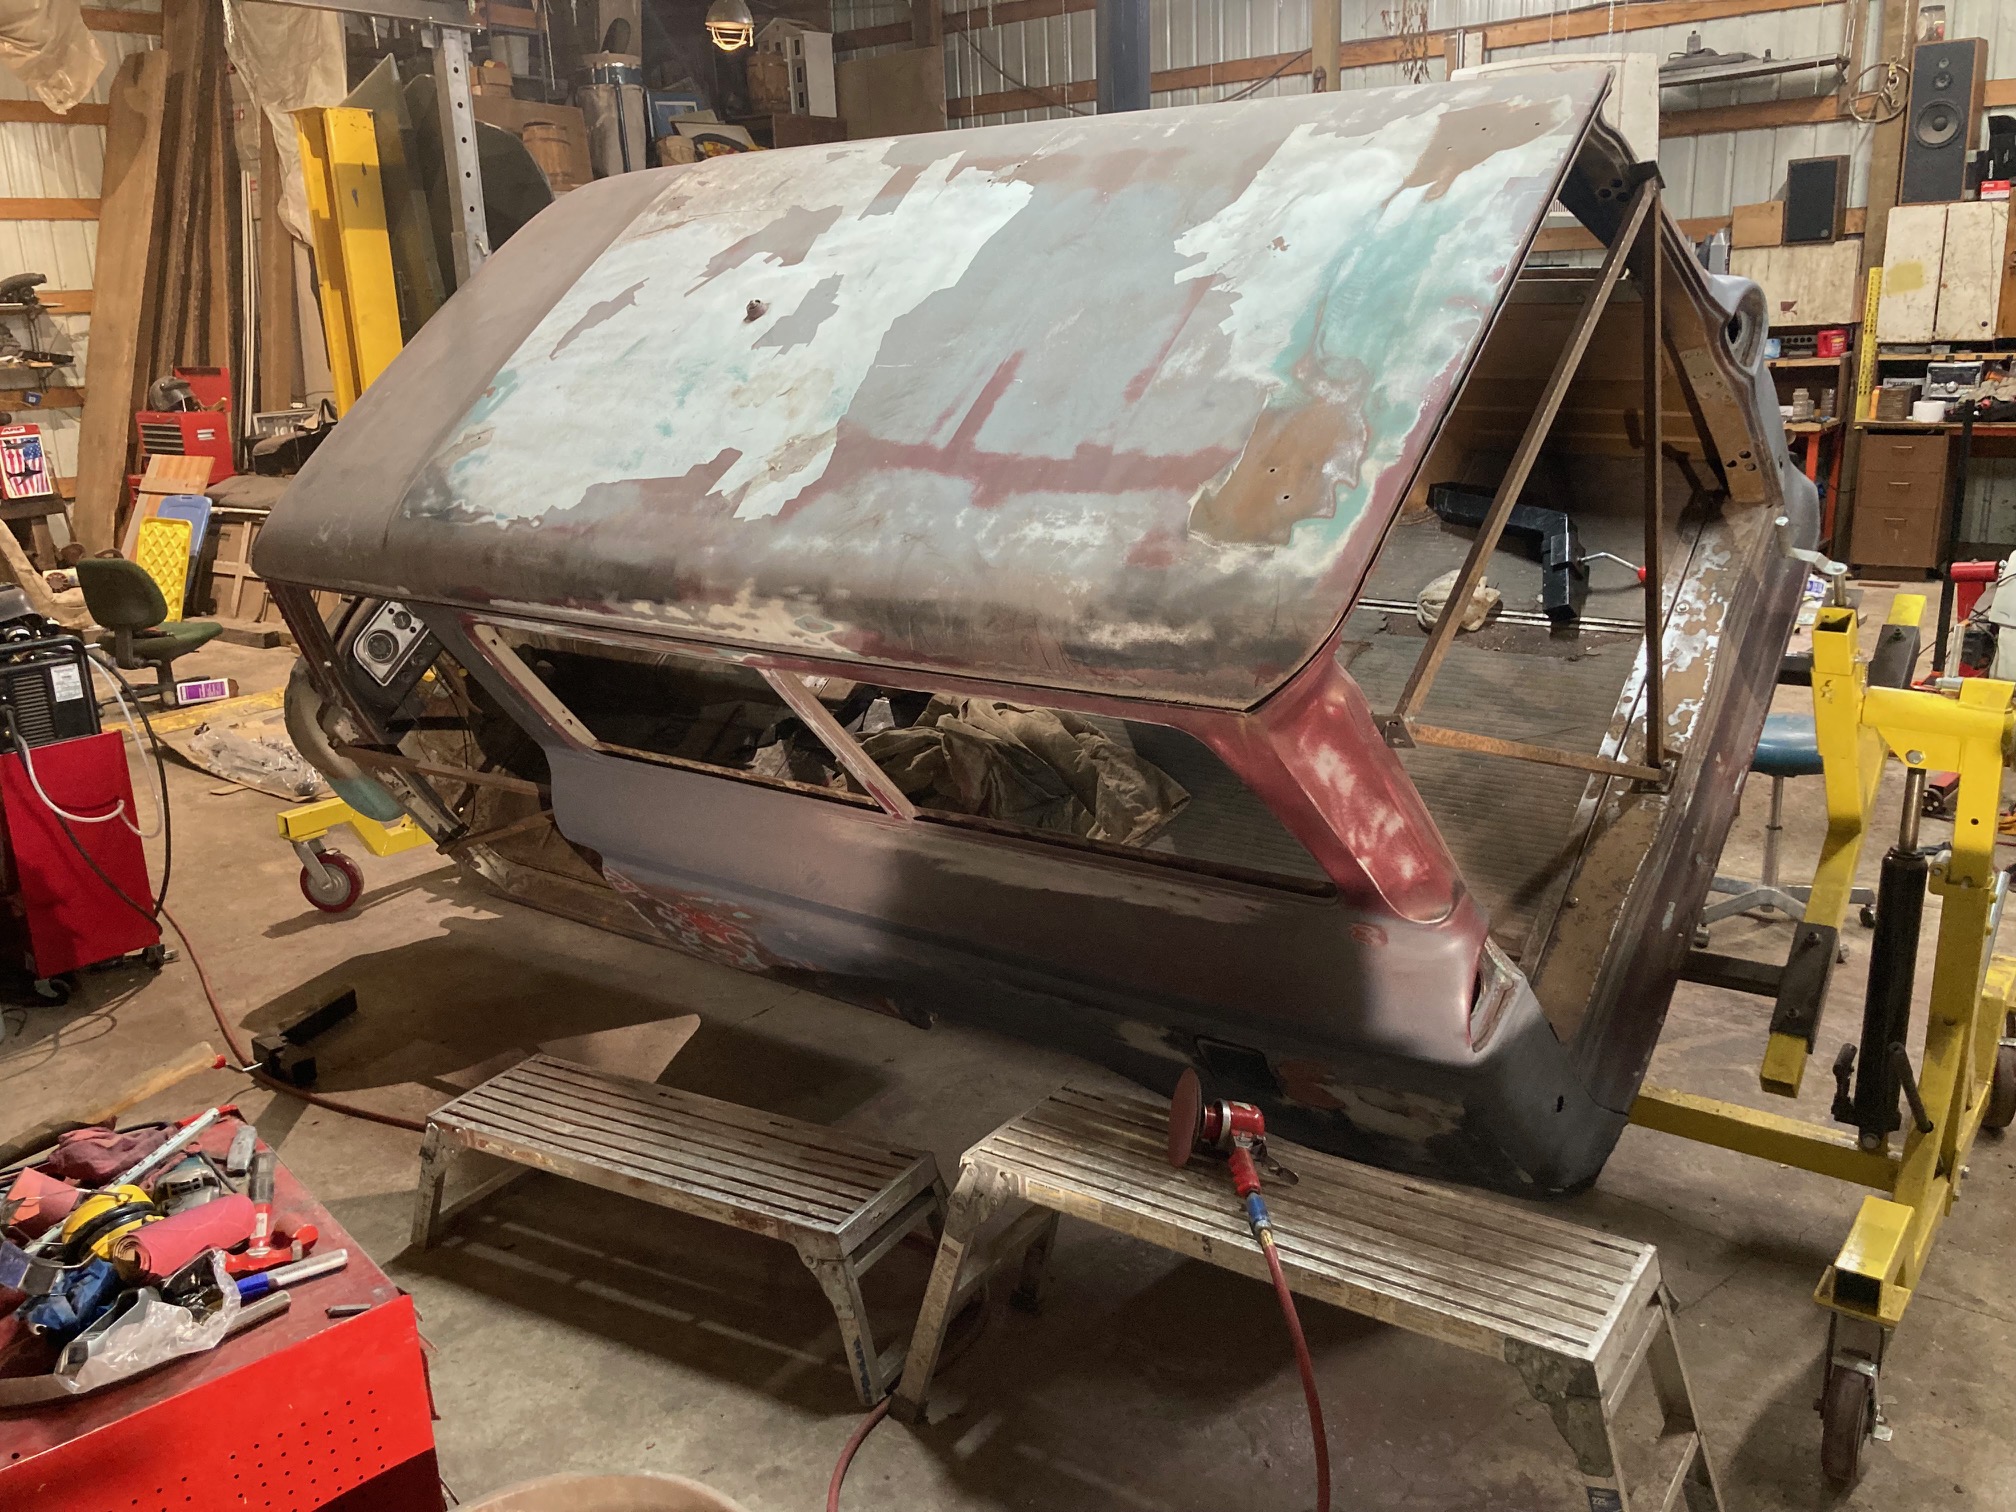
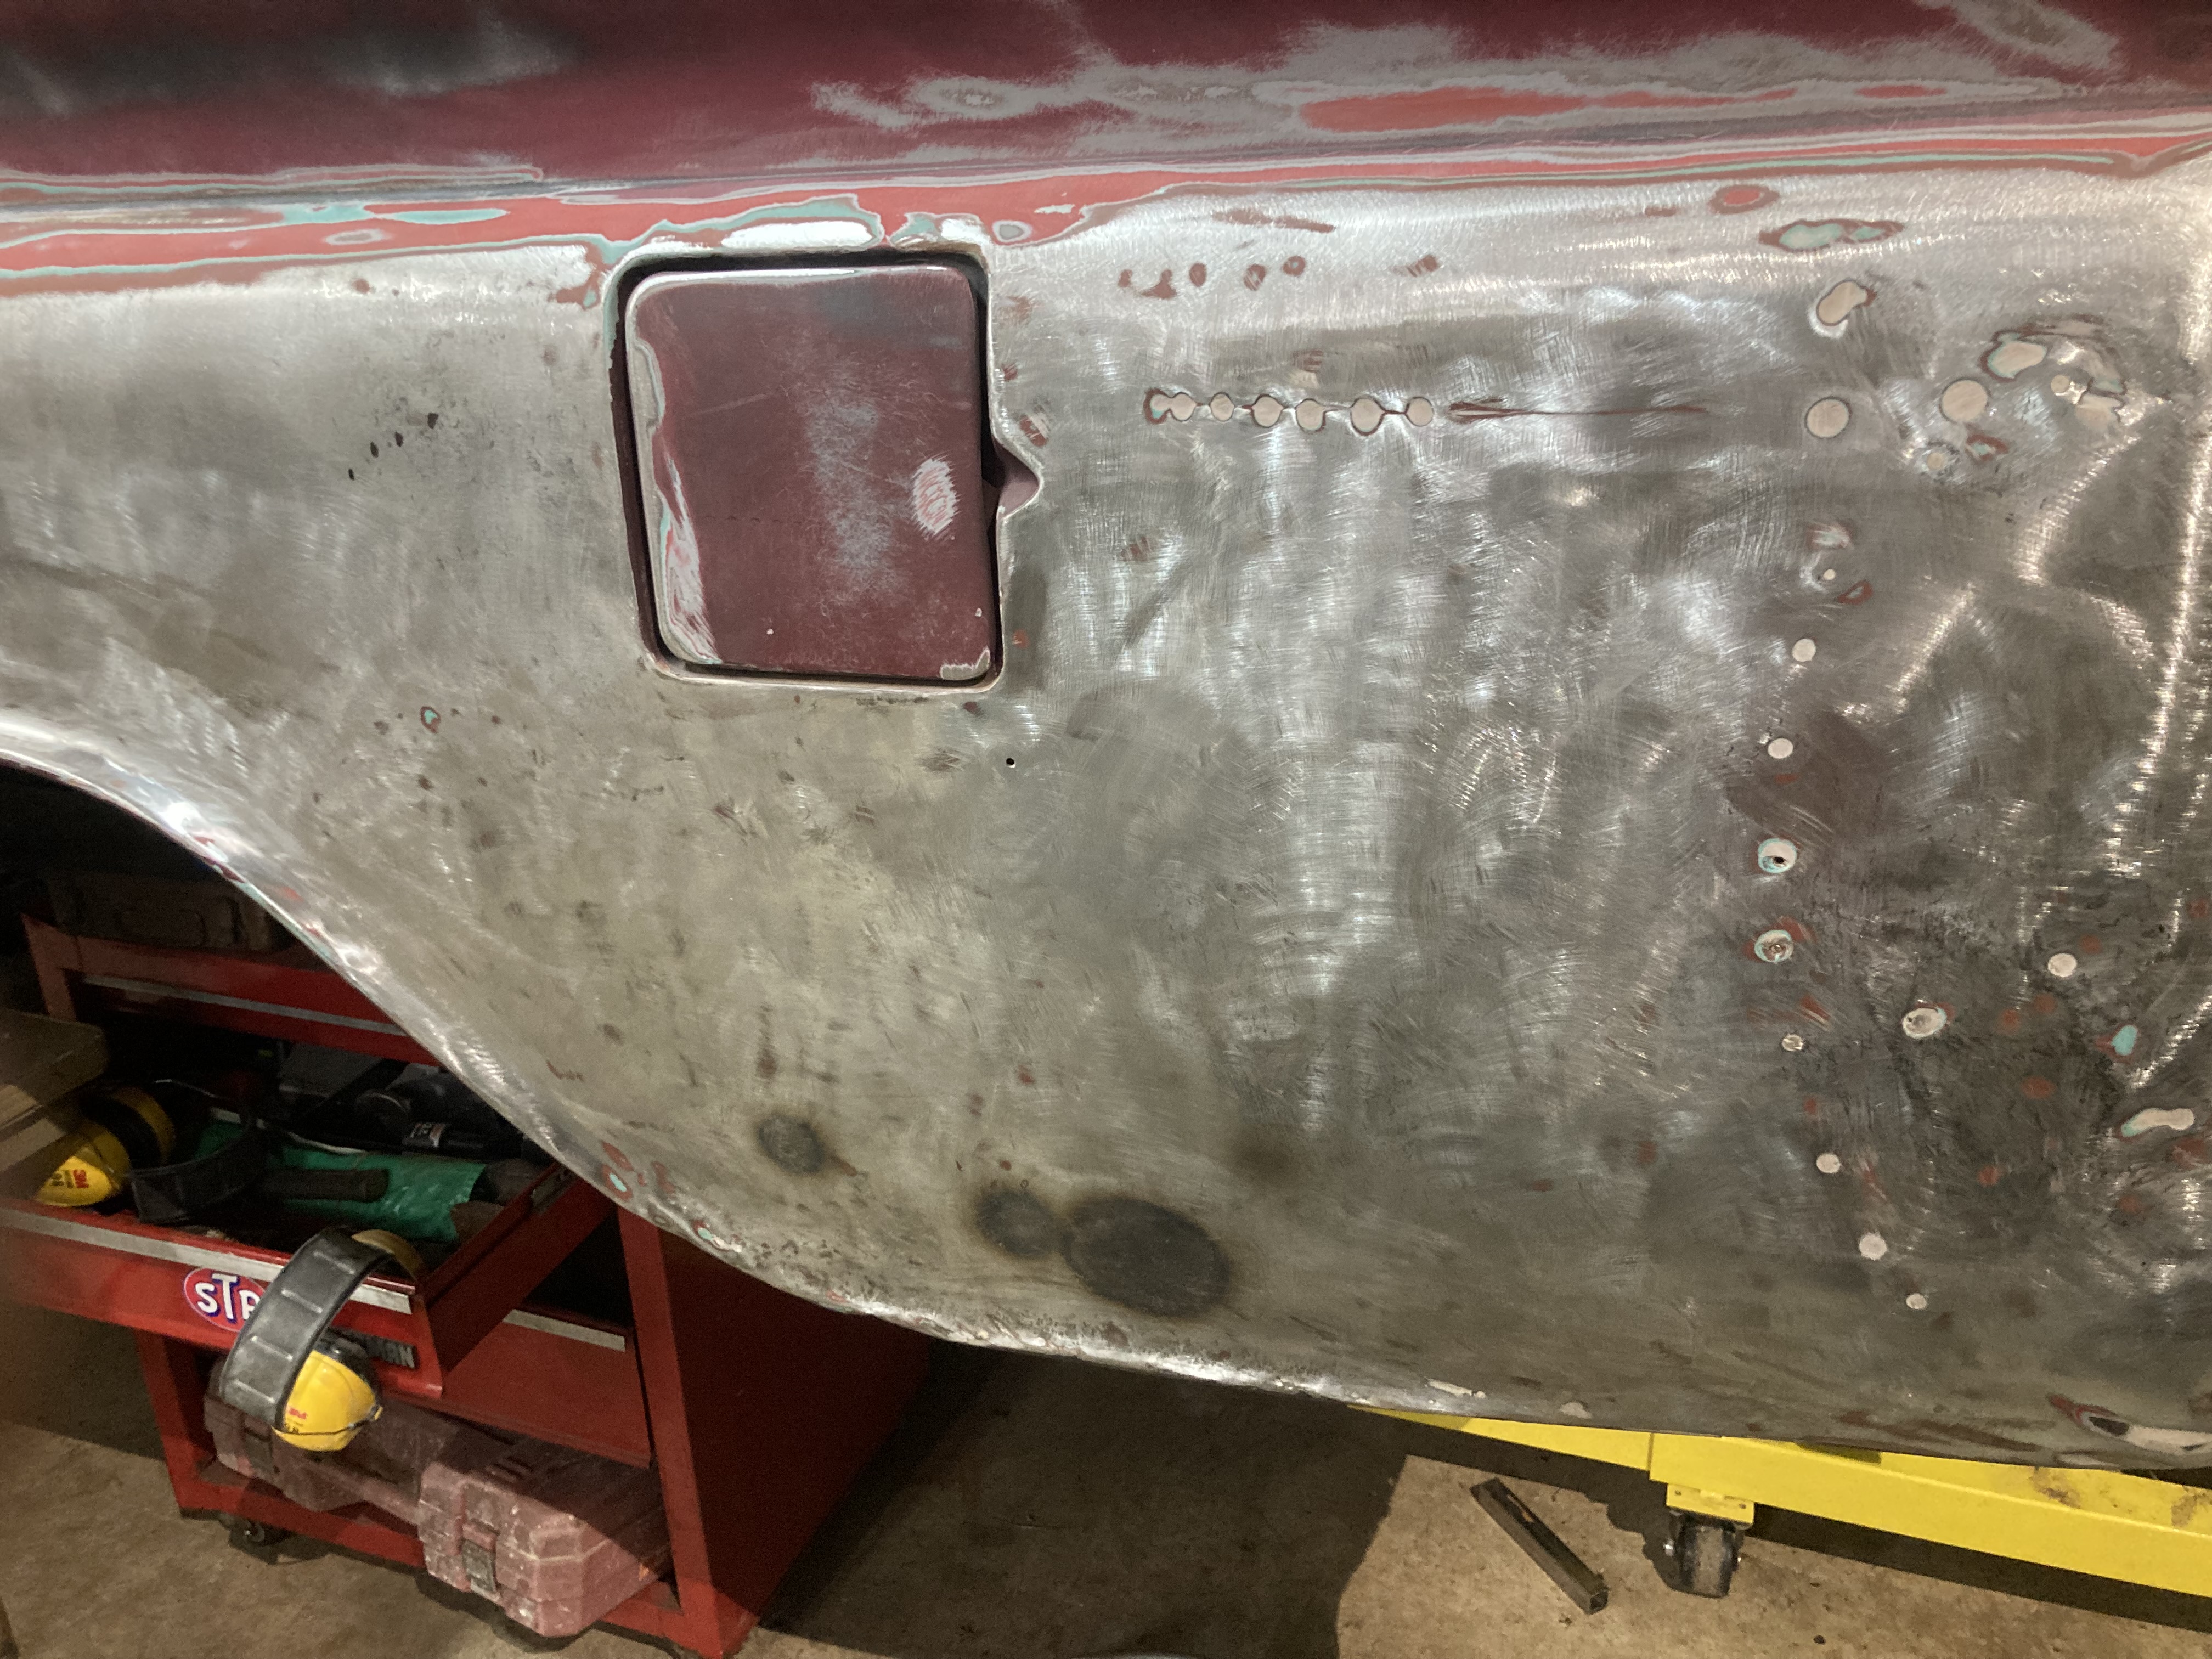
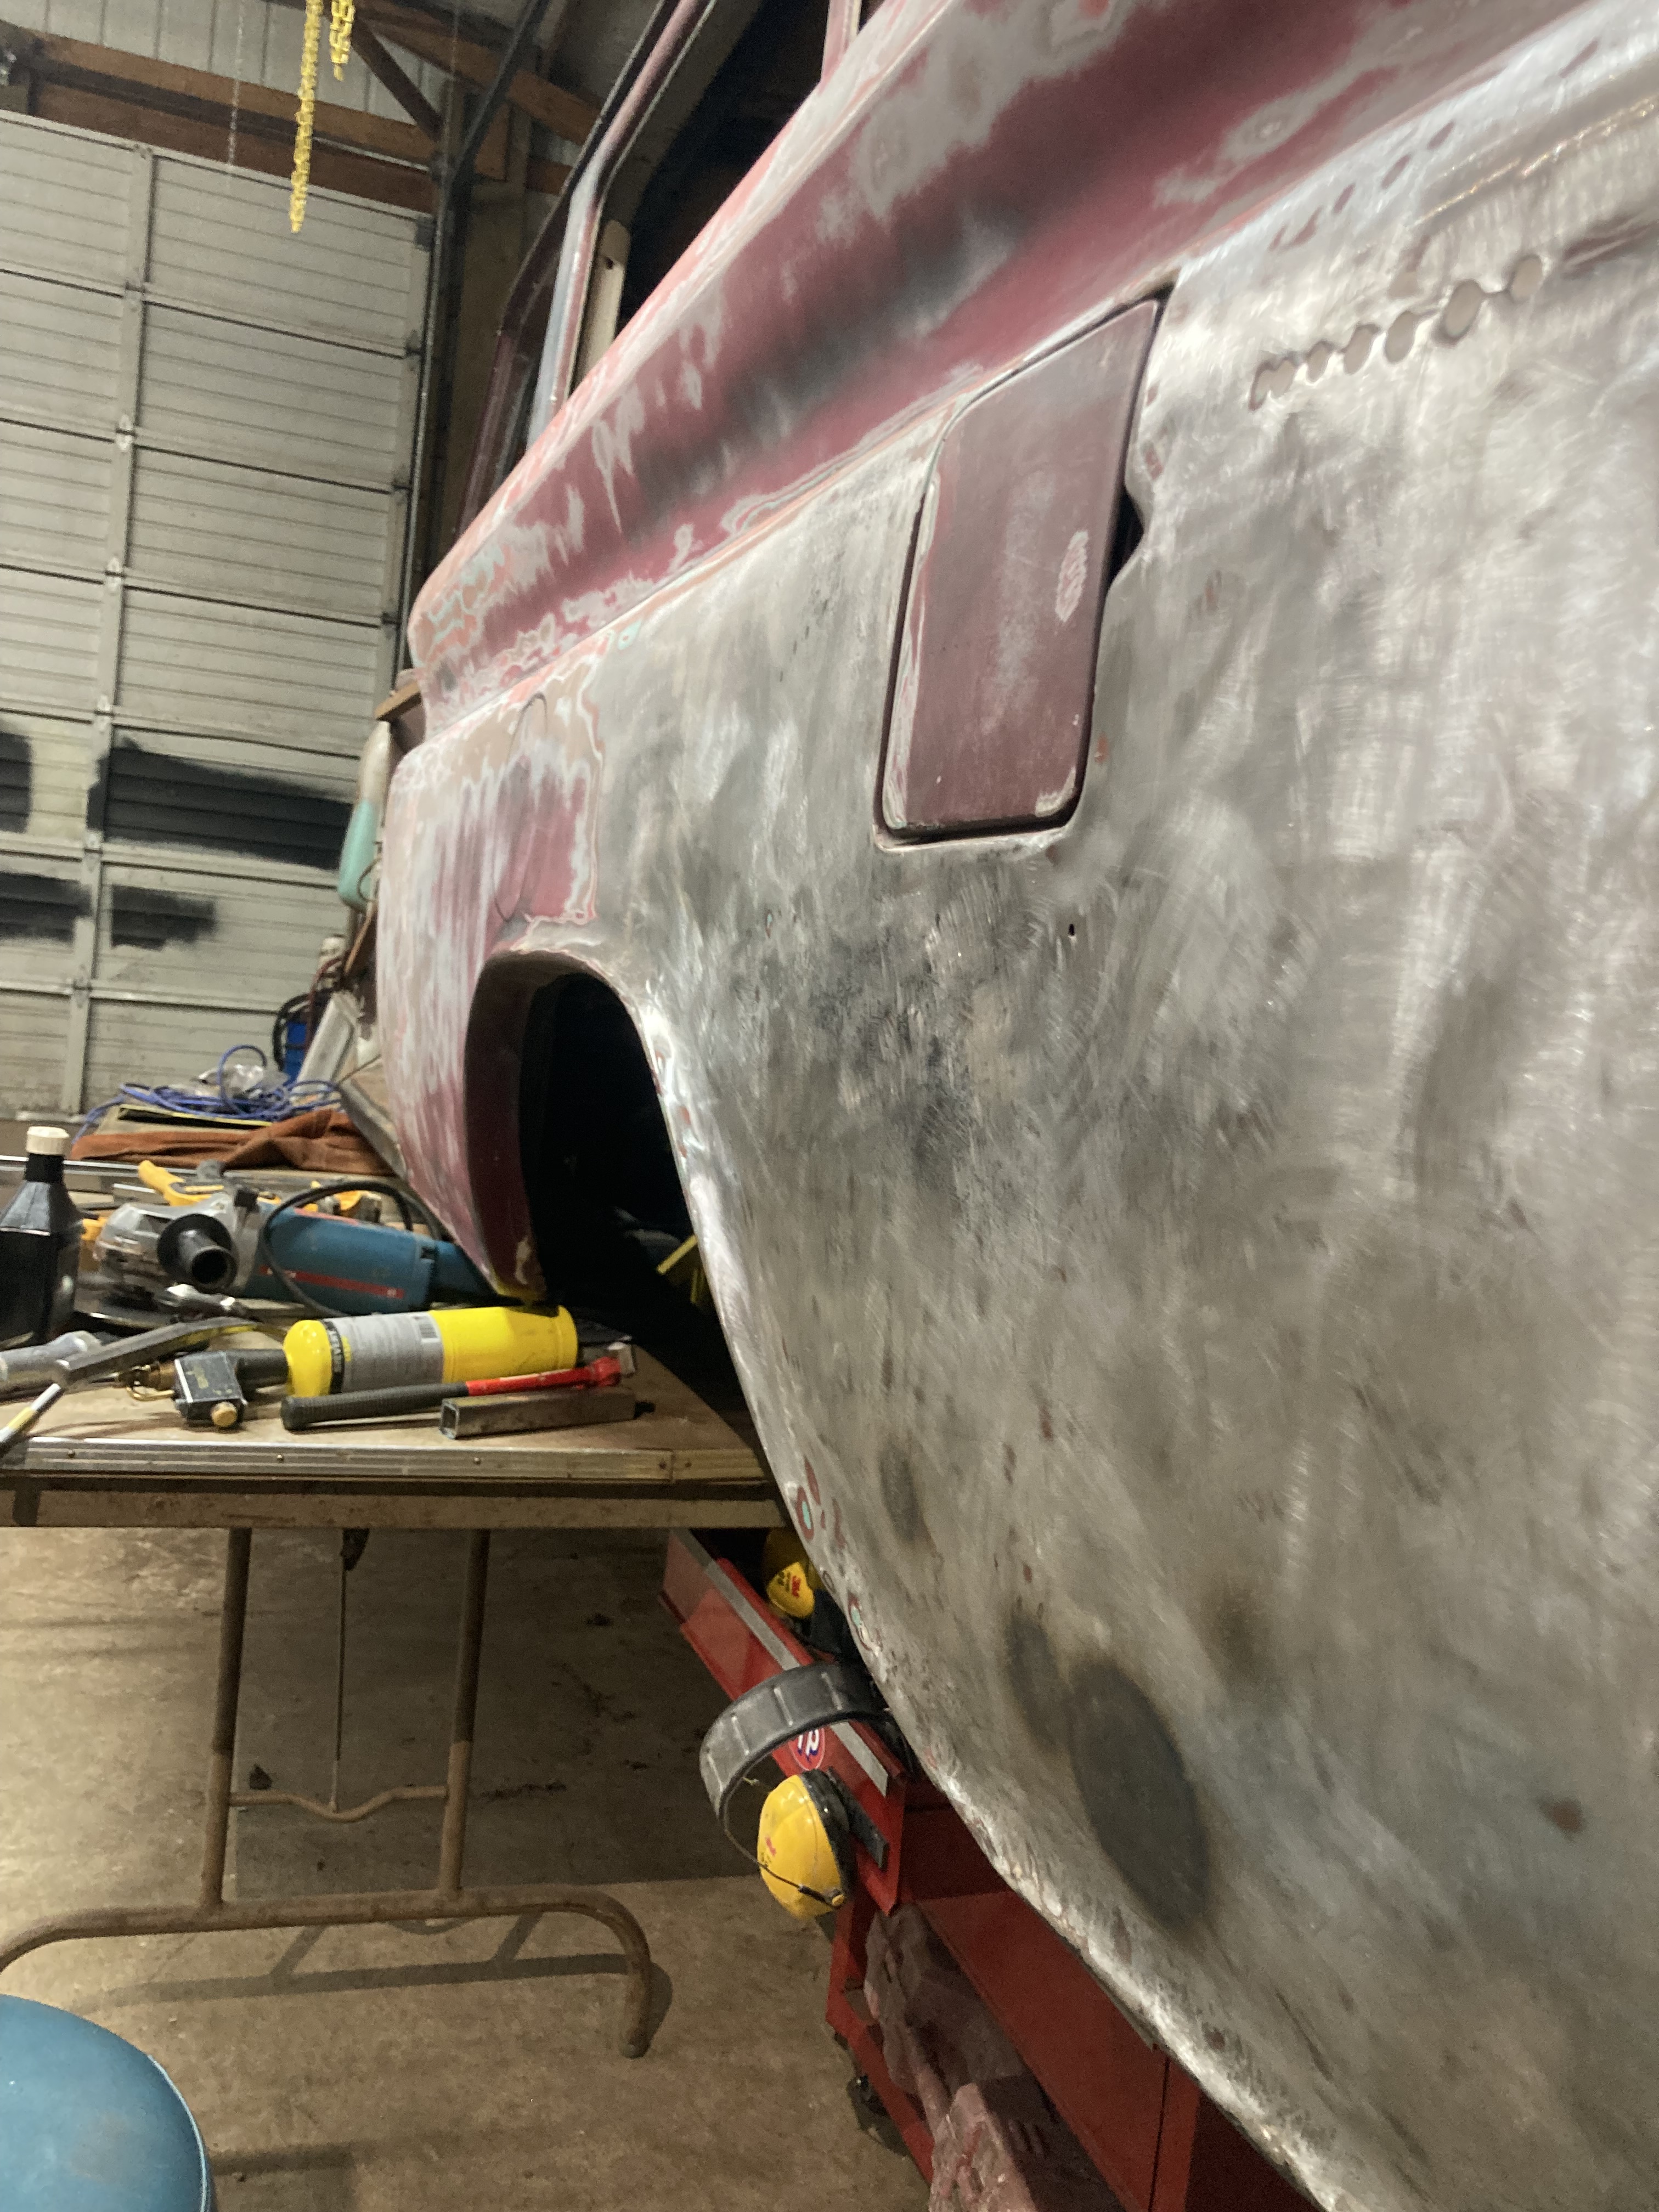
An afternoon was spent taking it off the frame and placing it on the new Rotisserie for better access to the rear quarter panels- both of which have a bit of bondo from previous work.


Bracing was added in the side and rear doorways after the front doors and the rear hatches were removed. This prevents the body from distorting when rotated on the rotisserie once dismounted from the frame. It is simple square steel tubing with bolt-plates welded to them. They mount in the places where the door hinges and strikers would have been attached.
It’s chassis is off to the owner’s shop for fabrication to accept the 6.2 turbocharged diesel engine. The frame will also be repaired to have the original front horns for the bumper mounts re-attached. It will also receive substantial reinforcement and boxing in for strength, and additional fabrication for new crossmembers as well.
We are looking forward to seeing it all come back in the middle of Summer, once chassis fabrication and drivetrain installation are completed. We should have fresh cured paint around then as well, and a finished body to re-attatch.


This corner was pushed upwards and inwards, but has been pulled down and out quite a bit.
Next is the Shrinking work, with Dolly and Torch / Quench time.
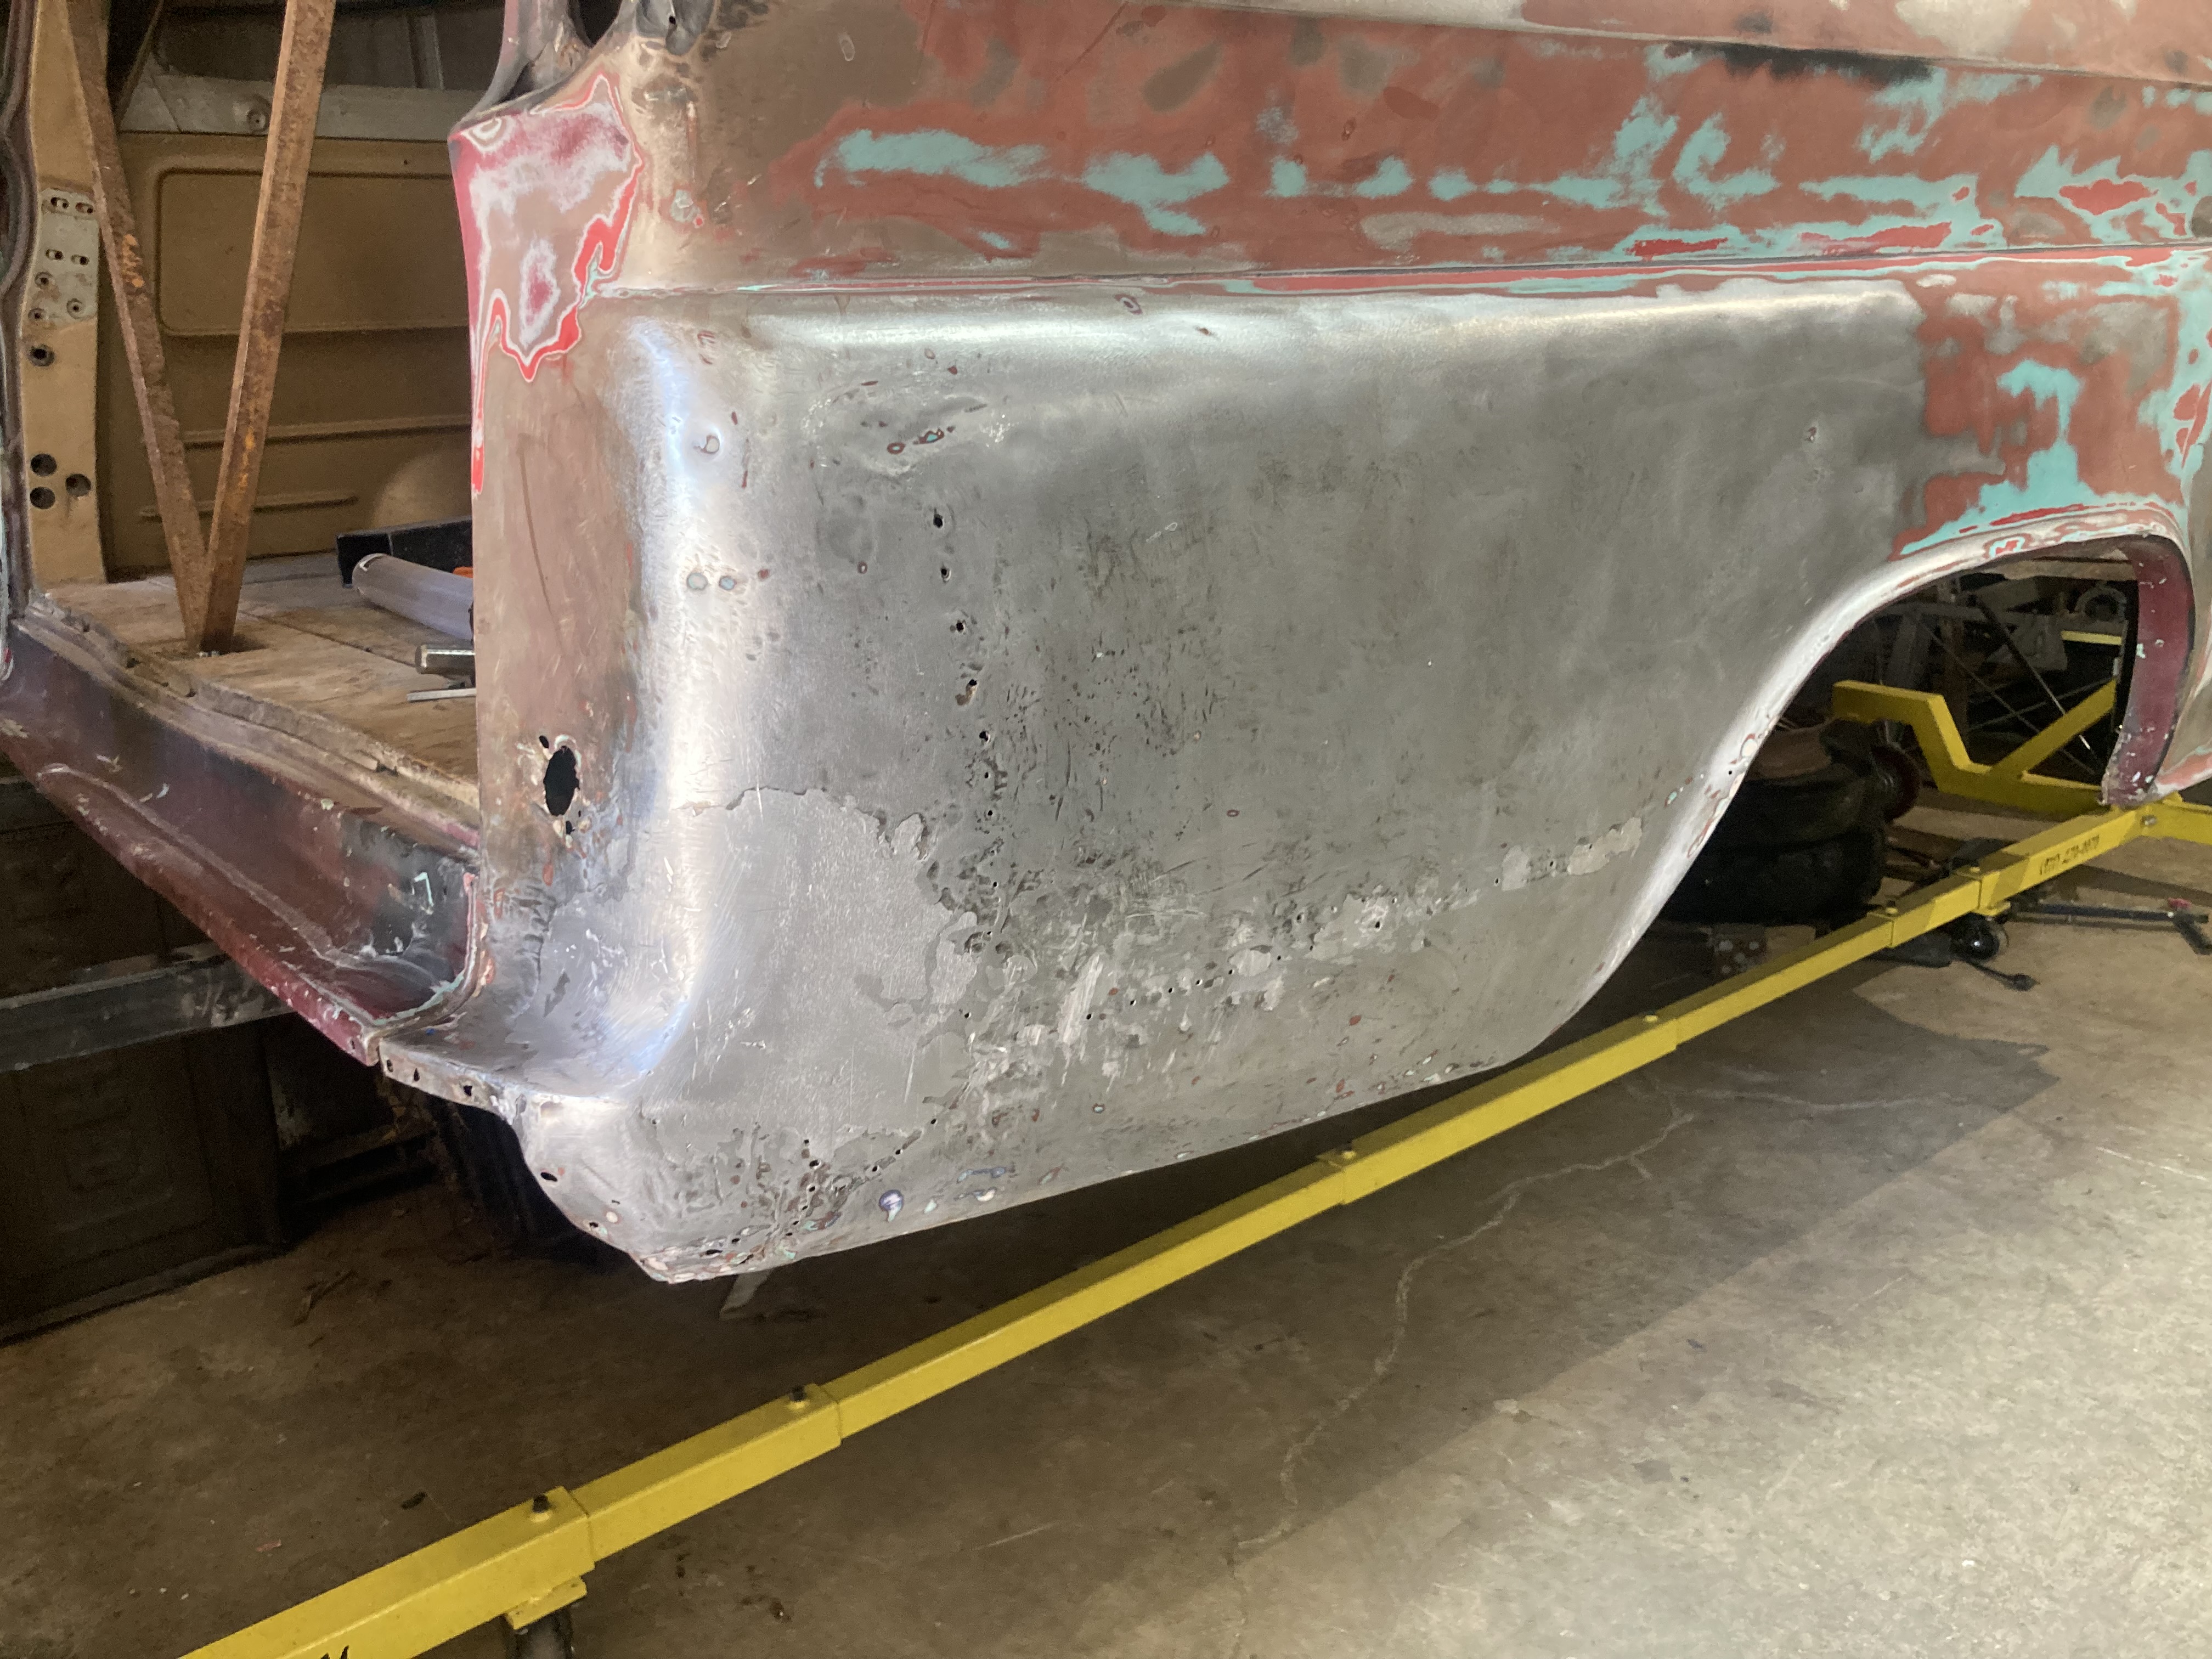
The Passenger quarter is looking really nice, so we flipped it around and worked on the Driver’s side for the last two days. It is coming along well, although still needs a lot of dent chasing.


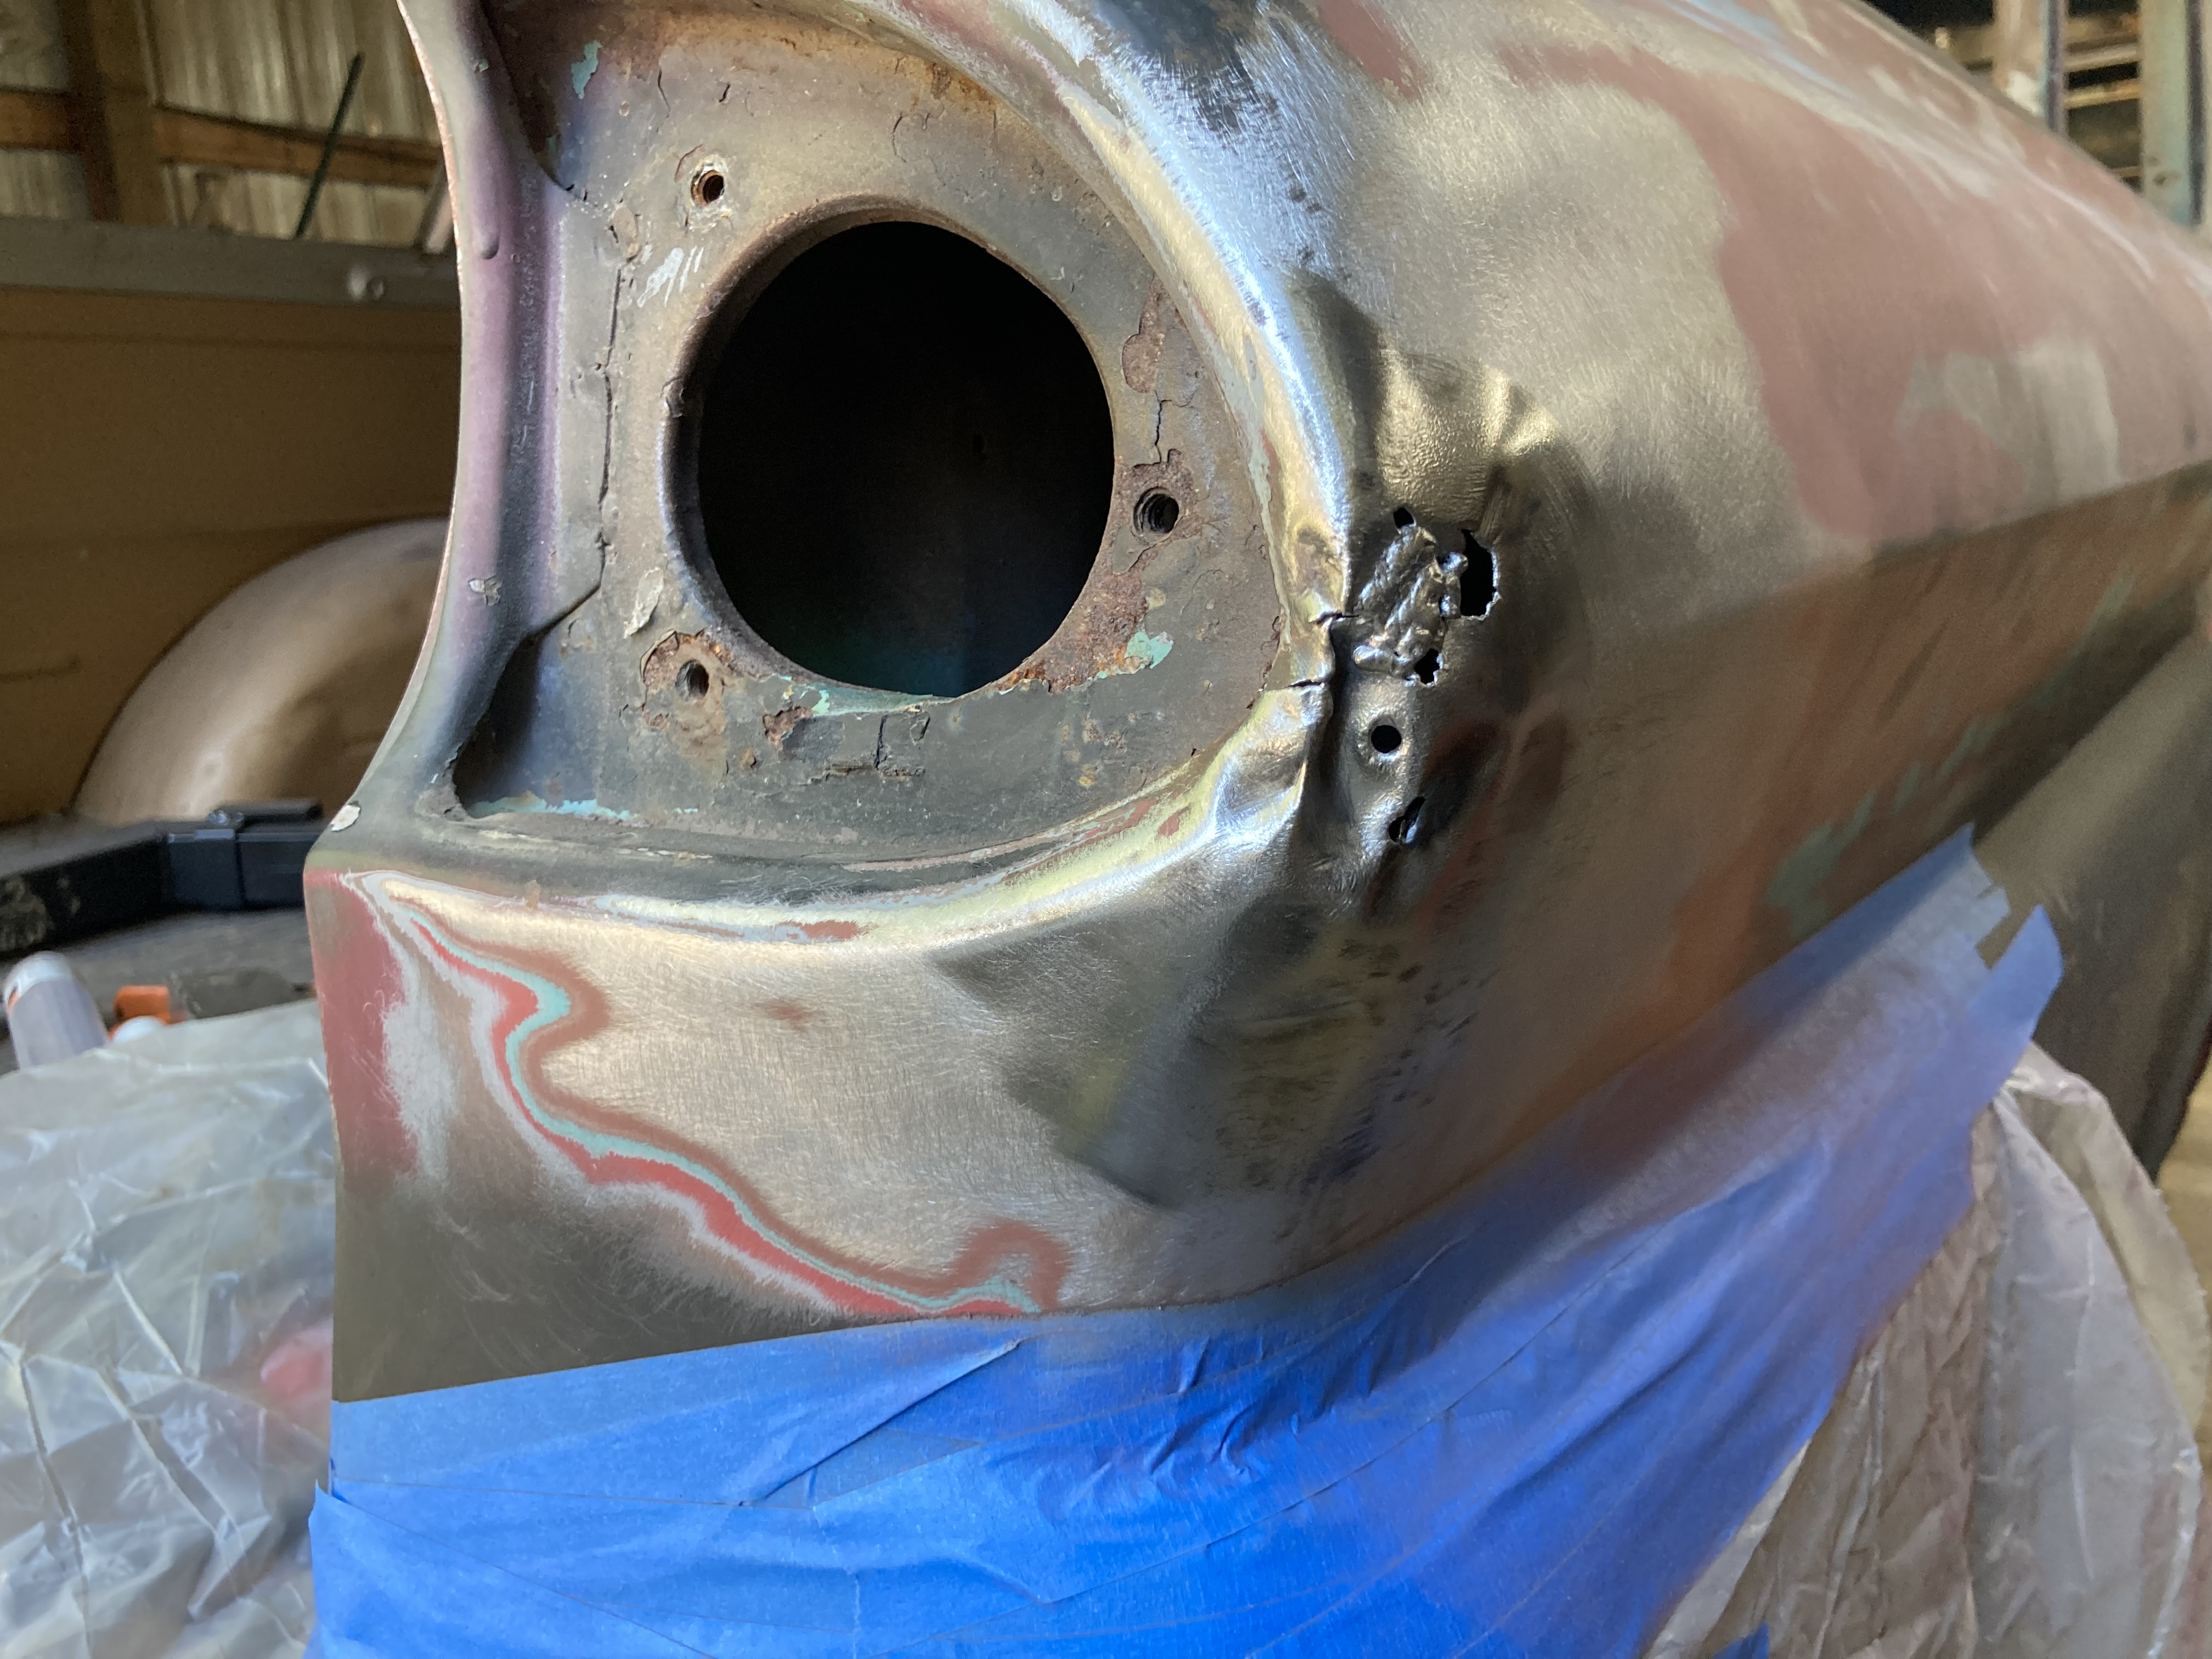
The holes were from a previous repair to these corners, where they decided to use a very thick layer of body filler, versus the hours of hammer and dolly work that we put in. It is now done right, with the crevices and tears filled with lead, in the old body solder technique.


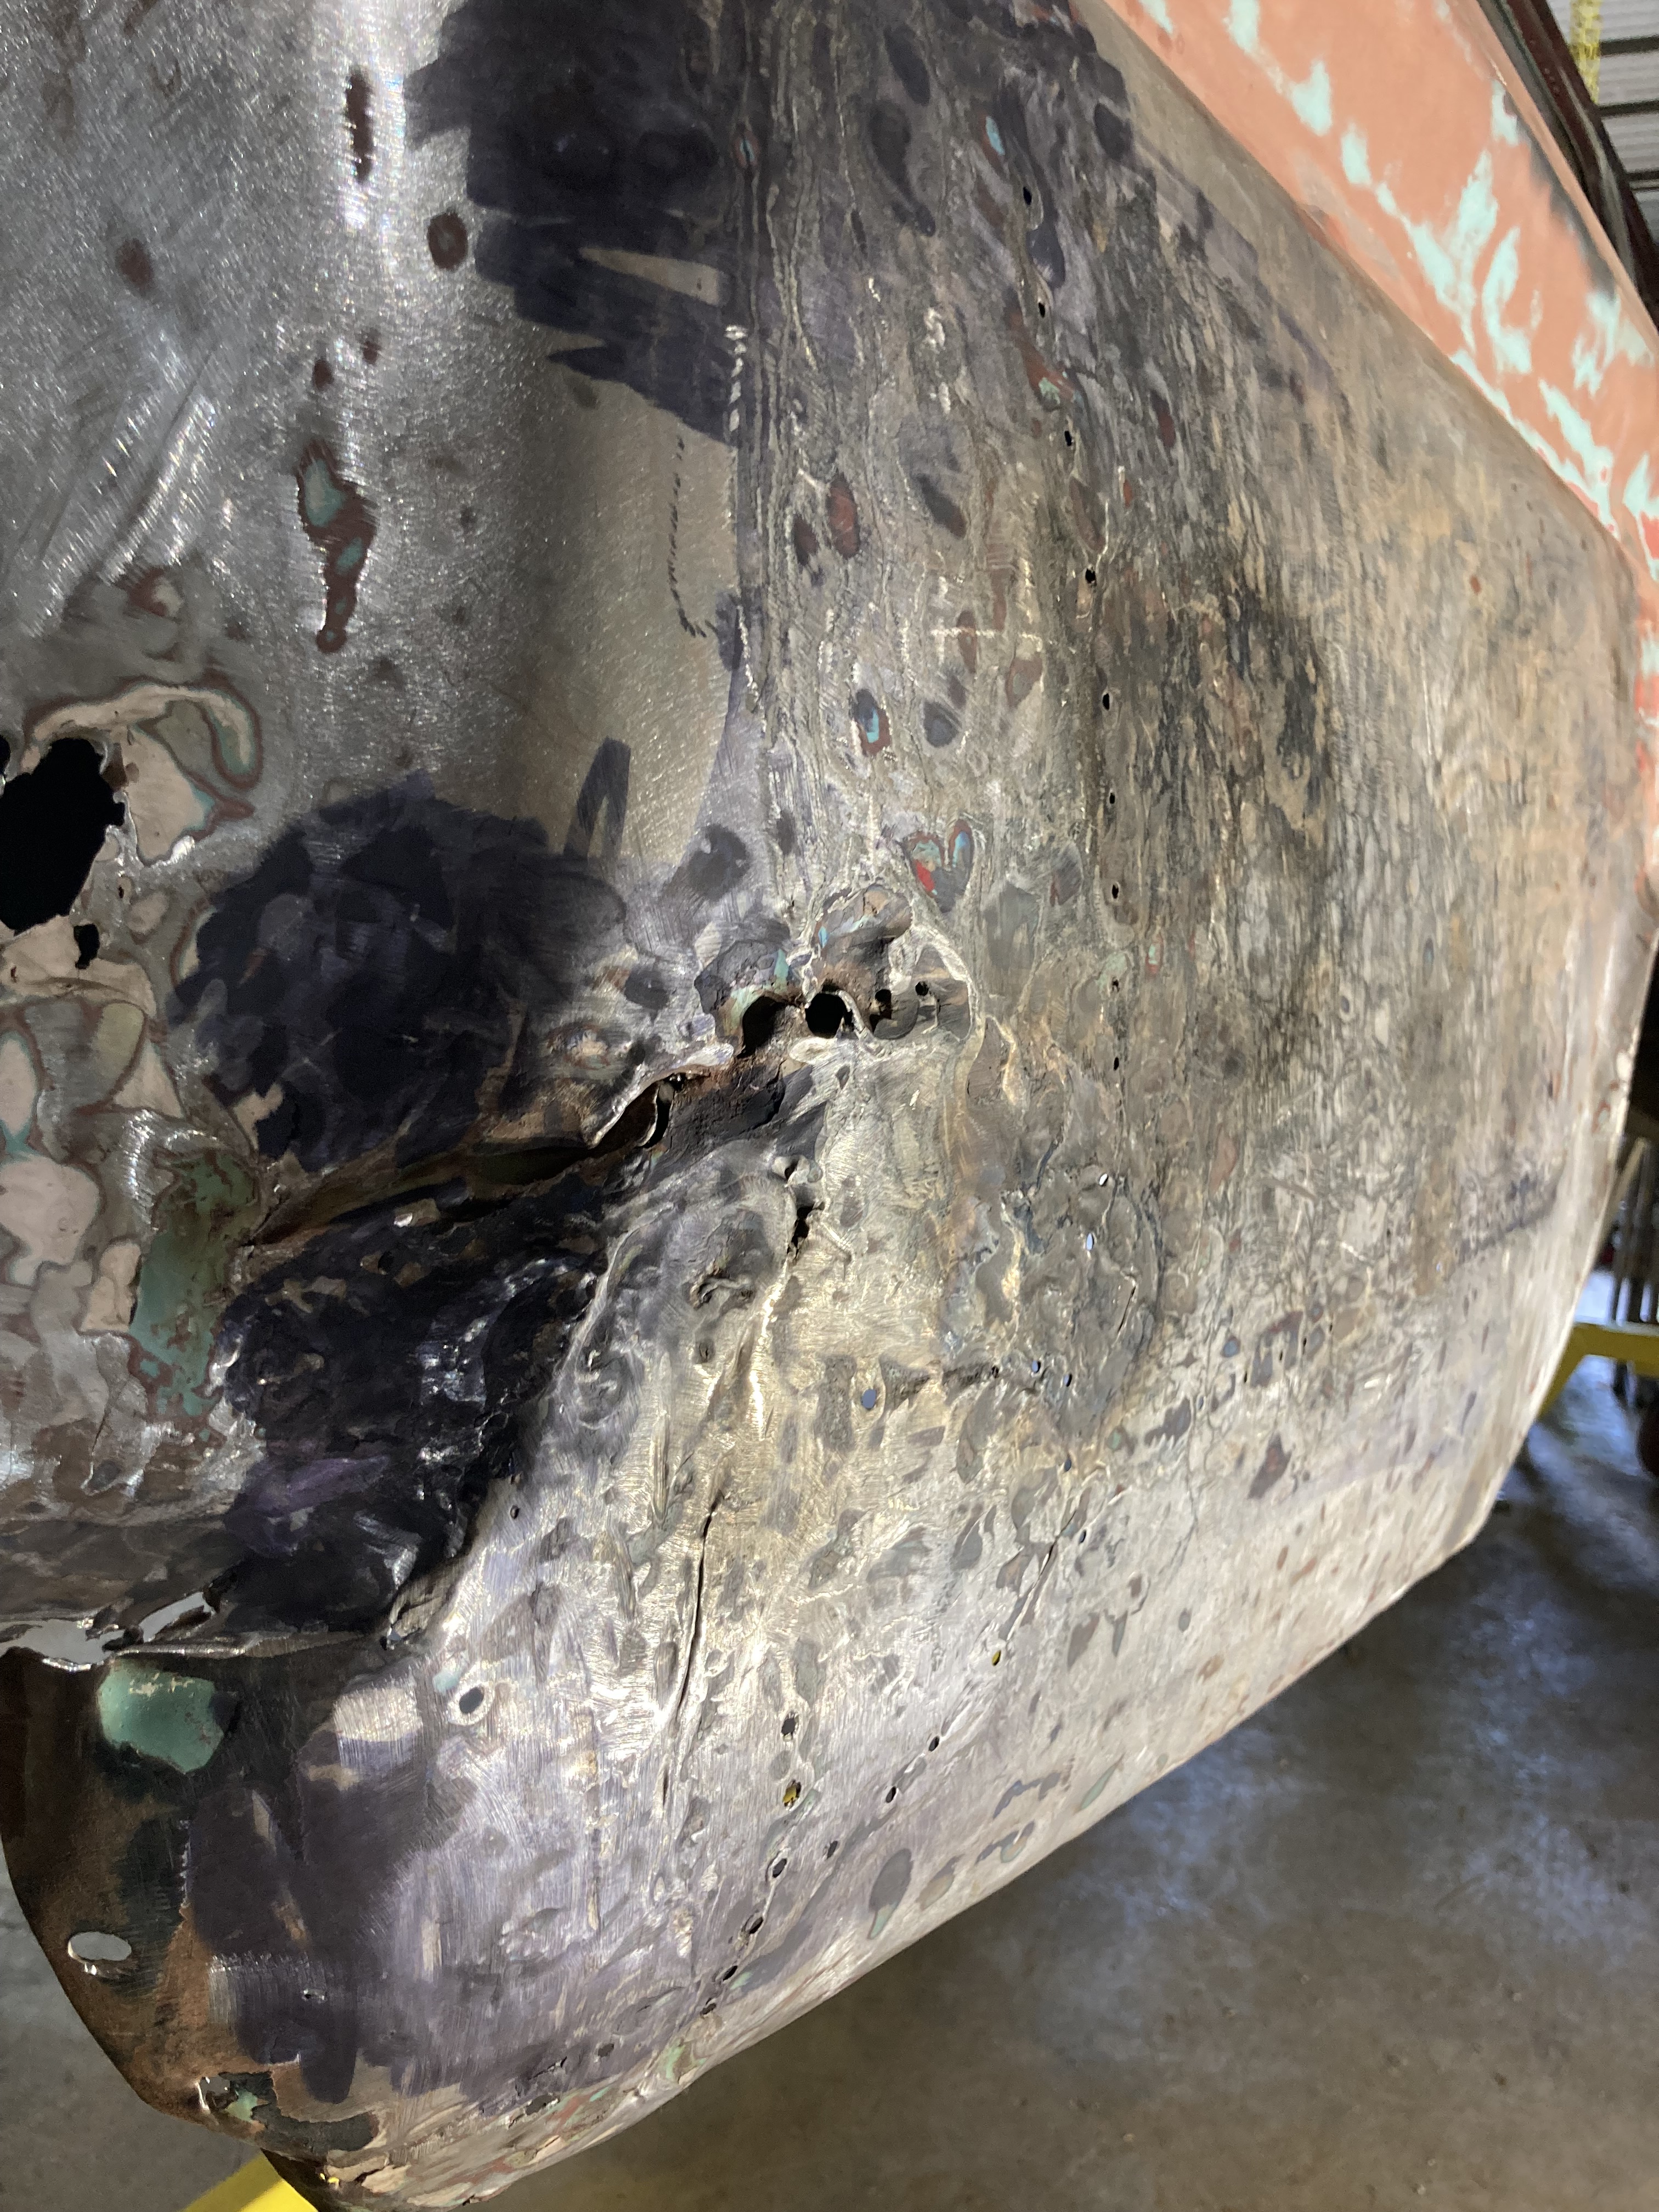
This above photo is showing the passenger corner raw after the completion of most of the hammer dolly work, and tons of torch shrinking, and also shrinking using the Wray Schellin method- That is where the black on the metal is from, as we were about to use the shrinking disks after this photo was taken. As it turned out, there was a bit more hammering to do as well. We do the final shrinking this way, right before lead filler was added to the crevice and surrounding area. Below shows after a layer of lead body solder was added and filed to shape.


Now that we have the majority of the blemishes addressed, we laid down a base coat of black sealer primer to ensure that our future sanding of the next layers of grey primer do not go through to the protected body work beneath.
There will be a bit more work that will go into detailing these out, but with them sealed in, we can go onto the next areas to lead fill along the roof-line, and once the rest of the truck is to this same level, we can apply the Grey high-build sealer, and begin to block sand the heck out of it.
This is a view of the rear passenger side tail light, after some light prep. It will get a Tinning, and then lead Body Solder. This will get spot-putty after sealer is applied, if needed.


Moving up the line on the passenger side, we get to the Passenger doorway, and the Dogleg. The area where the door meets the interior floor was pitted and had rust all the way through as well. We opted to cut this section out, and form a new patch for it. That is then welded in, and the welds are ground down smooth to the original surface.

A quick skim of lead body solder, and it will vanish from sight.
We are now getting ready to finish off the exterior work, and have begun prepping the roof. Here is the progress so far.