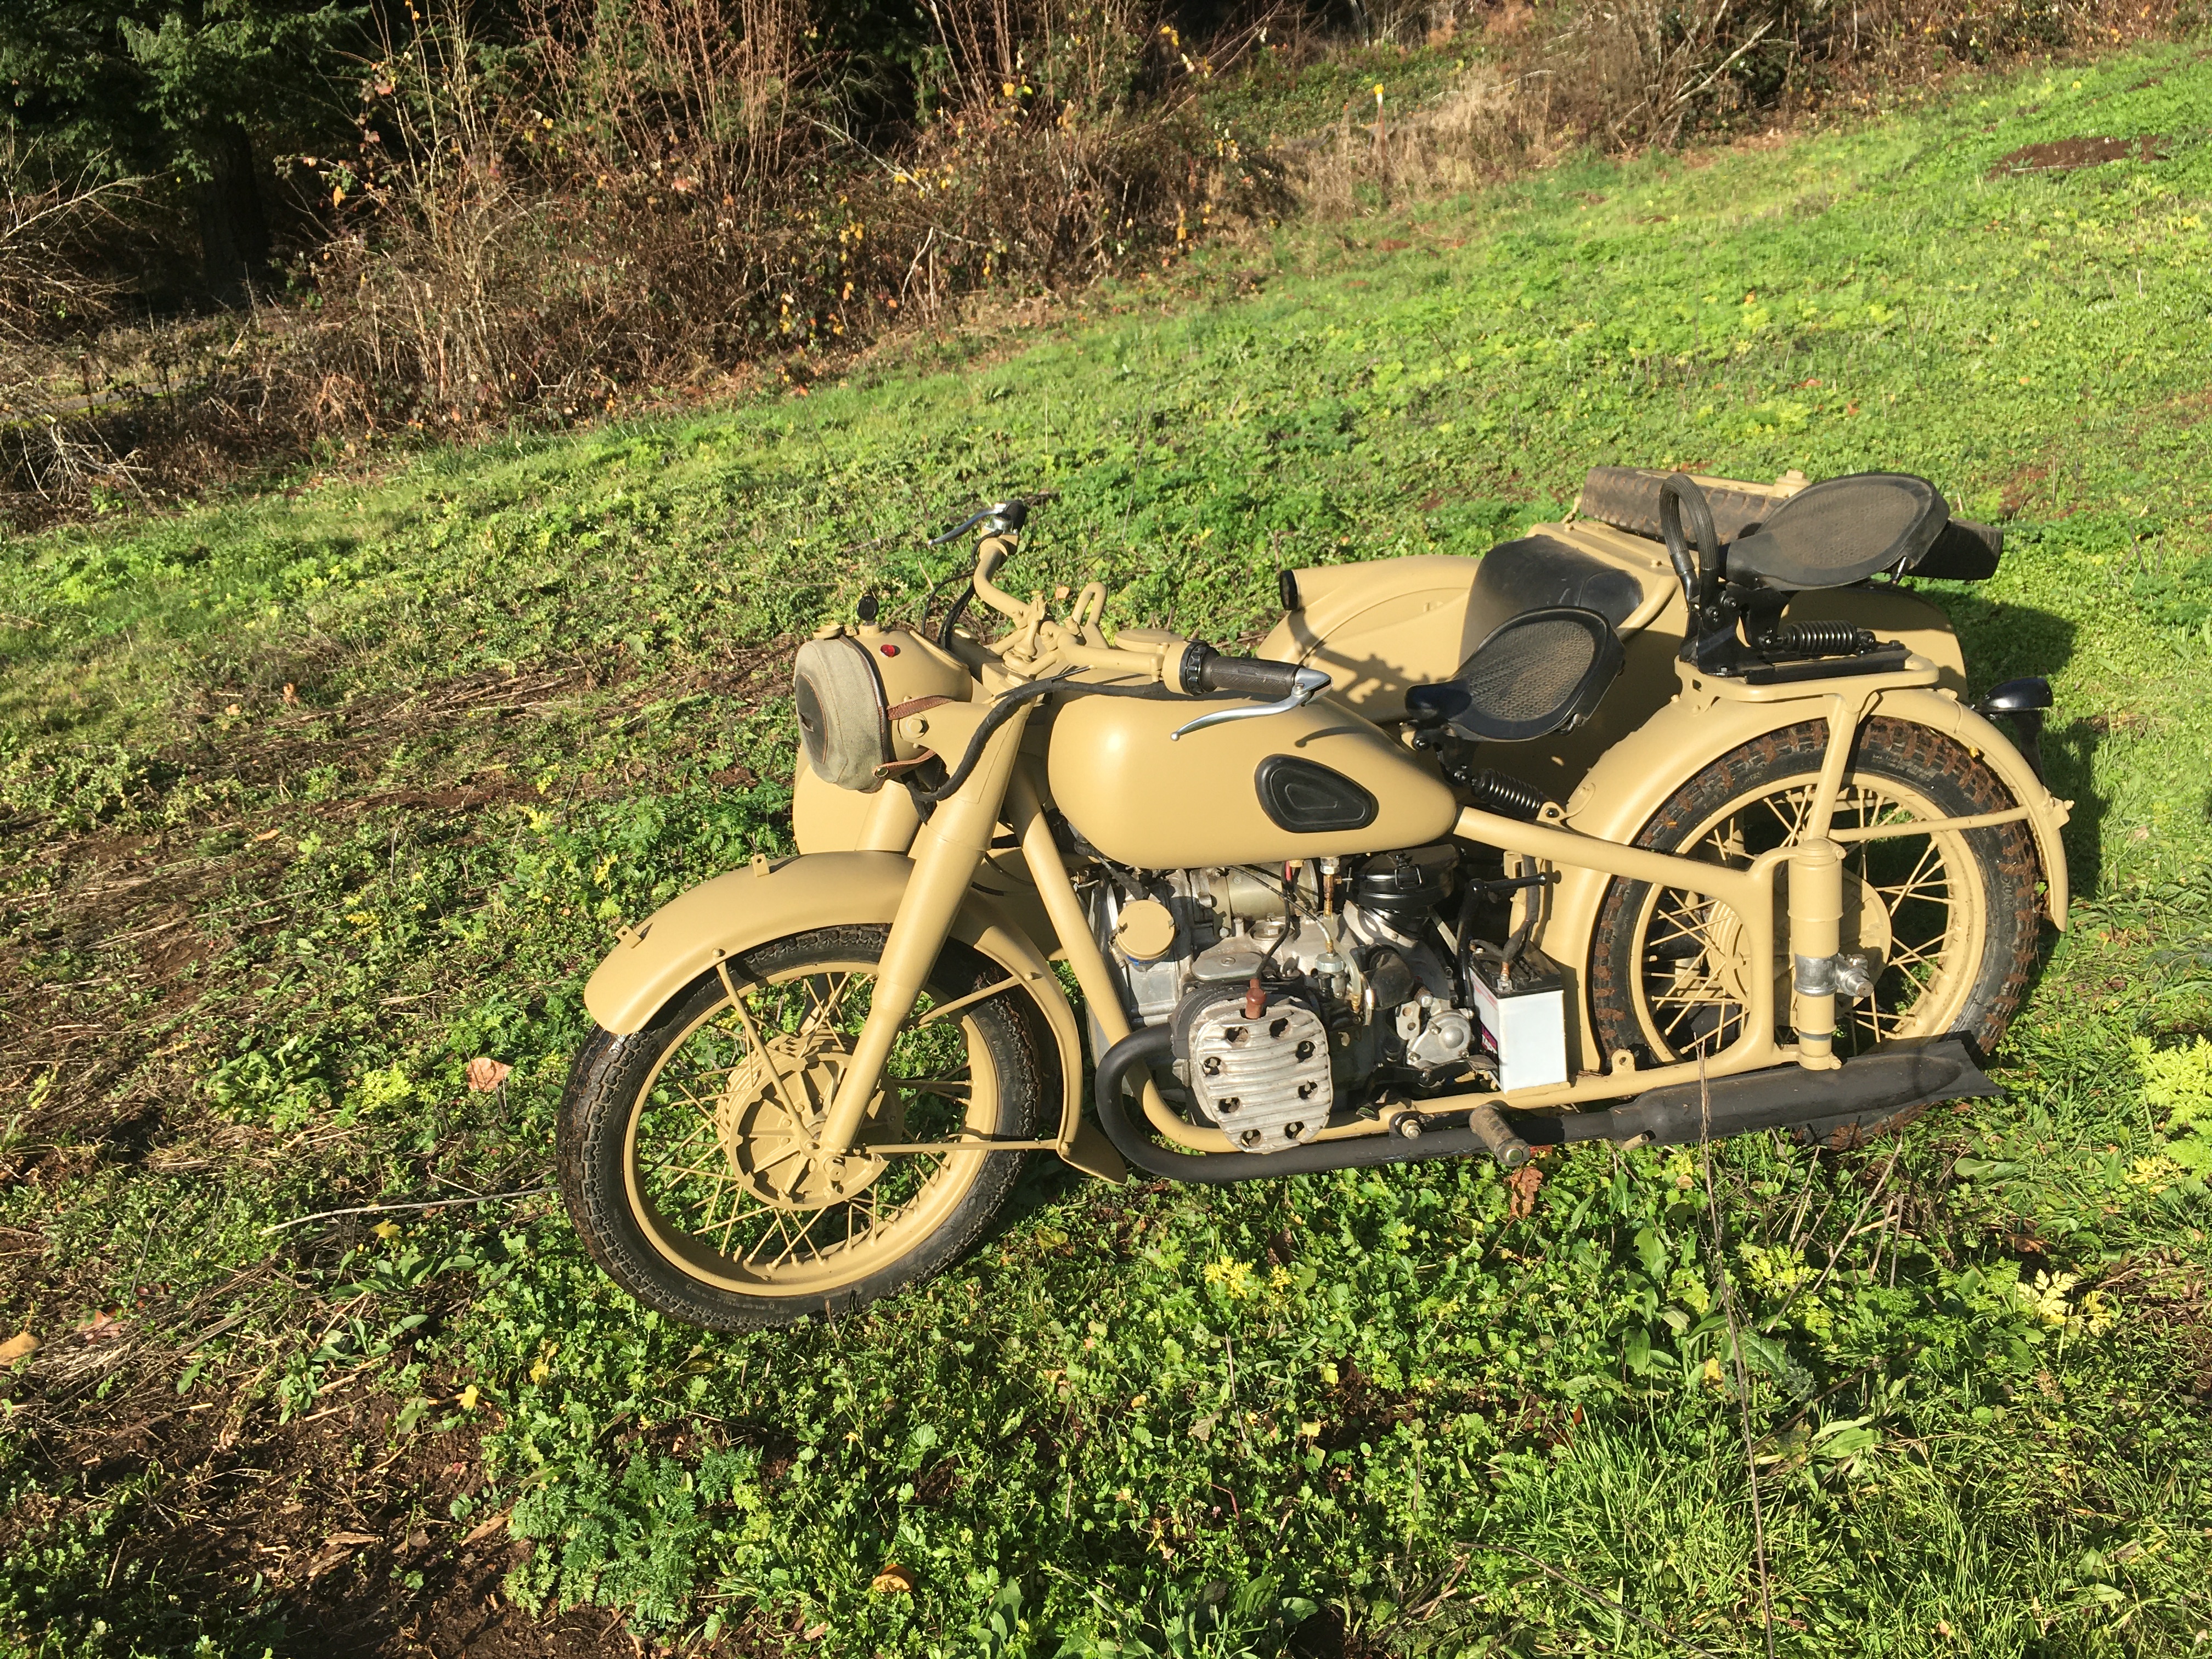
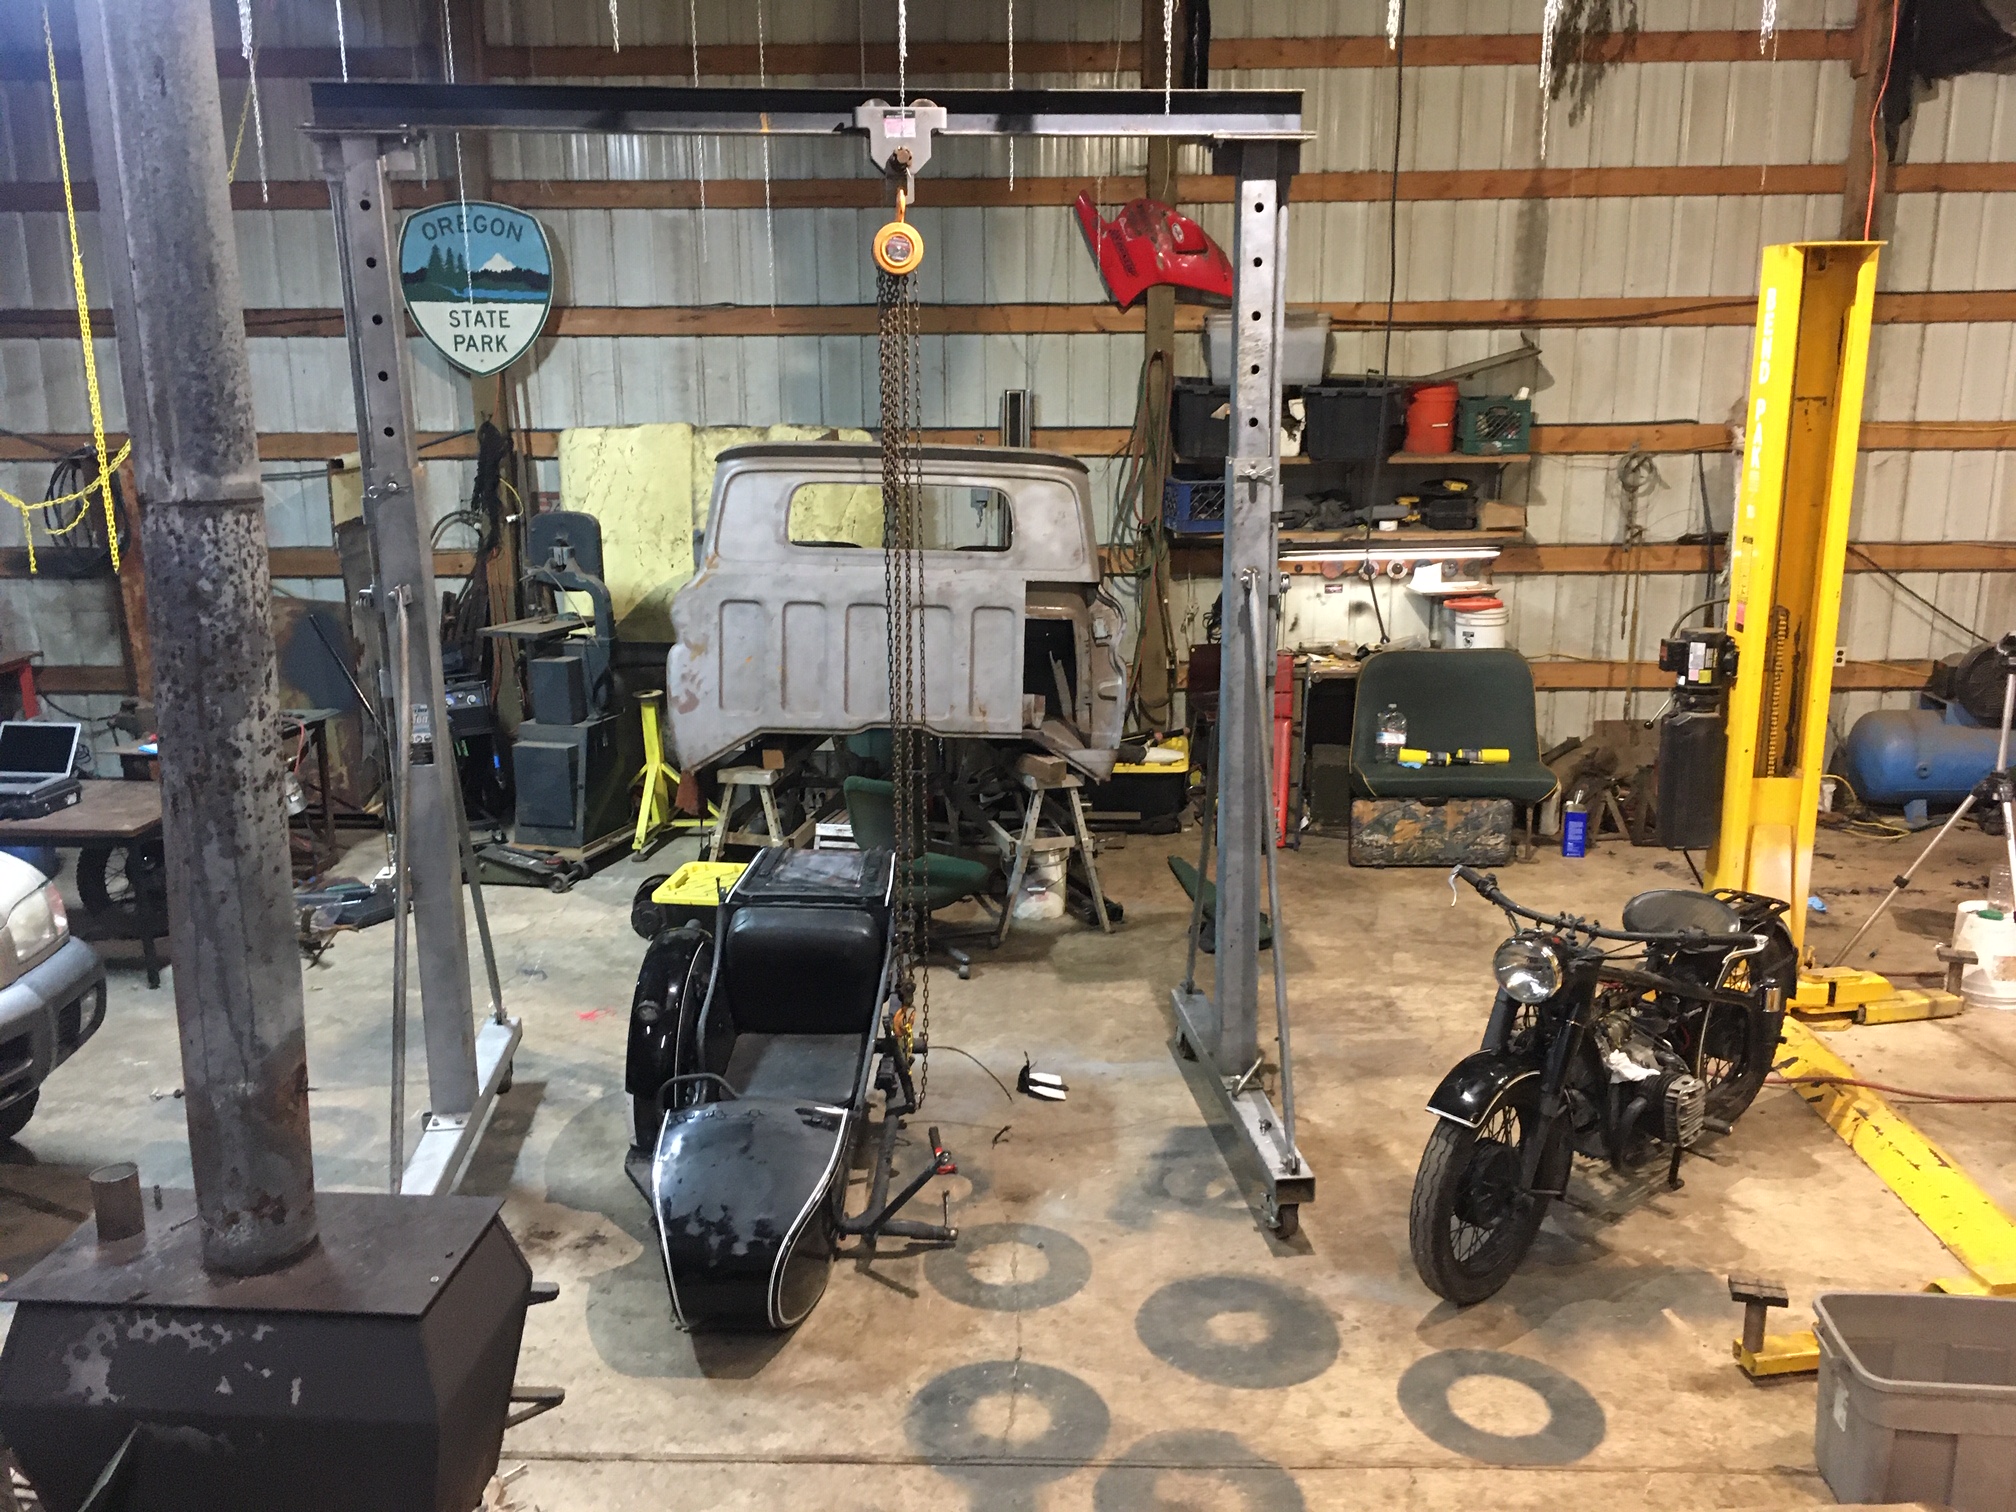
FOR THE PORTLAND EXPO SWAP MEET – We have one of these in our shop that is road legal and has a powered Side-car wheel, making it 2 wheel drive, with reverse. We can build the bike that we have in the shop that meets these specs for you in either the Gelbbraun (Afrika Corps beige), or Panzergrau (darker grey). The display bike and these two pages here are meant to demonstrate what you should expect in the end, and a bit of the process along the way. Please contact us at battlefindrestorations@gmail.com
Your bike can be freeway driven, and road legally registered. It has a clear title
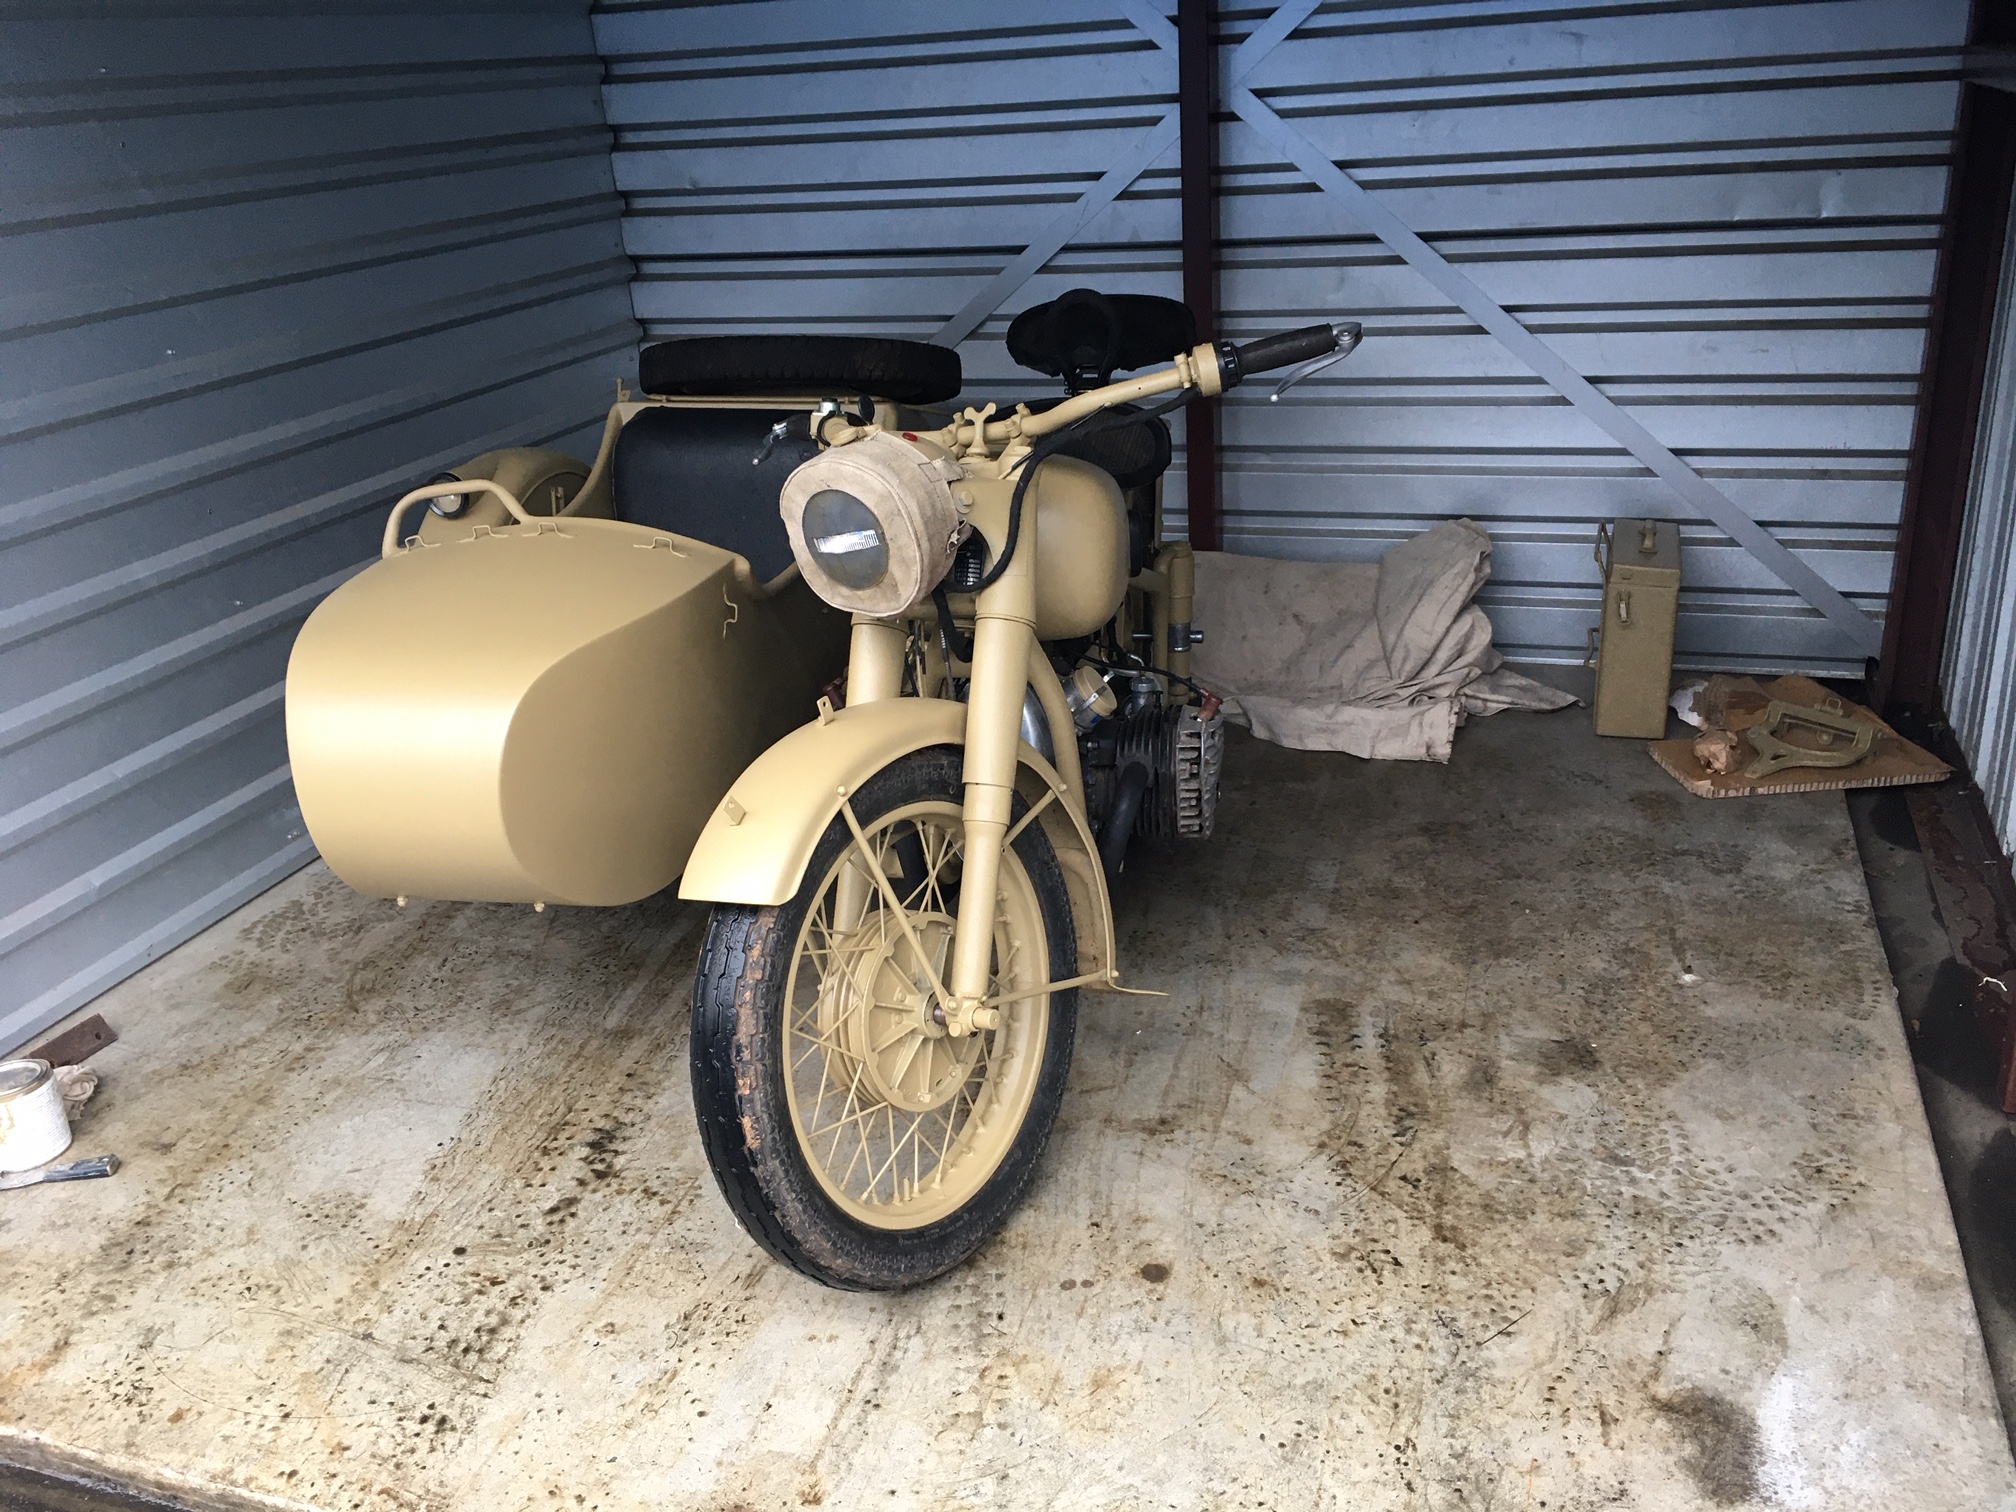
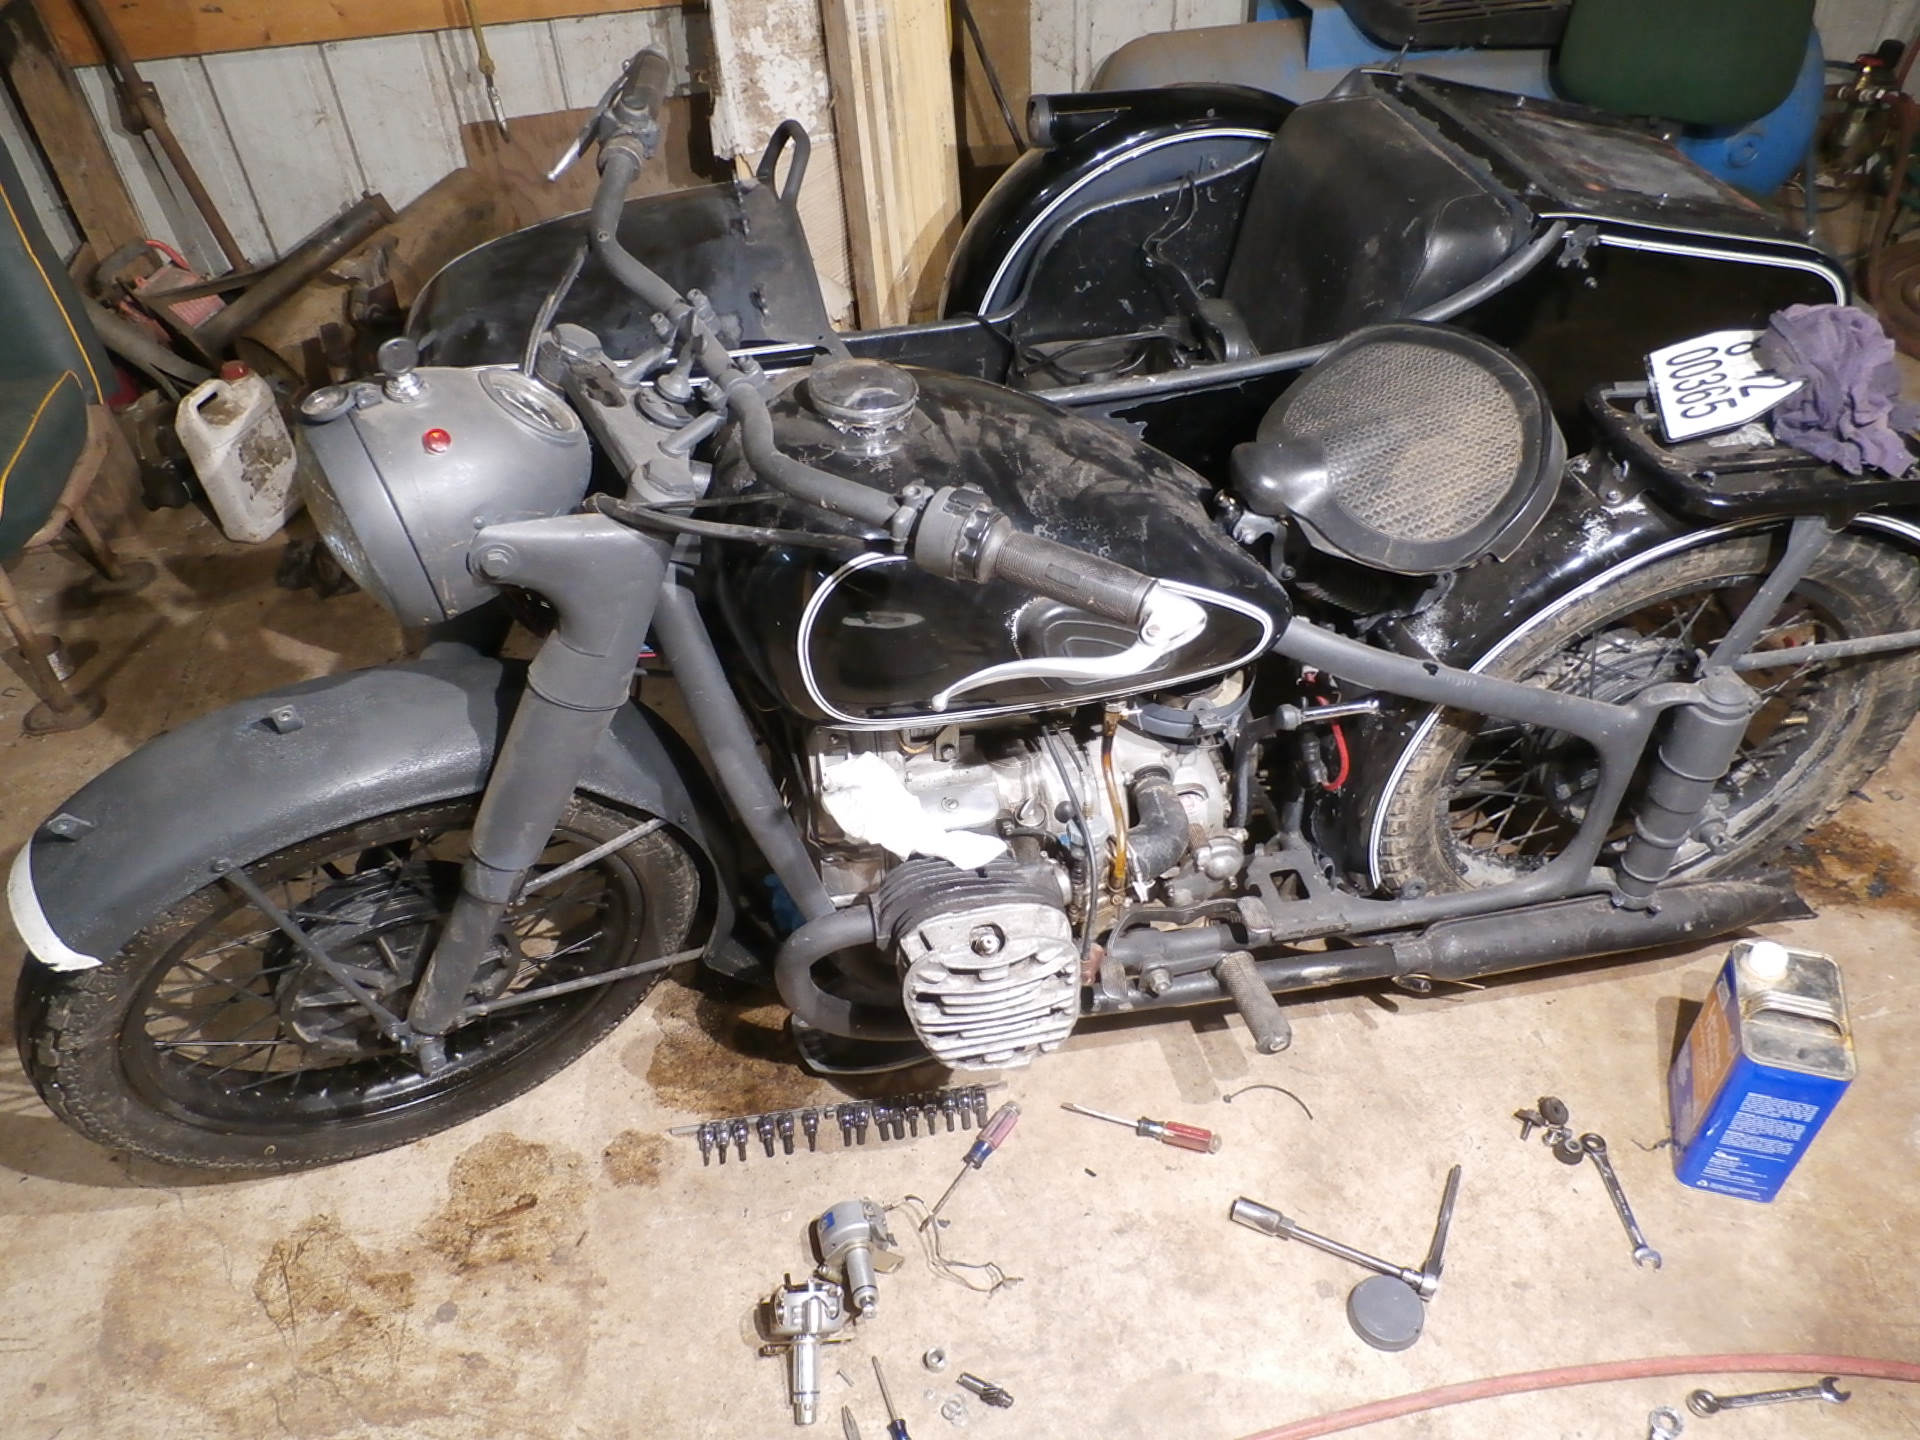
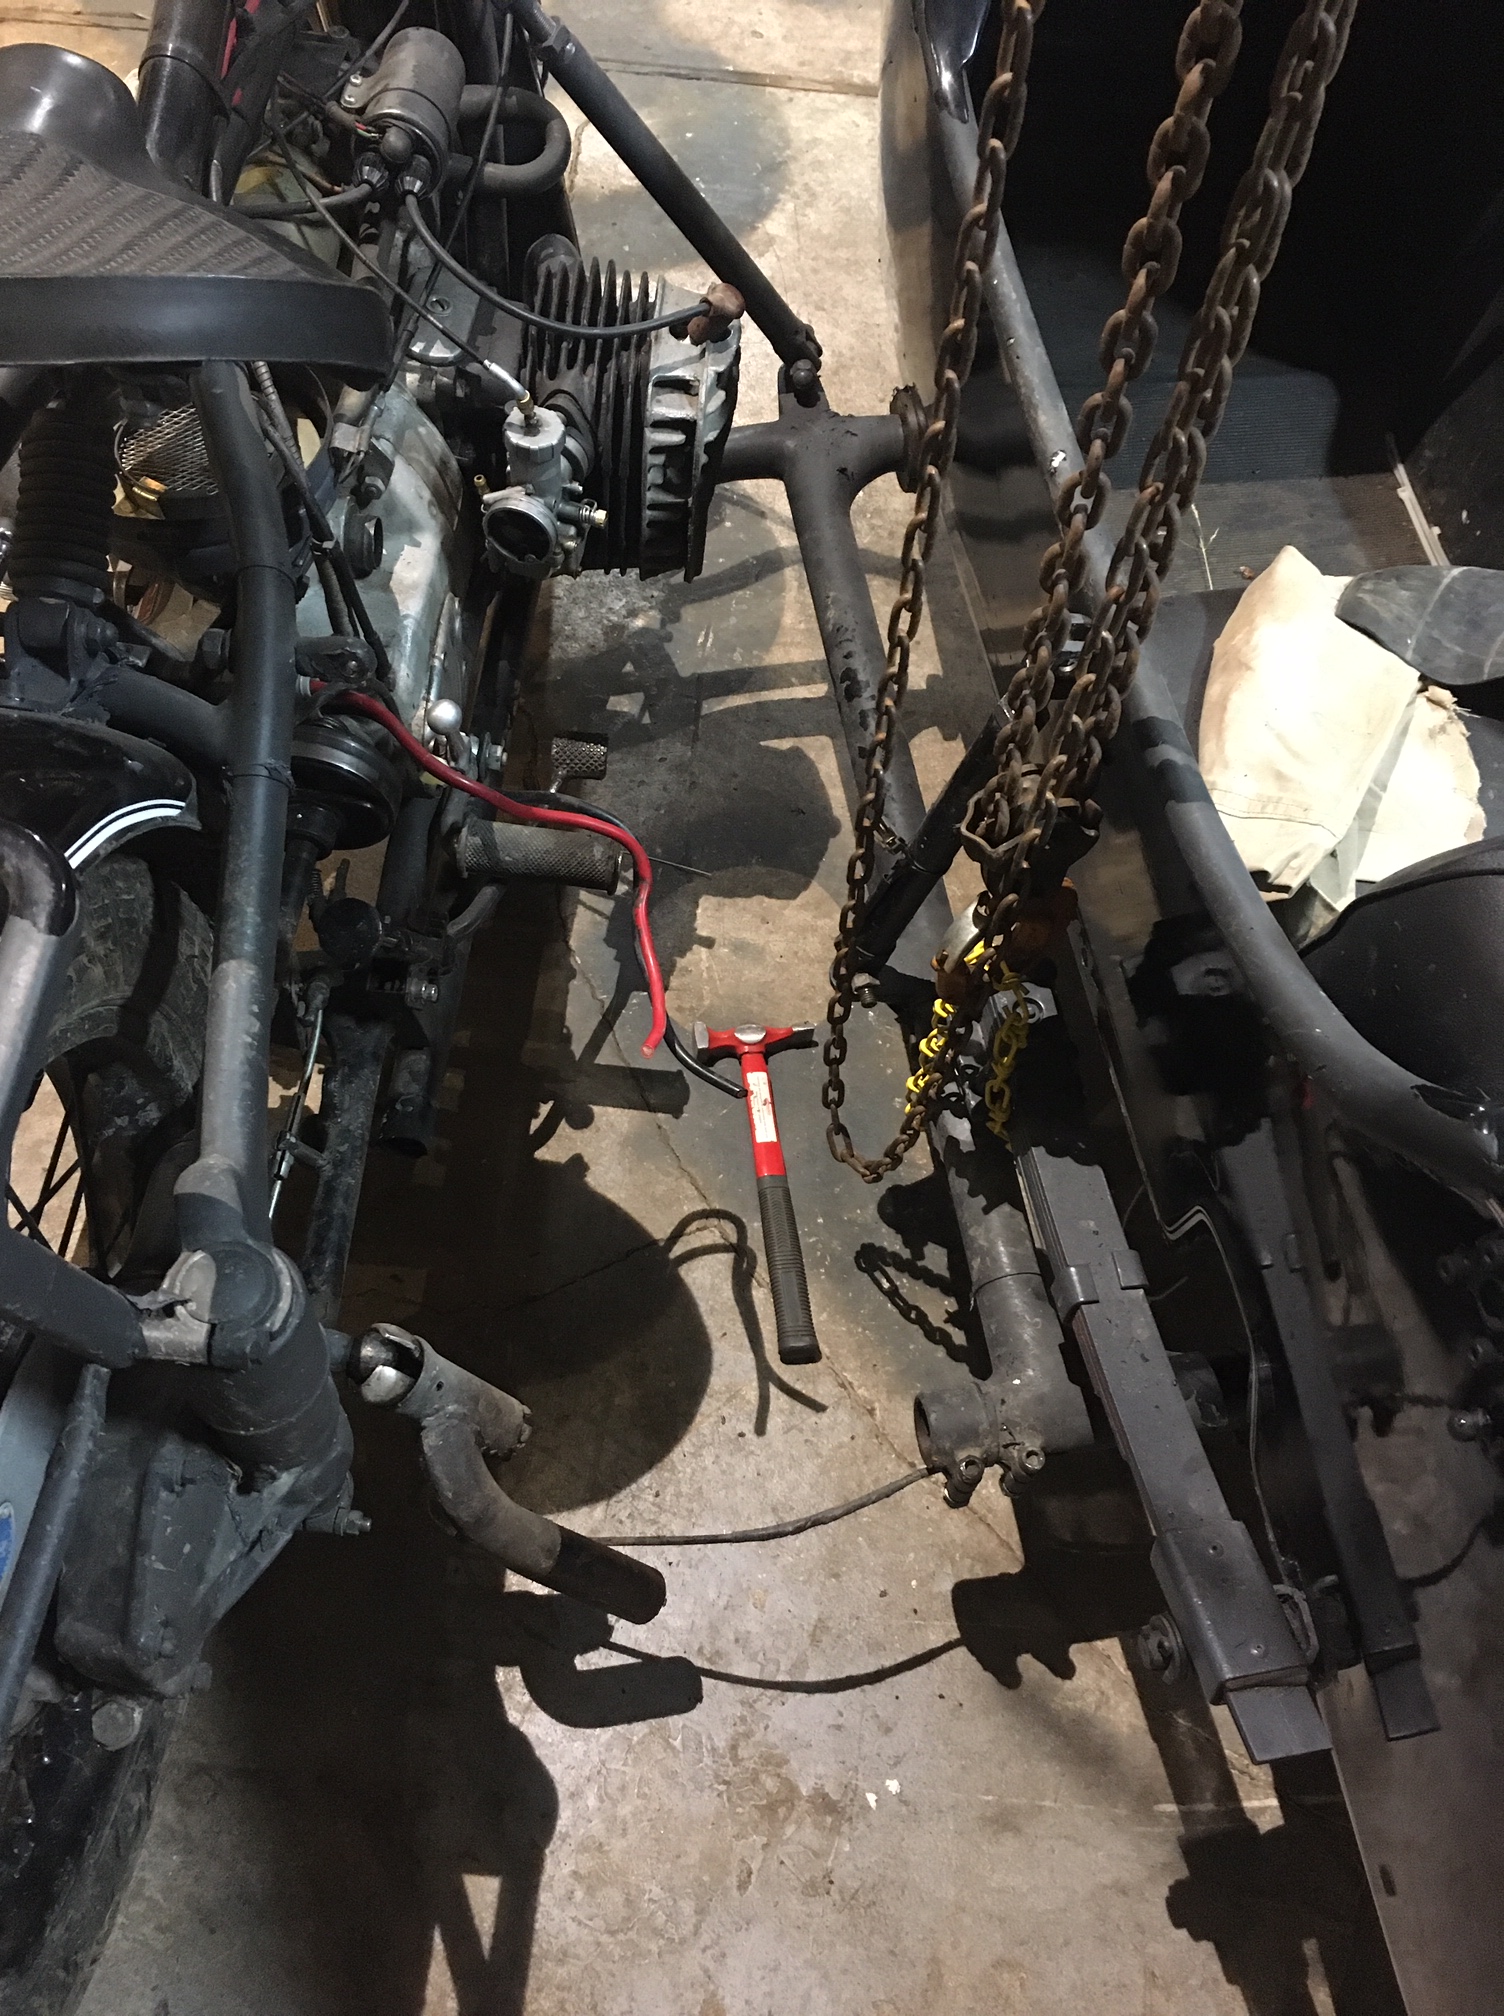
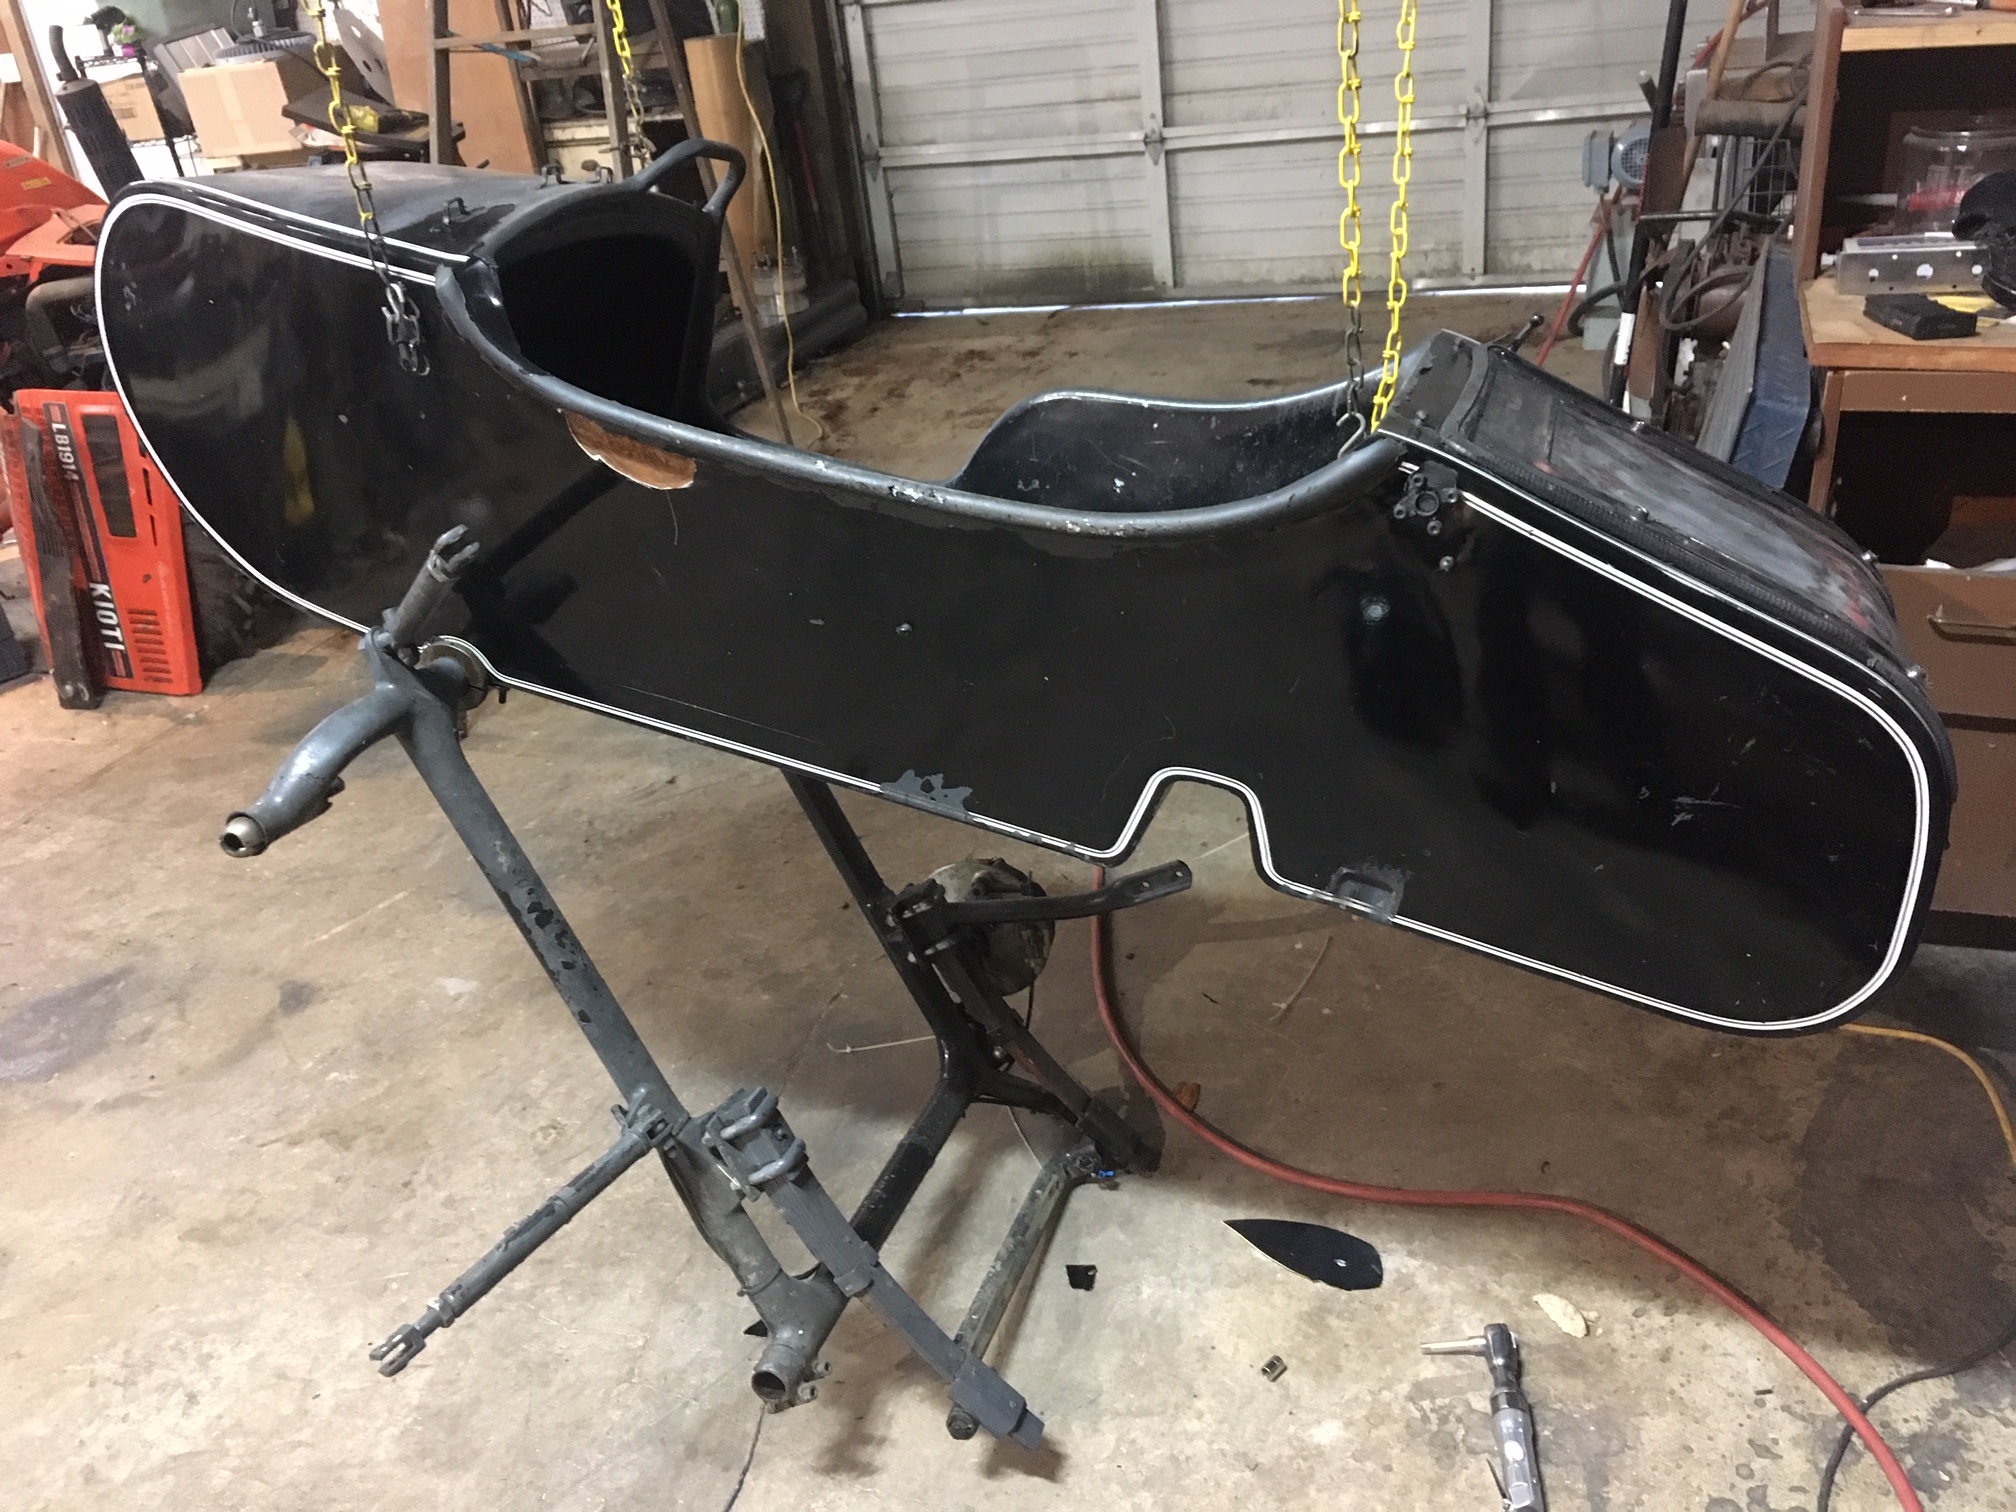
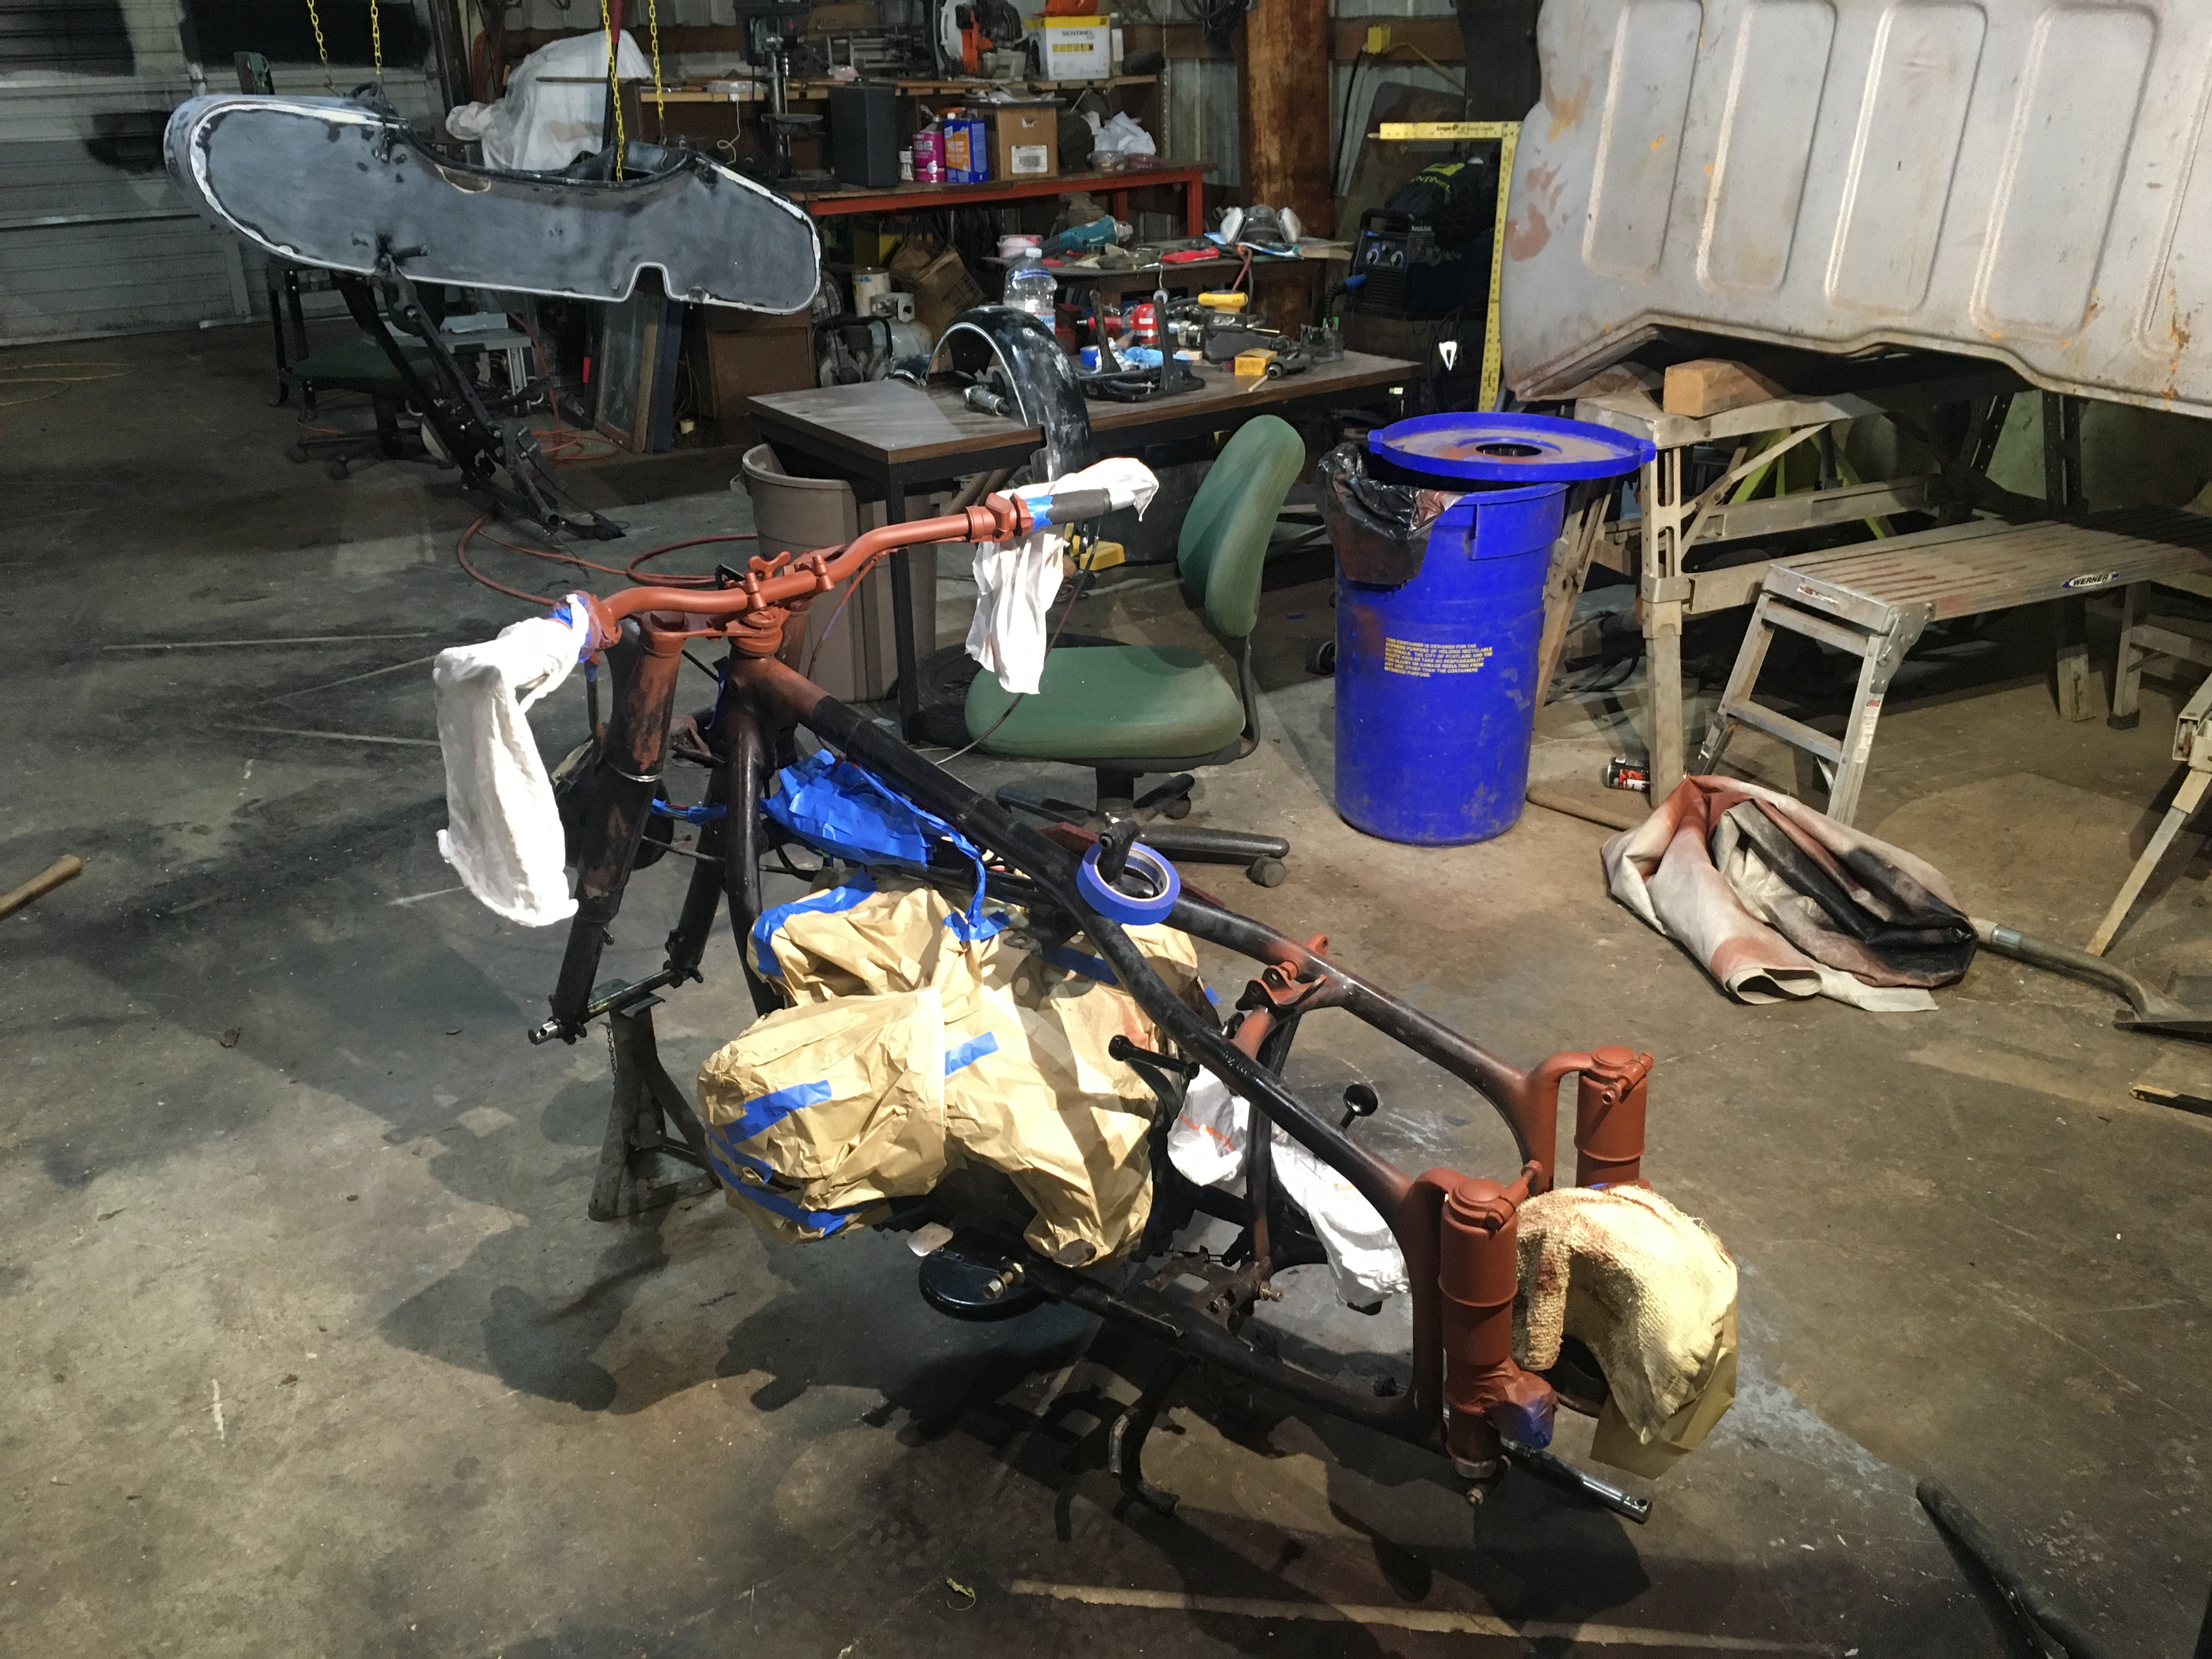
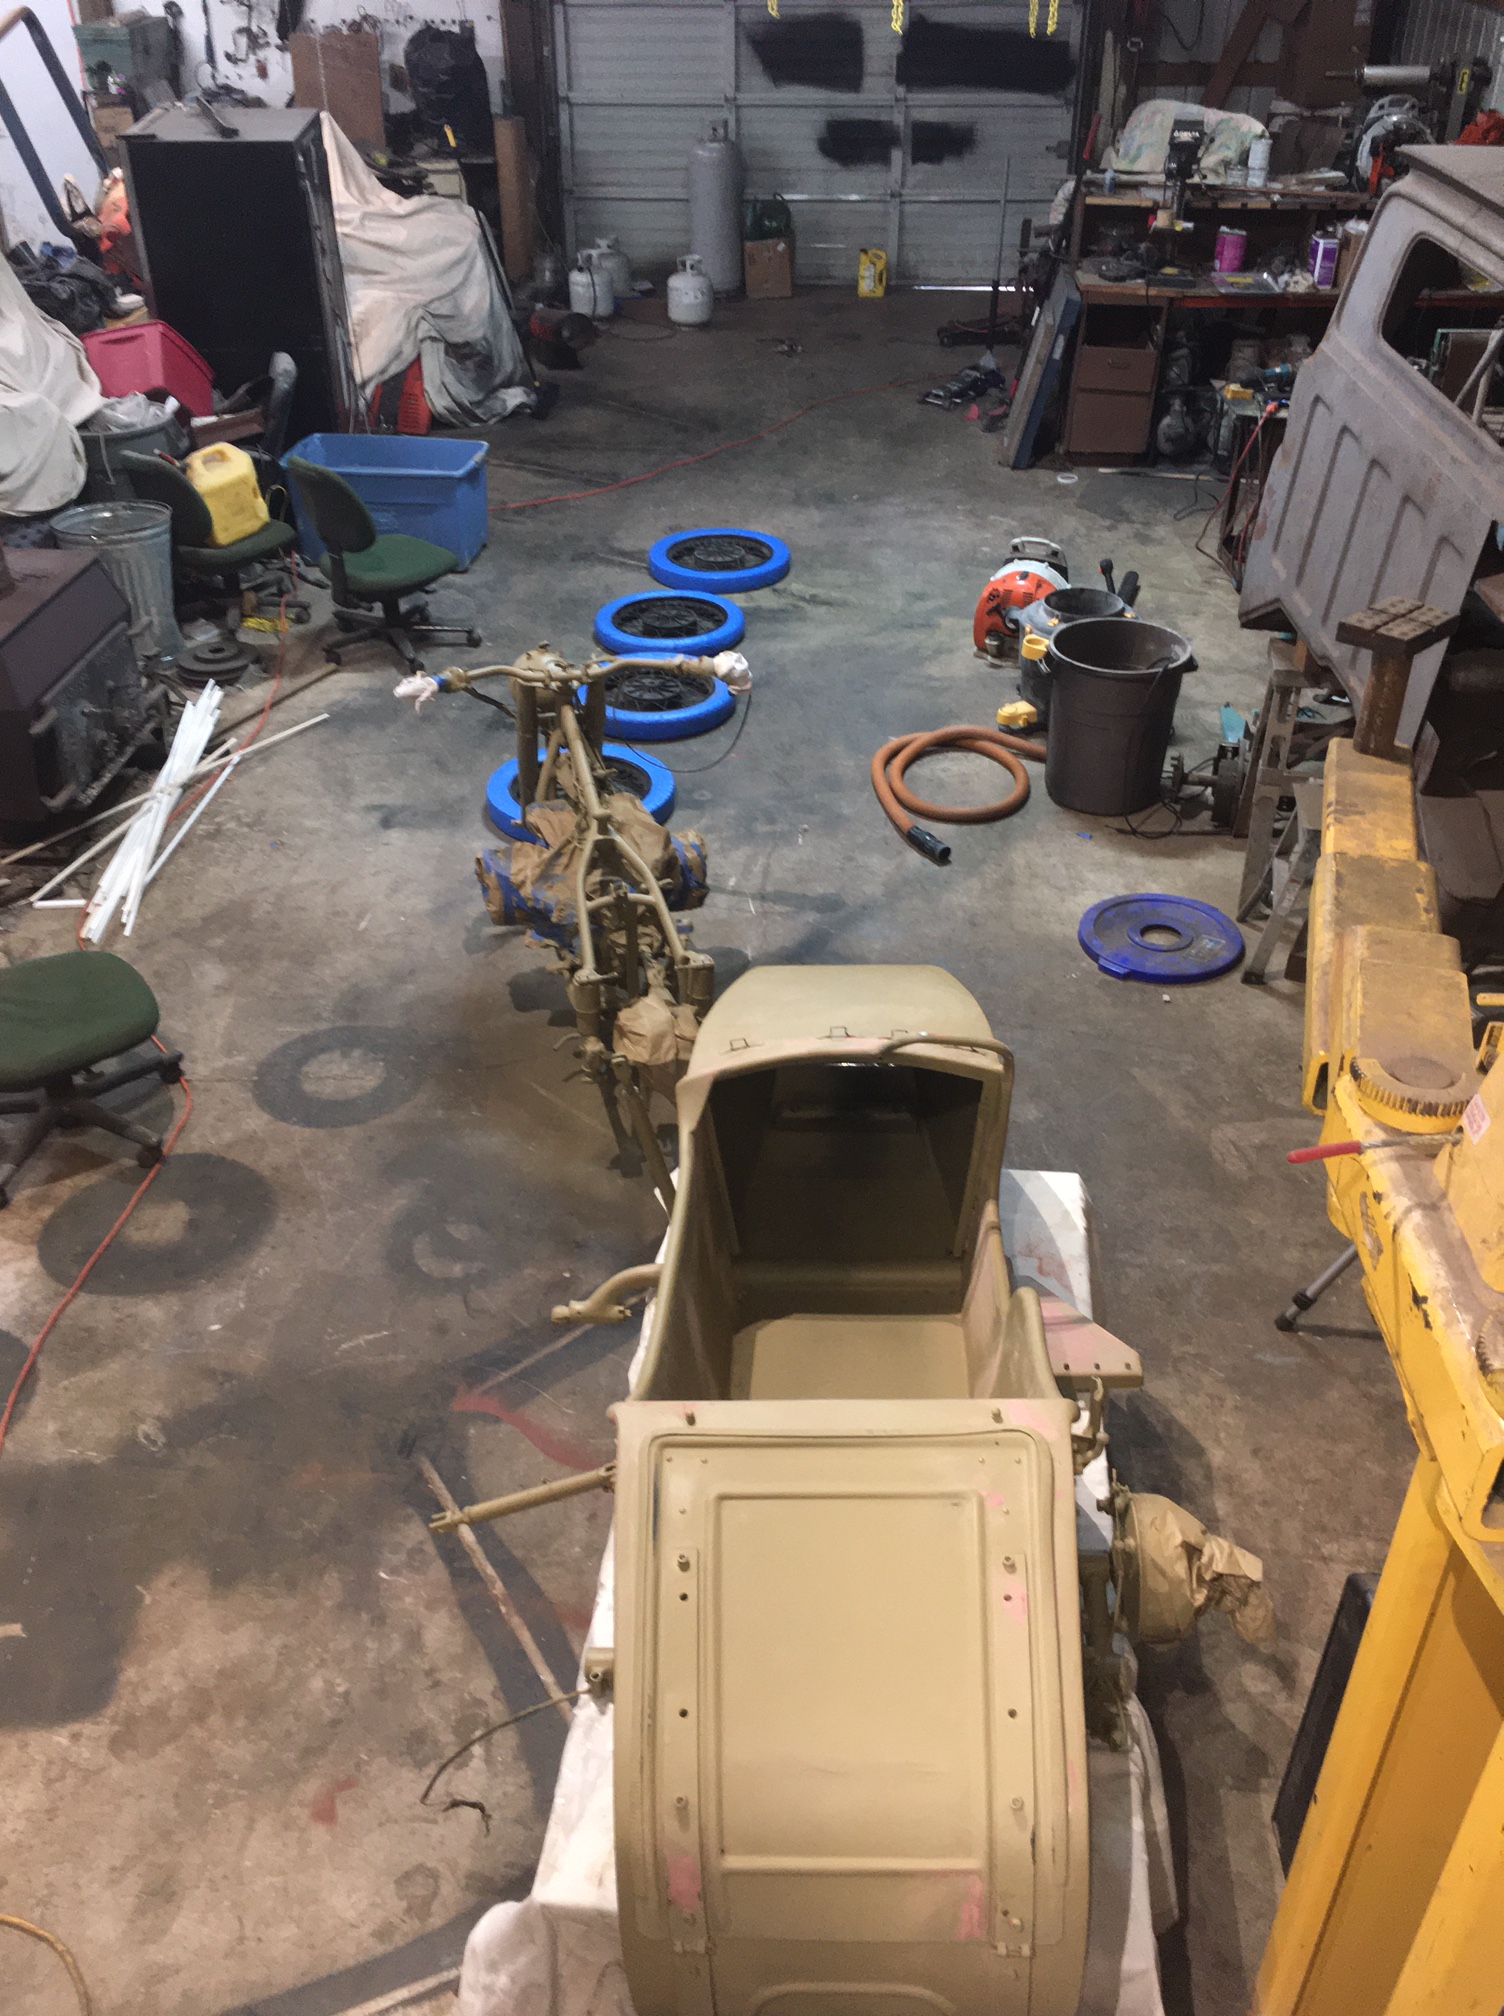
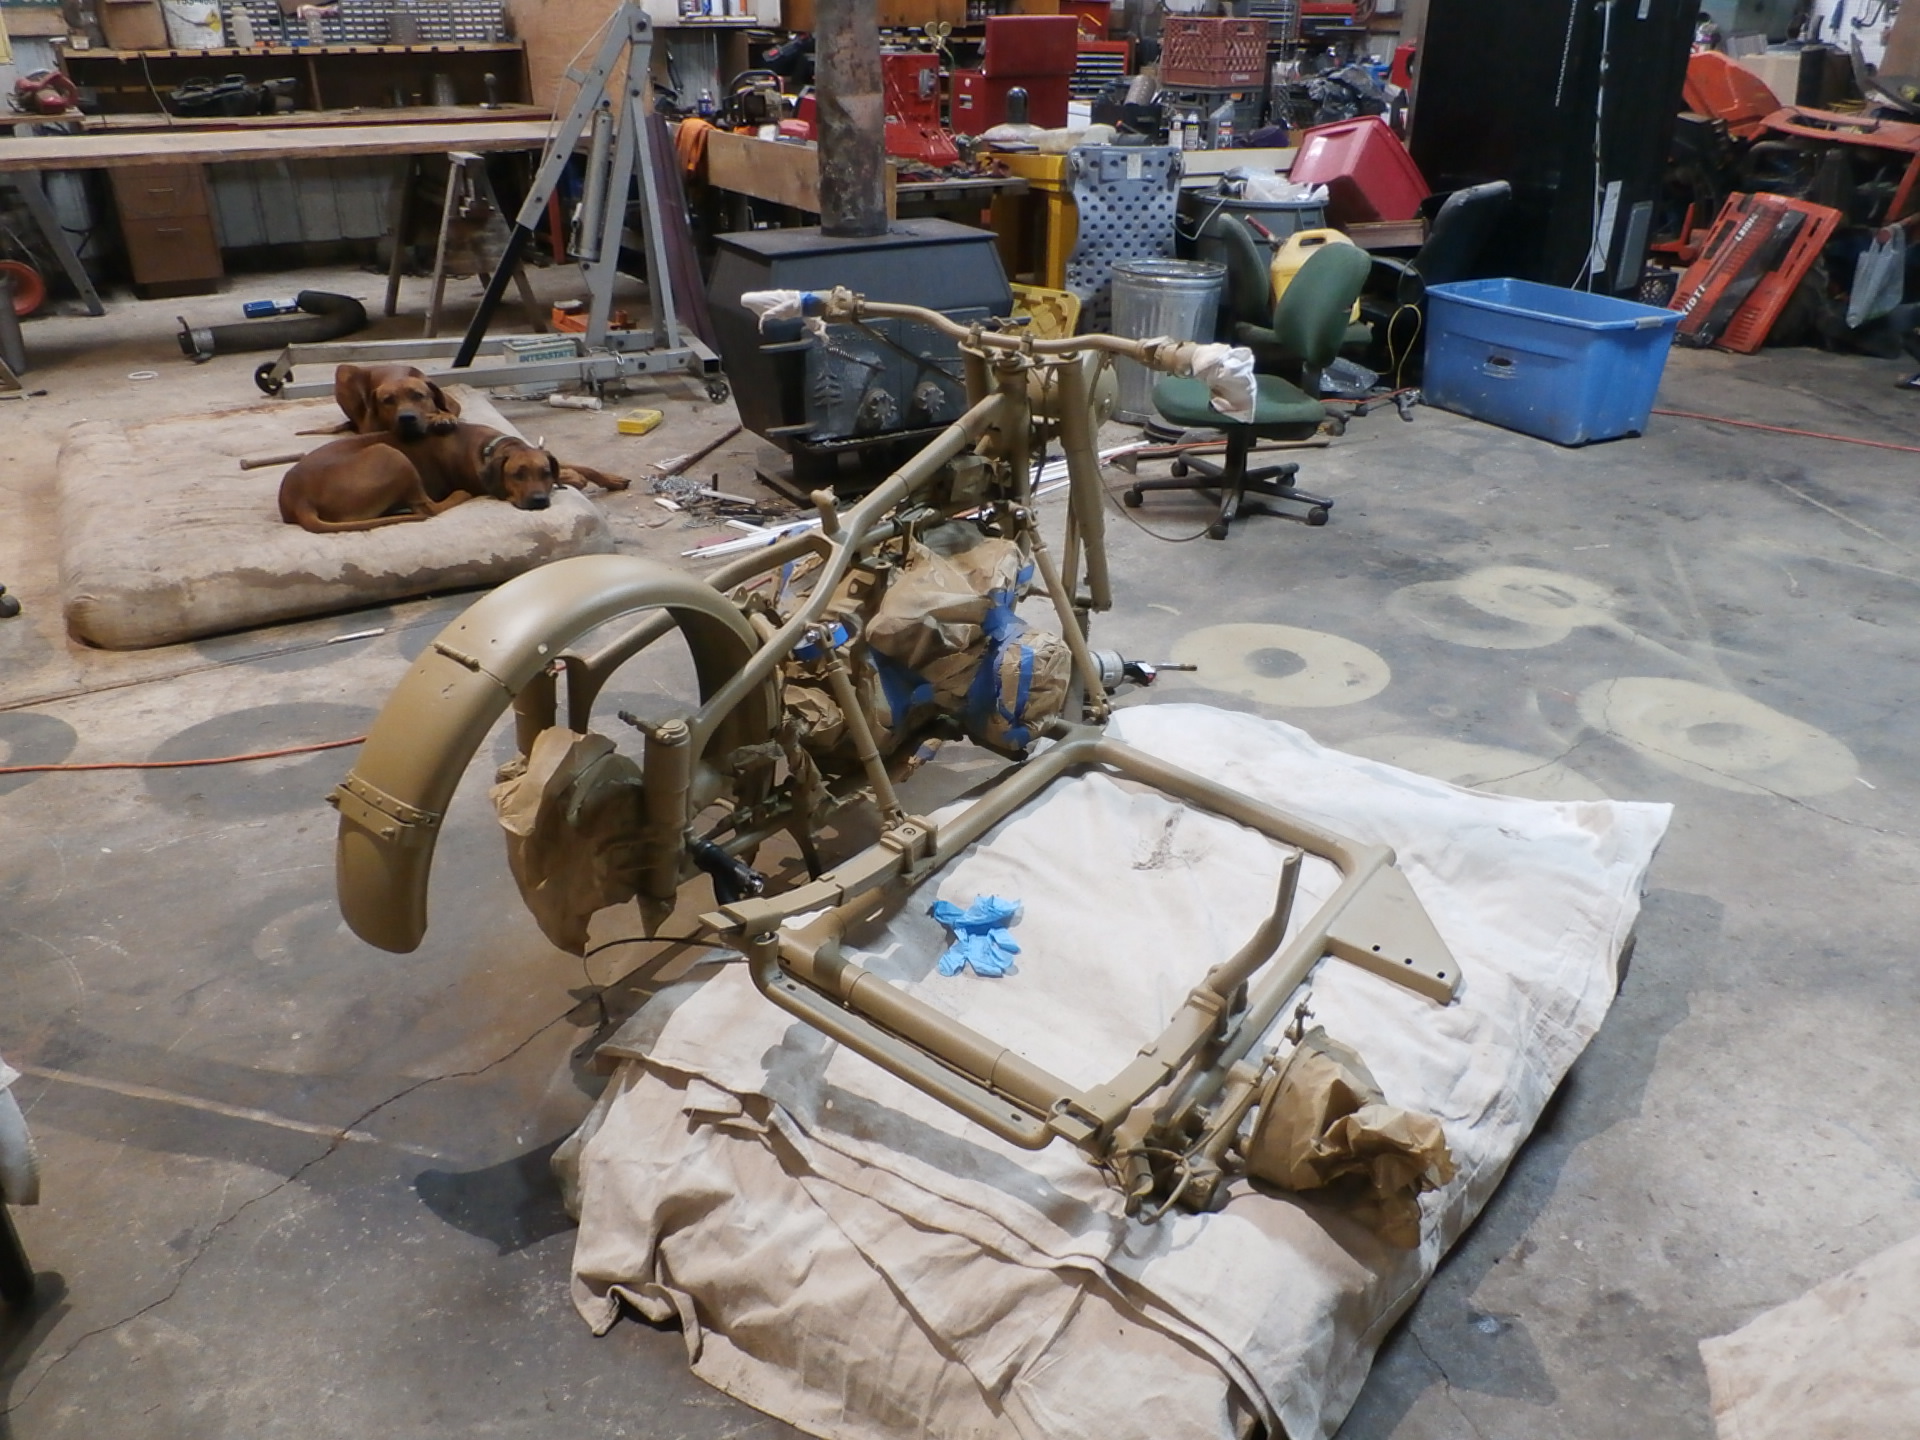
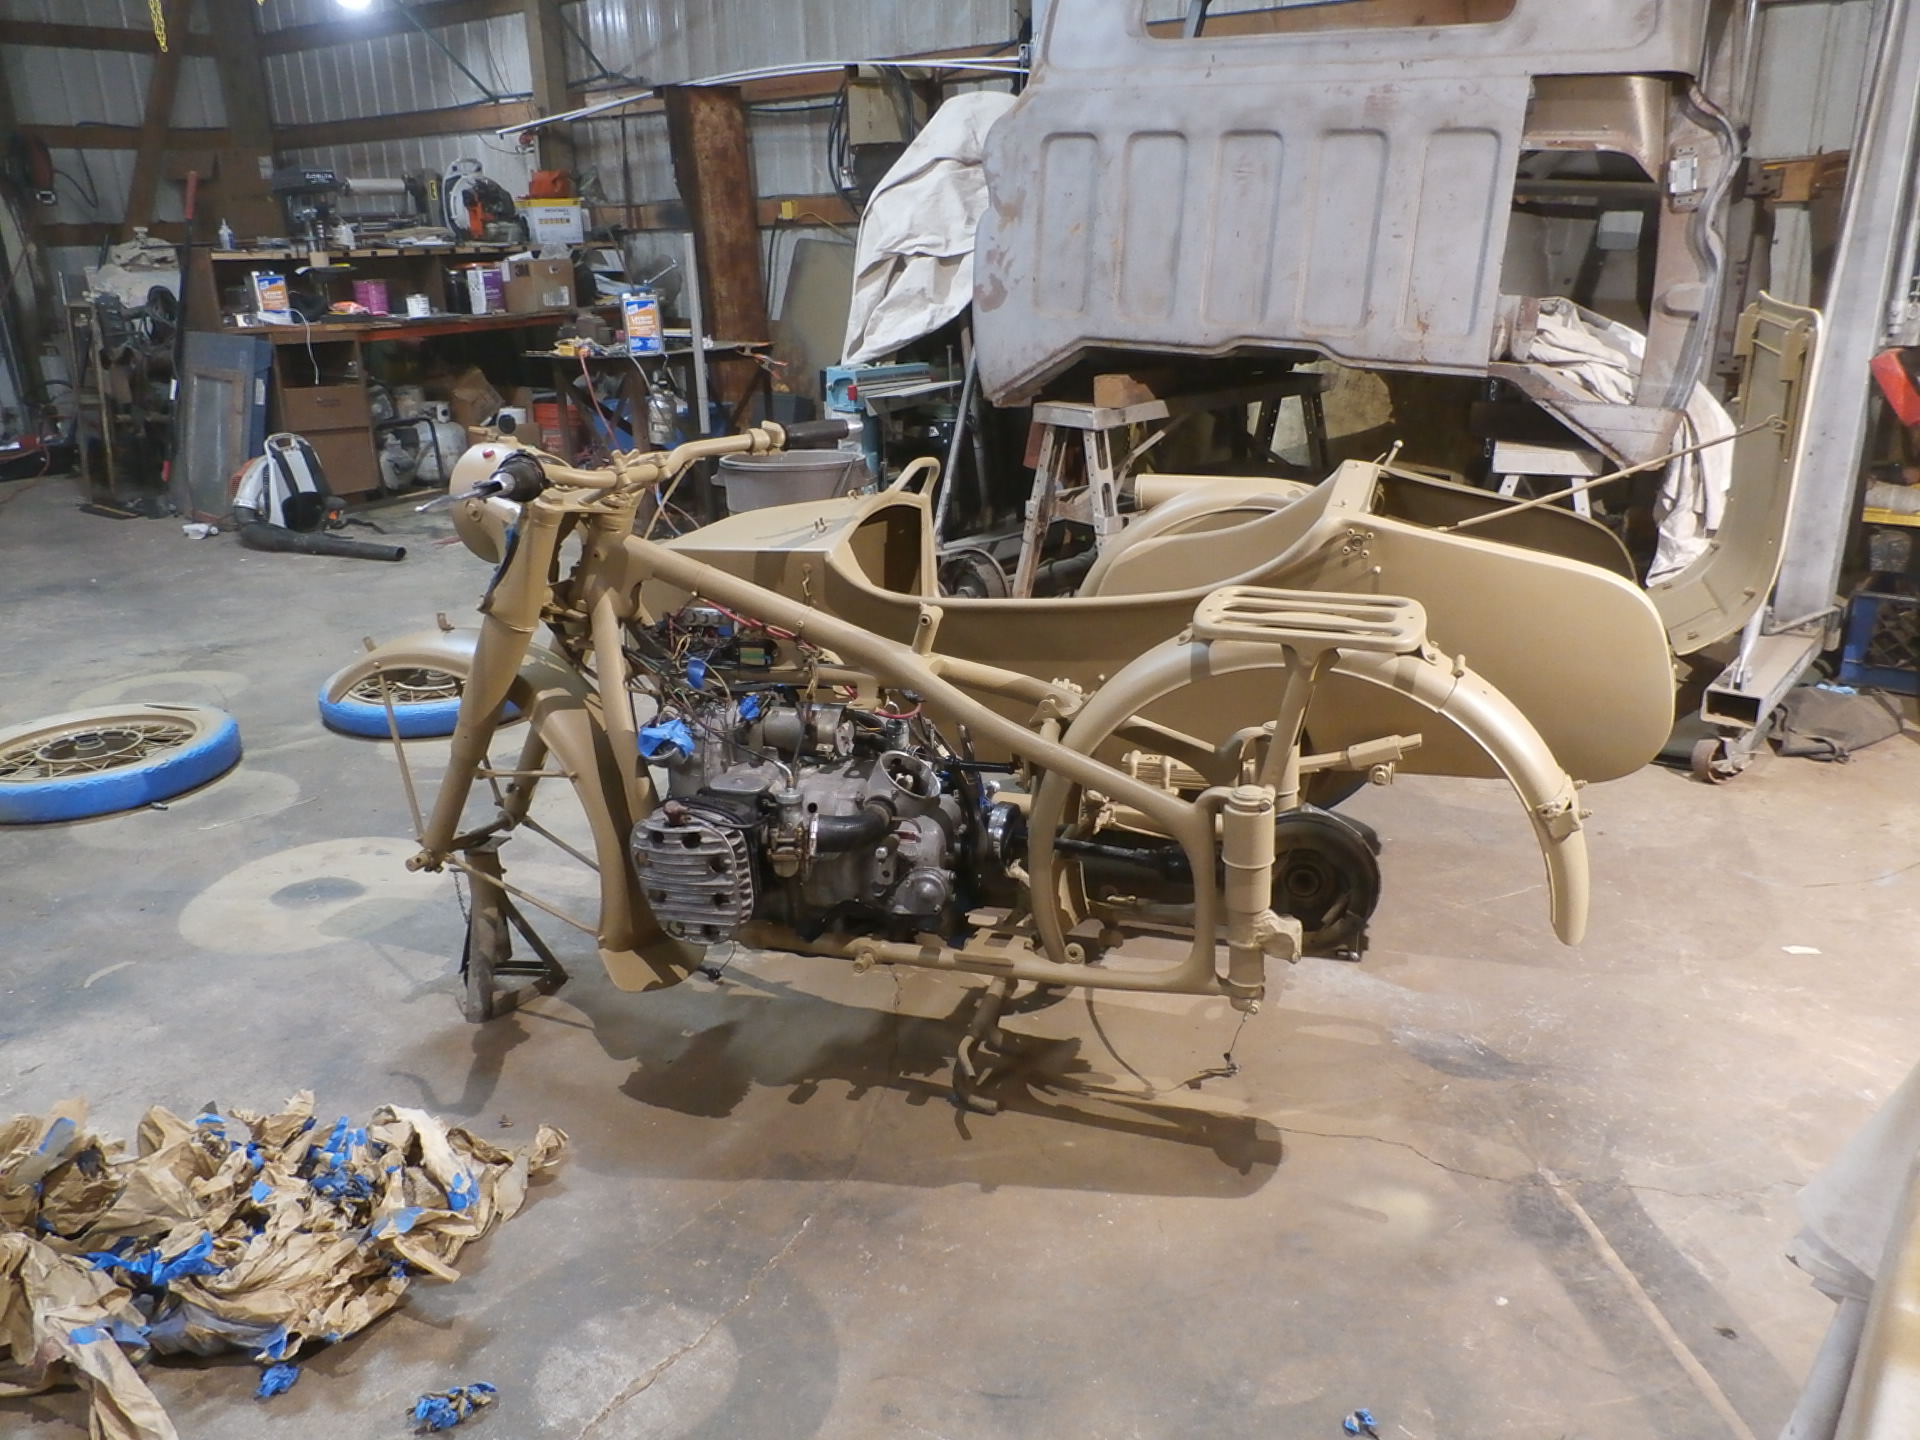
This grey bike pictured is the beginning base of the next restoration that Battlefind is doing, as of October 2020. Currently, the bike sits as it was, in this grey- It is actually a plastic-dip product, brush applied over a non-deglossed black paint job- This means, the bike will need to undergo two different paint stripping processes, and this has partially begun.
This motorcycle is slated to go to the home of the new owner, and will see many hours of enjoyment. First, the grey needs to be removed, and the black paint that the previous owner did not de-gloss will need to be properly prepped for a beautiful paint job in the original materials and colors used in WWII by the German Forces in Africa.


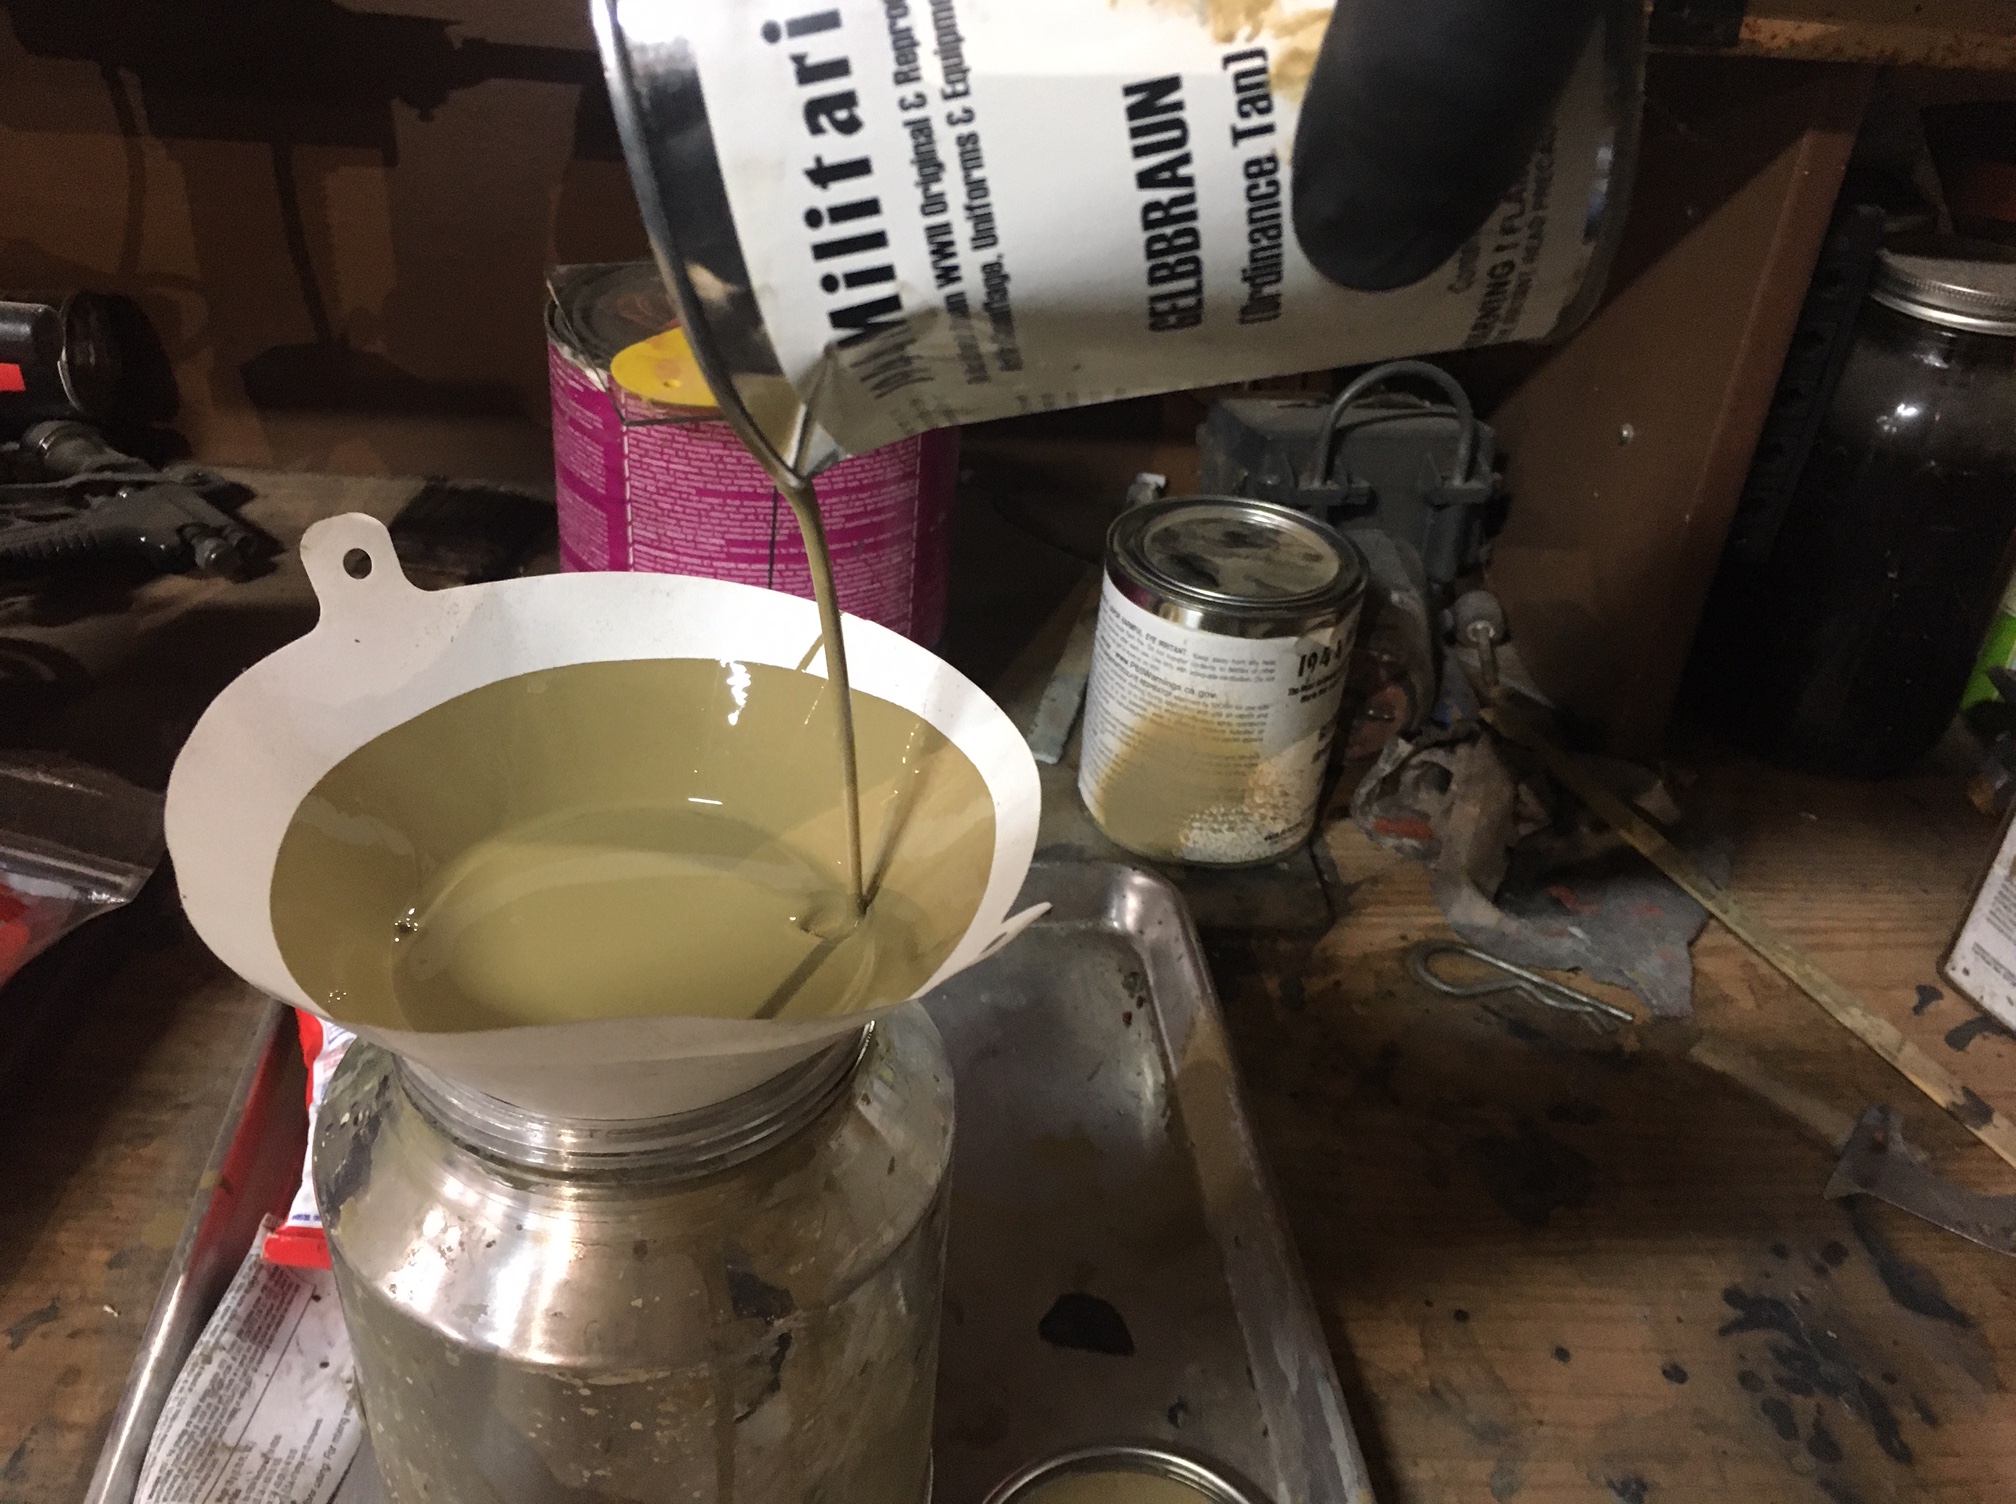
This is the point where a deposit has been placed as of October 1, 2020, and this machine is on it’s way to be set in GELBBRAUN (Ordnance Tan) Lacquer, as appeared in the Africa Corps in early WWII.
Stay tuned to this page, as we begin the teardown and painting process this month.
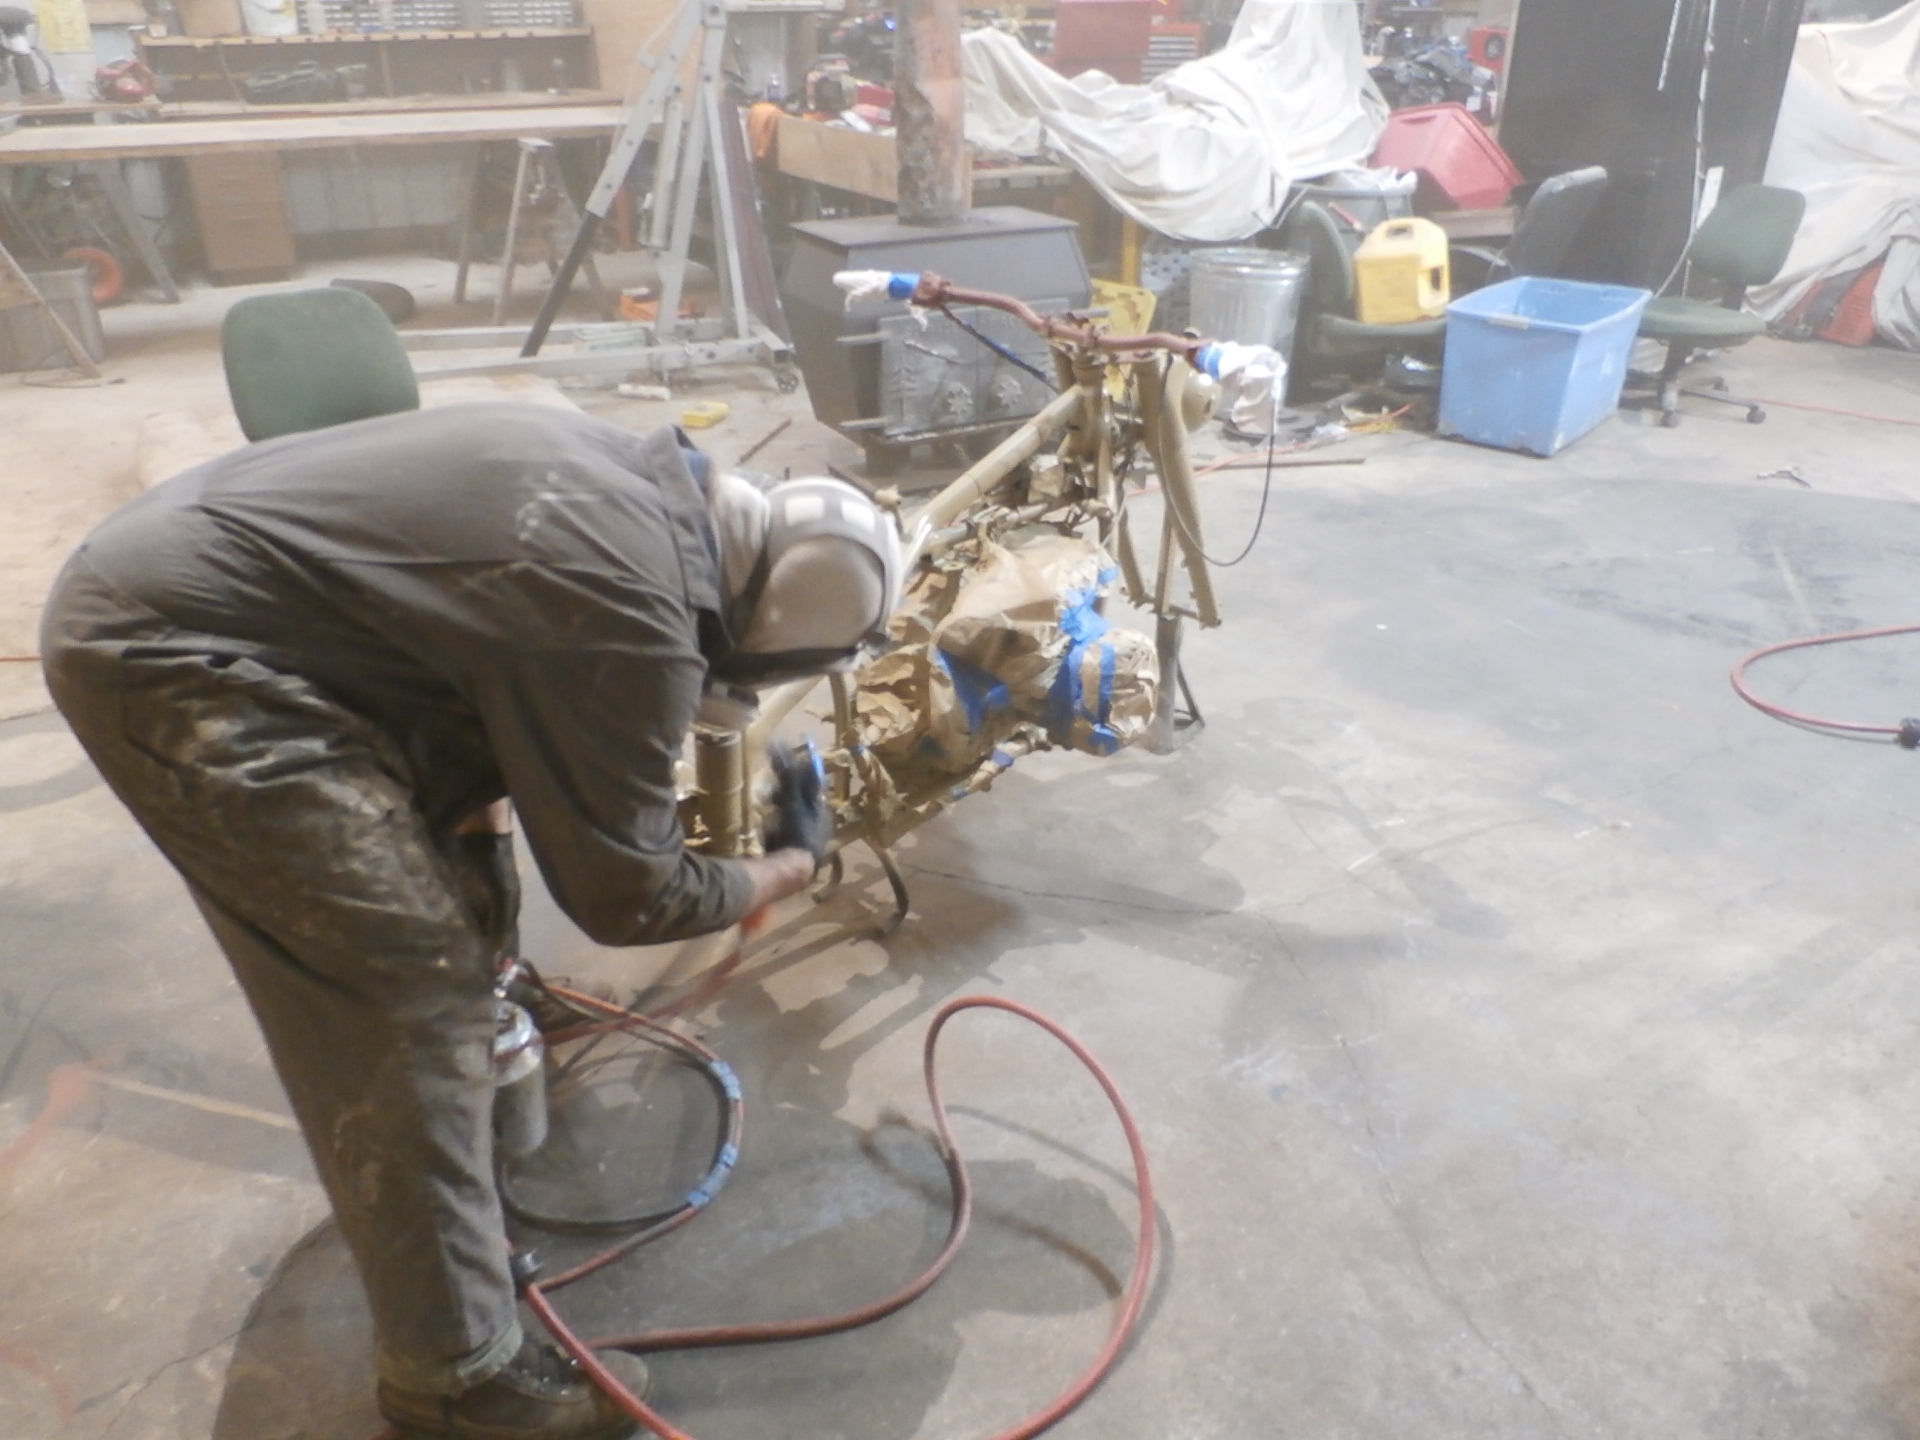
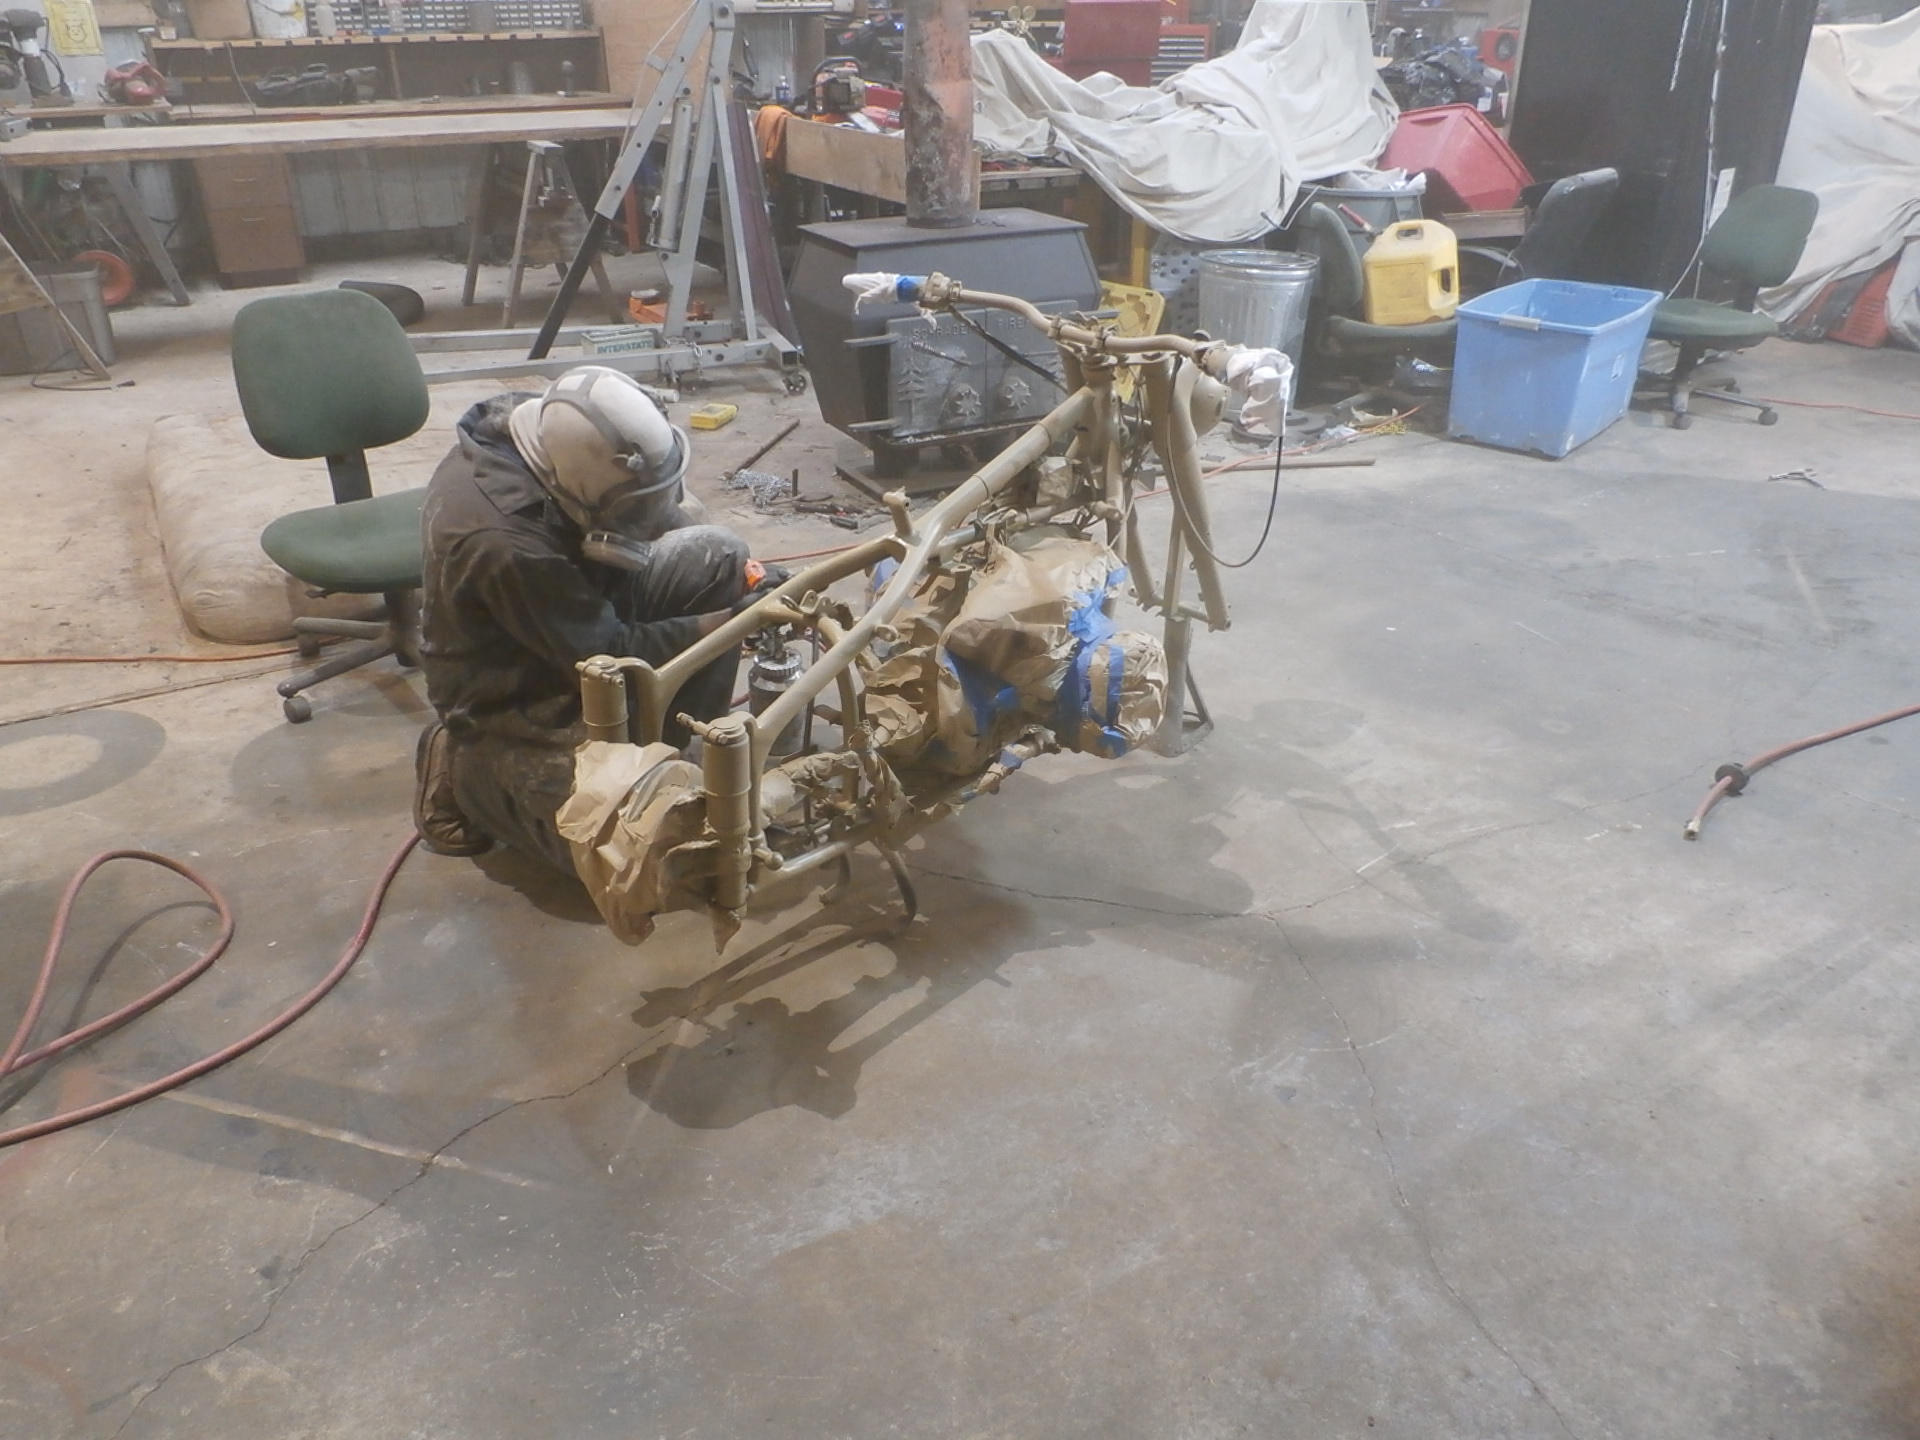
October is well underway, and we are stripping the top layer of the coating off this bike, in preparation for bringing it to Gelbbraun. We pulled one of the ammunition cans and mounts from another project and will re-coat this to match.

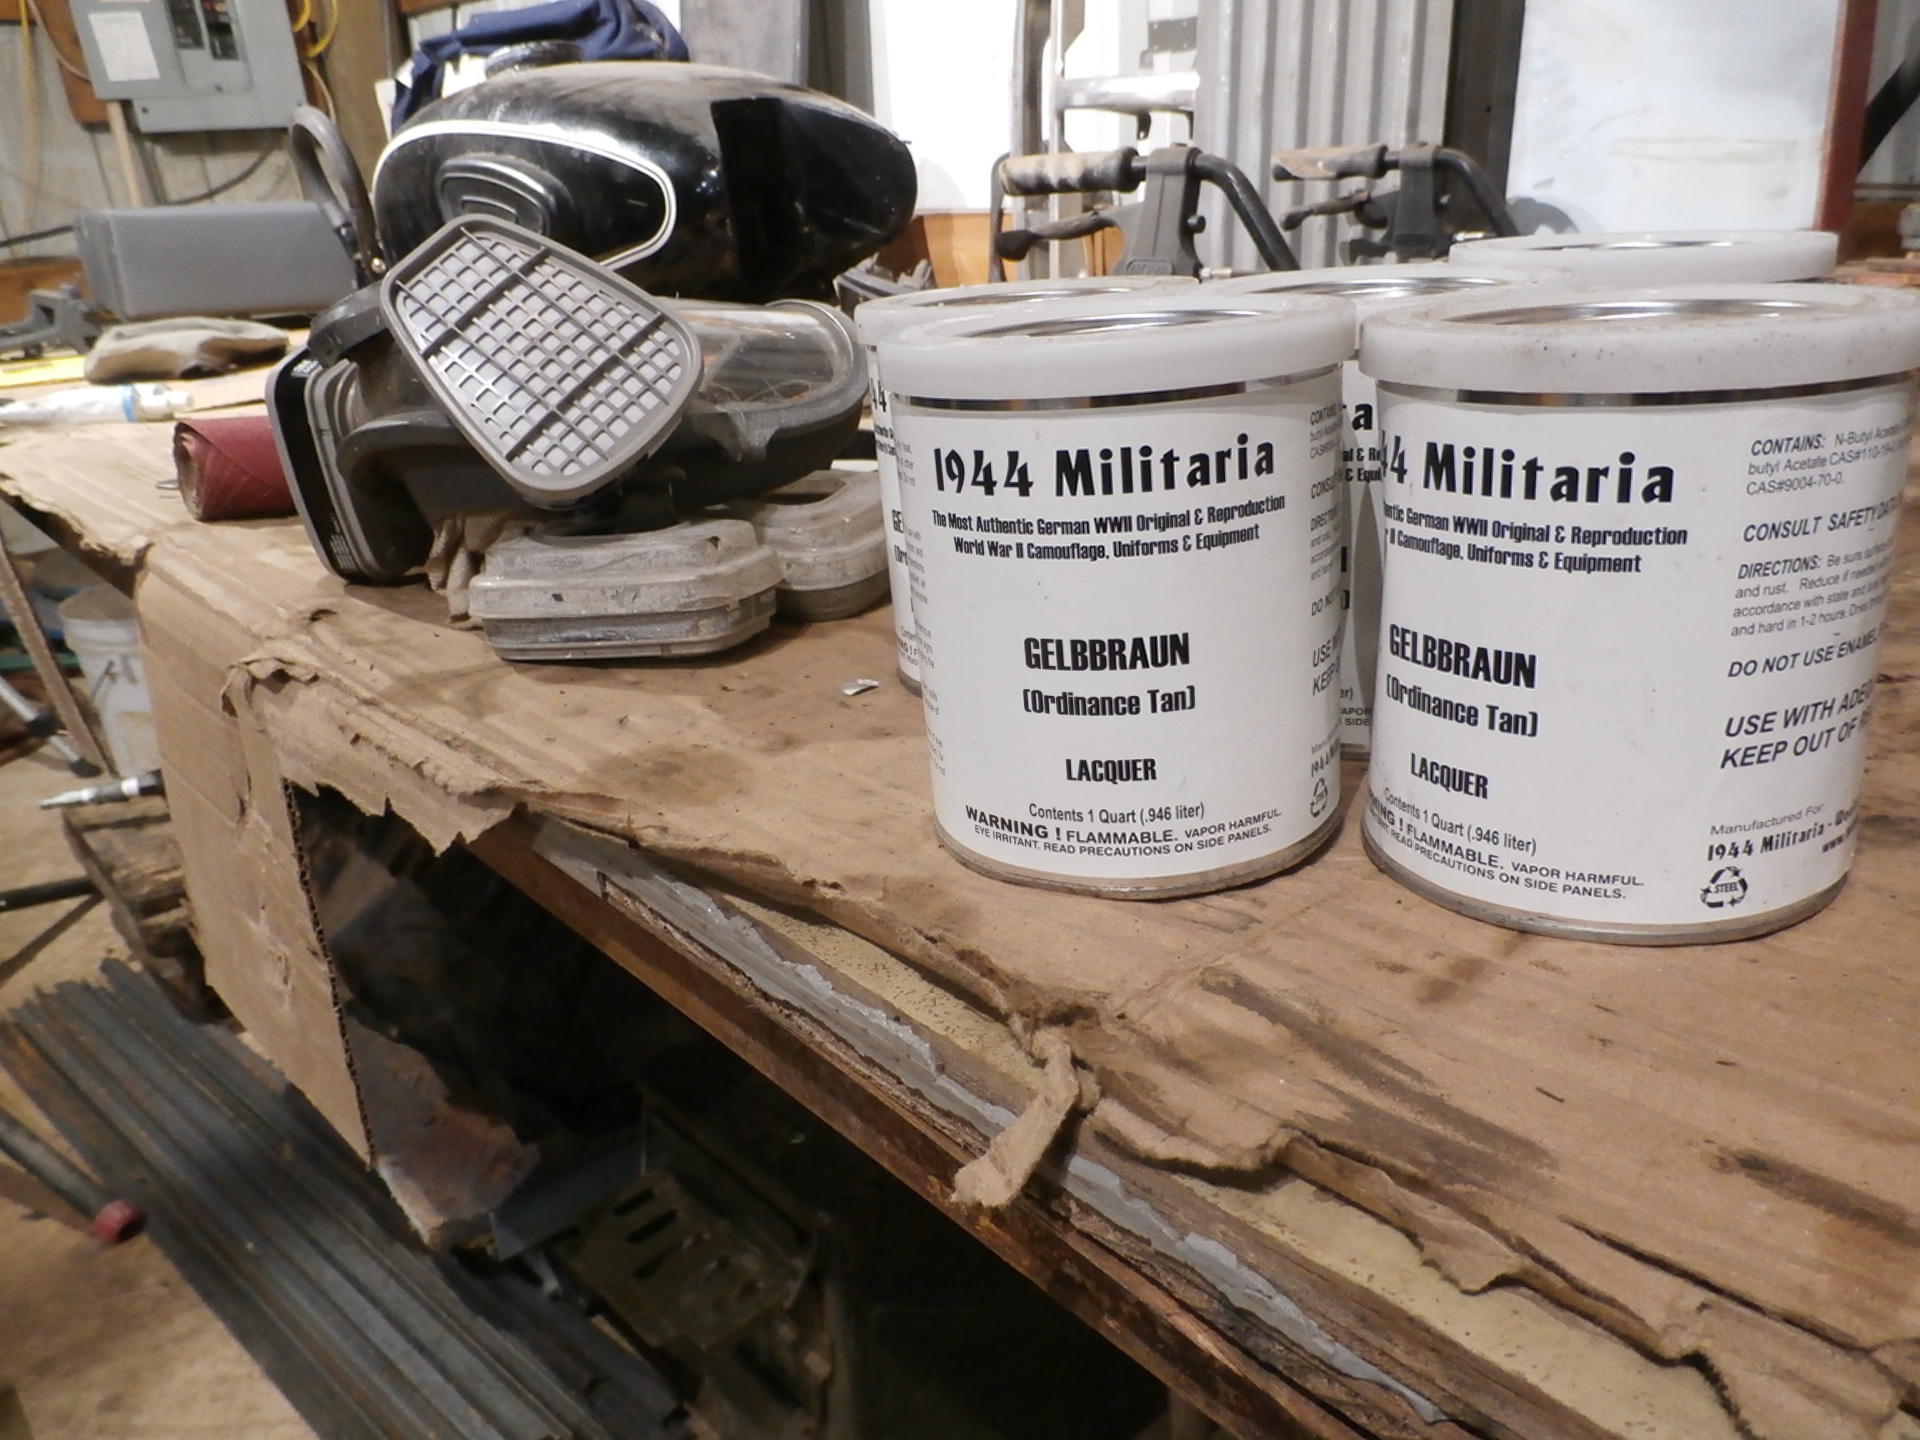
This is my source for the German Lacquer paint colors that we use here on our German vehicle restorations, as their quality in color matching is un-surpassed, although lacquer paint can be more prone to impact chipping.

Take note of the rear outer corner of the sidecar. I sprayed it down with lacquer thinner, and let that sit for ten minutes, then came back with a rubber block from a sanding pad, without the sandpaper, and rubbed the semi-soft coating off. It was not actually grey paint on this bike, but rather, a Plastic-Dip product intended for other uses, but brush applied to this machine by the previous owner. It is an arduous process, and once completed, the bike can begin the process of having the original paint properly sanded and primed, before the final three coats of Gelbbraun Lacquer are applied.

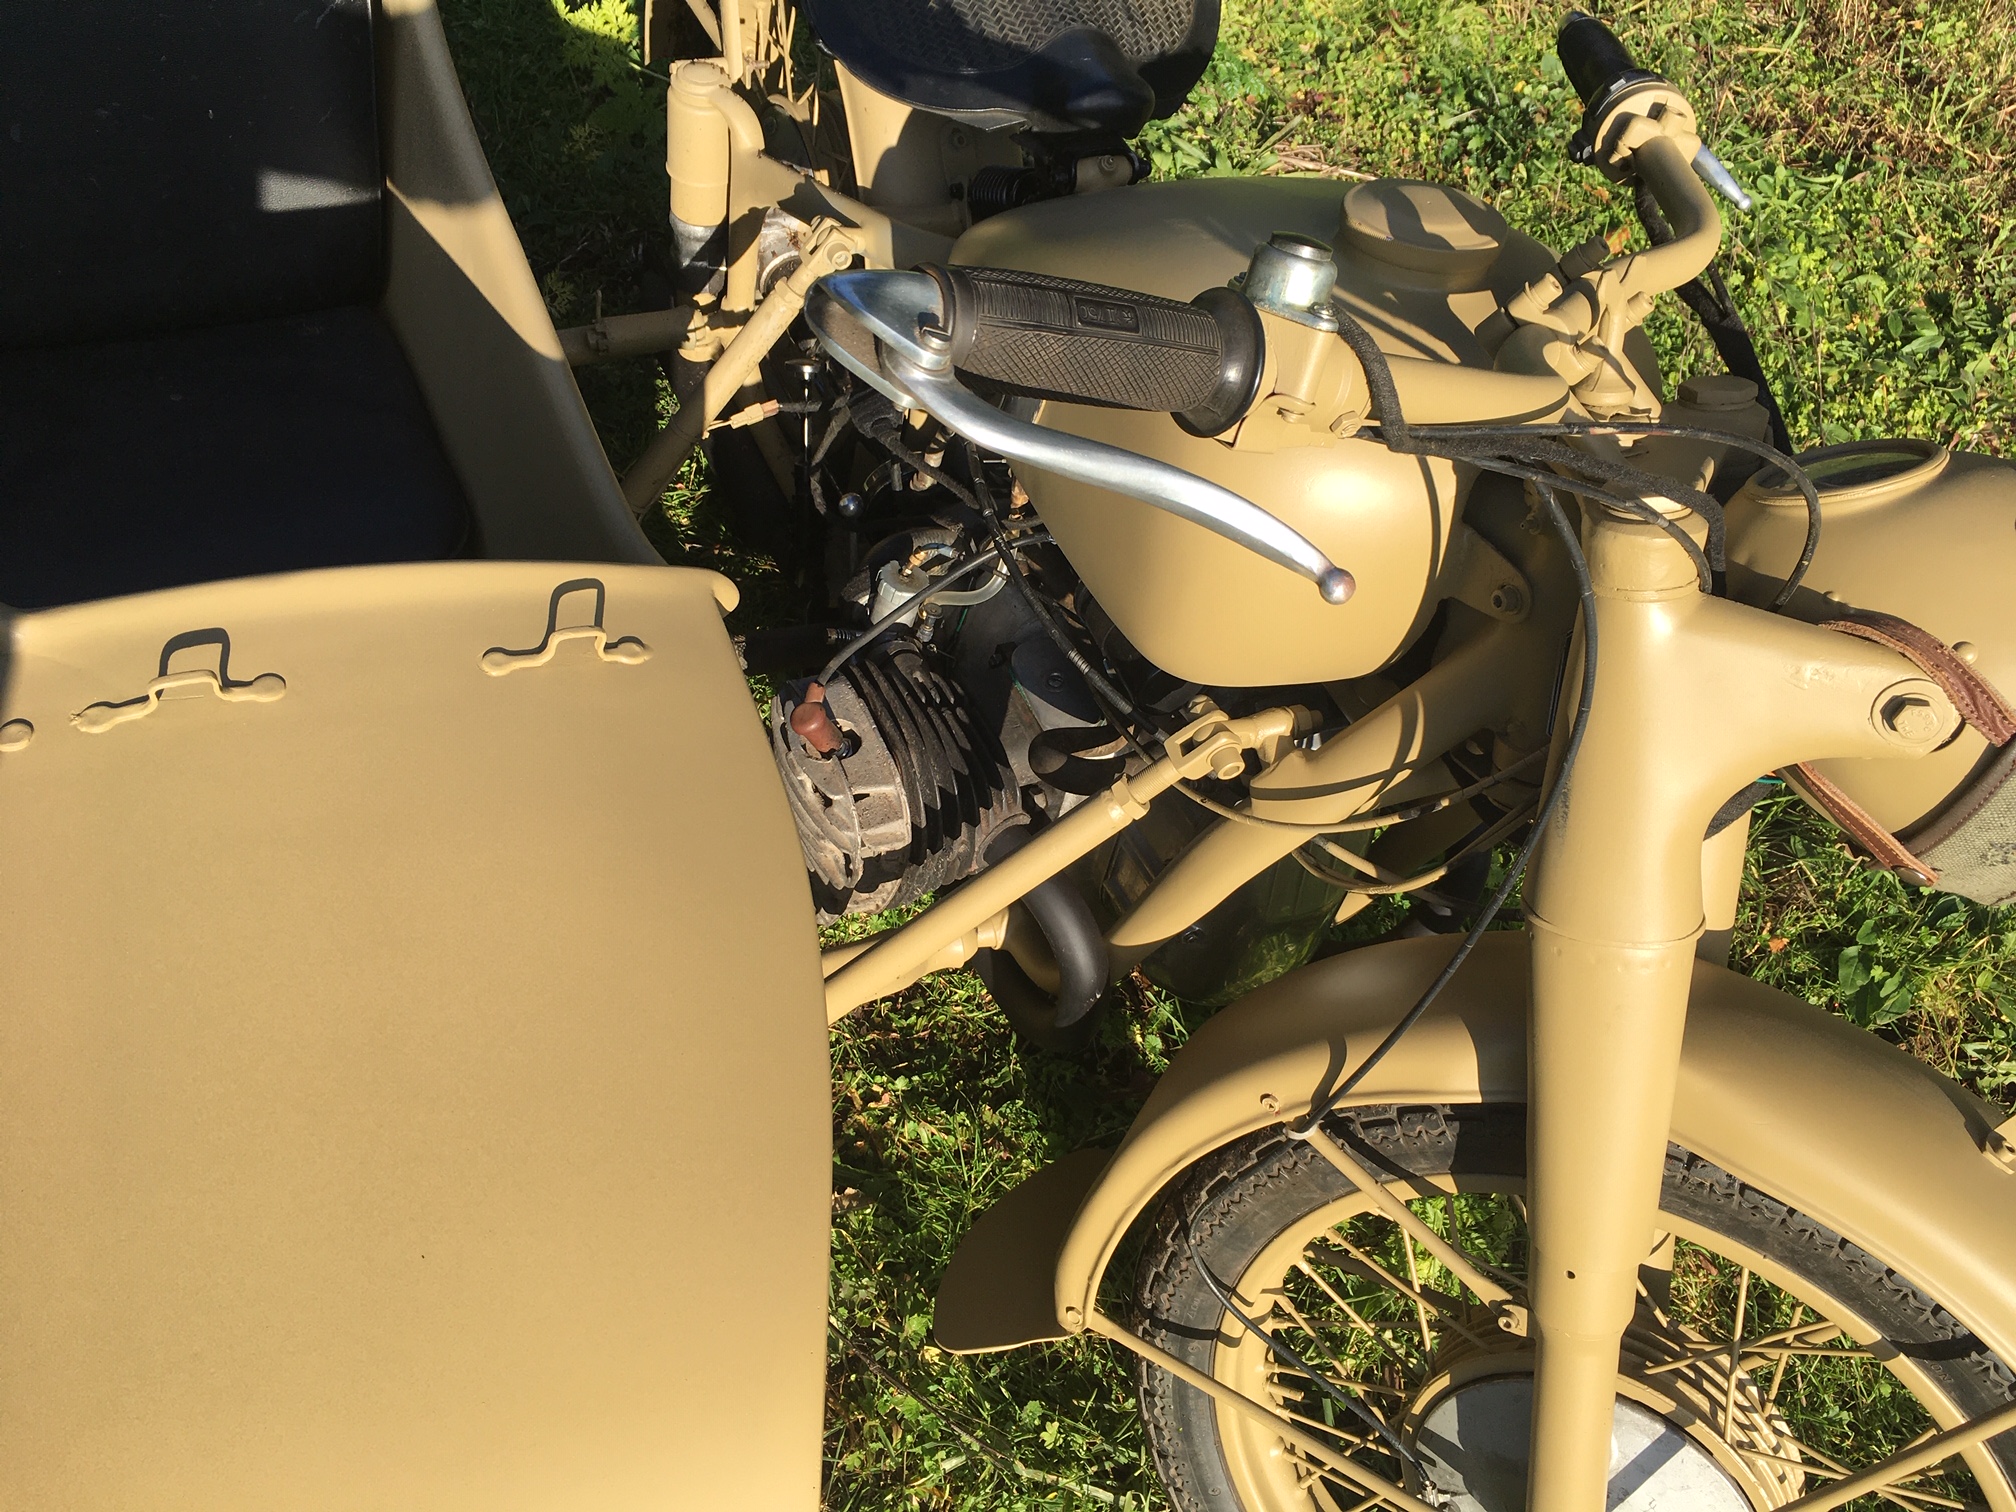
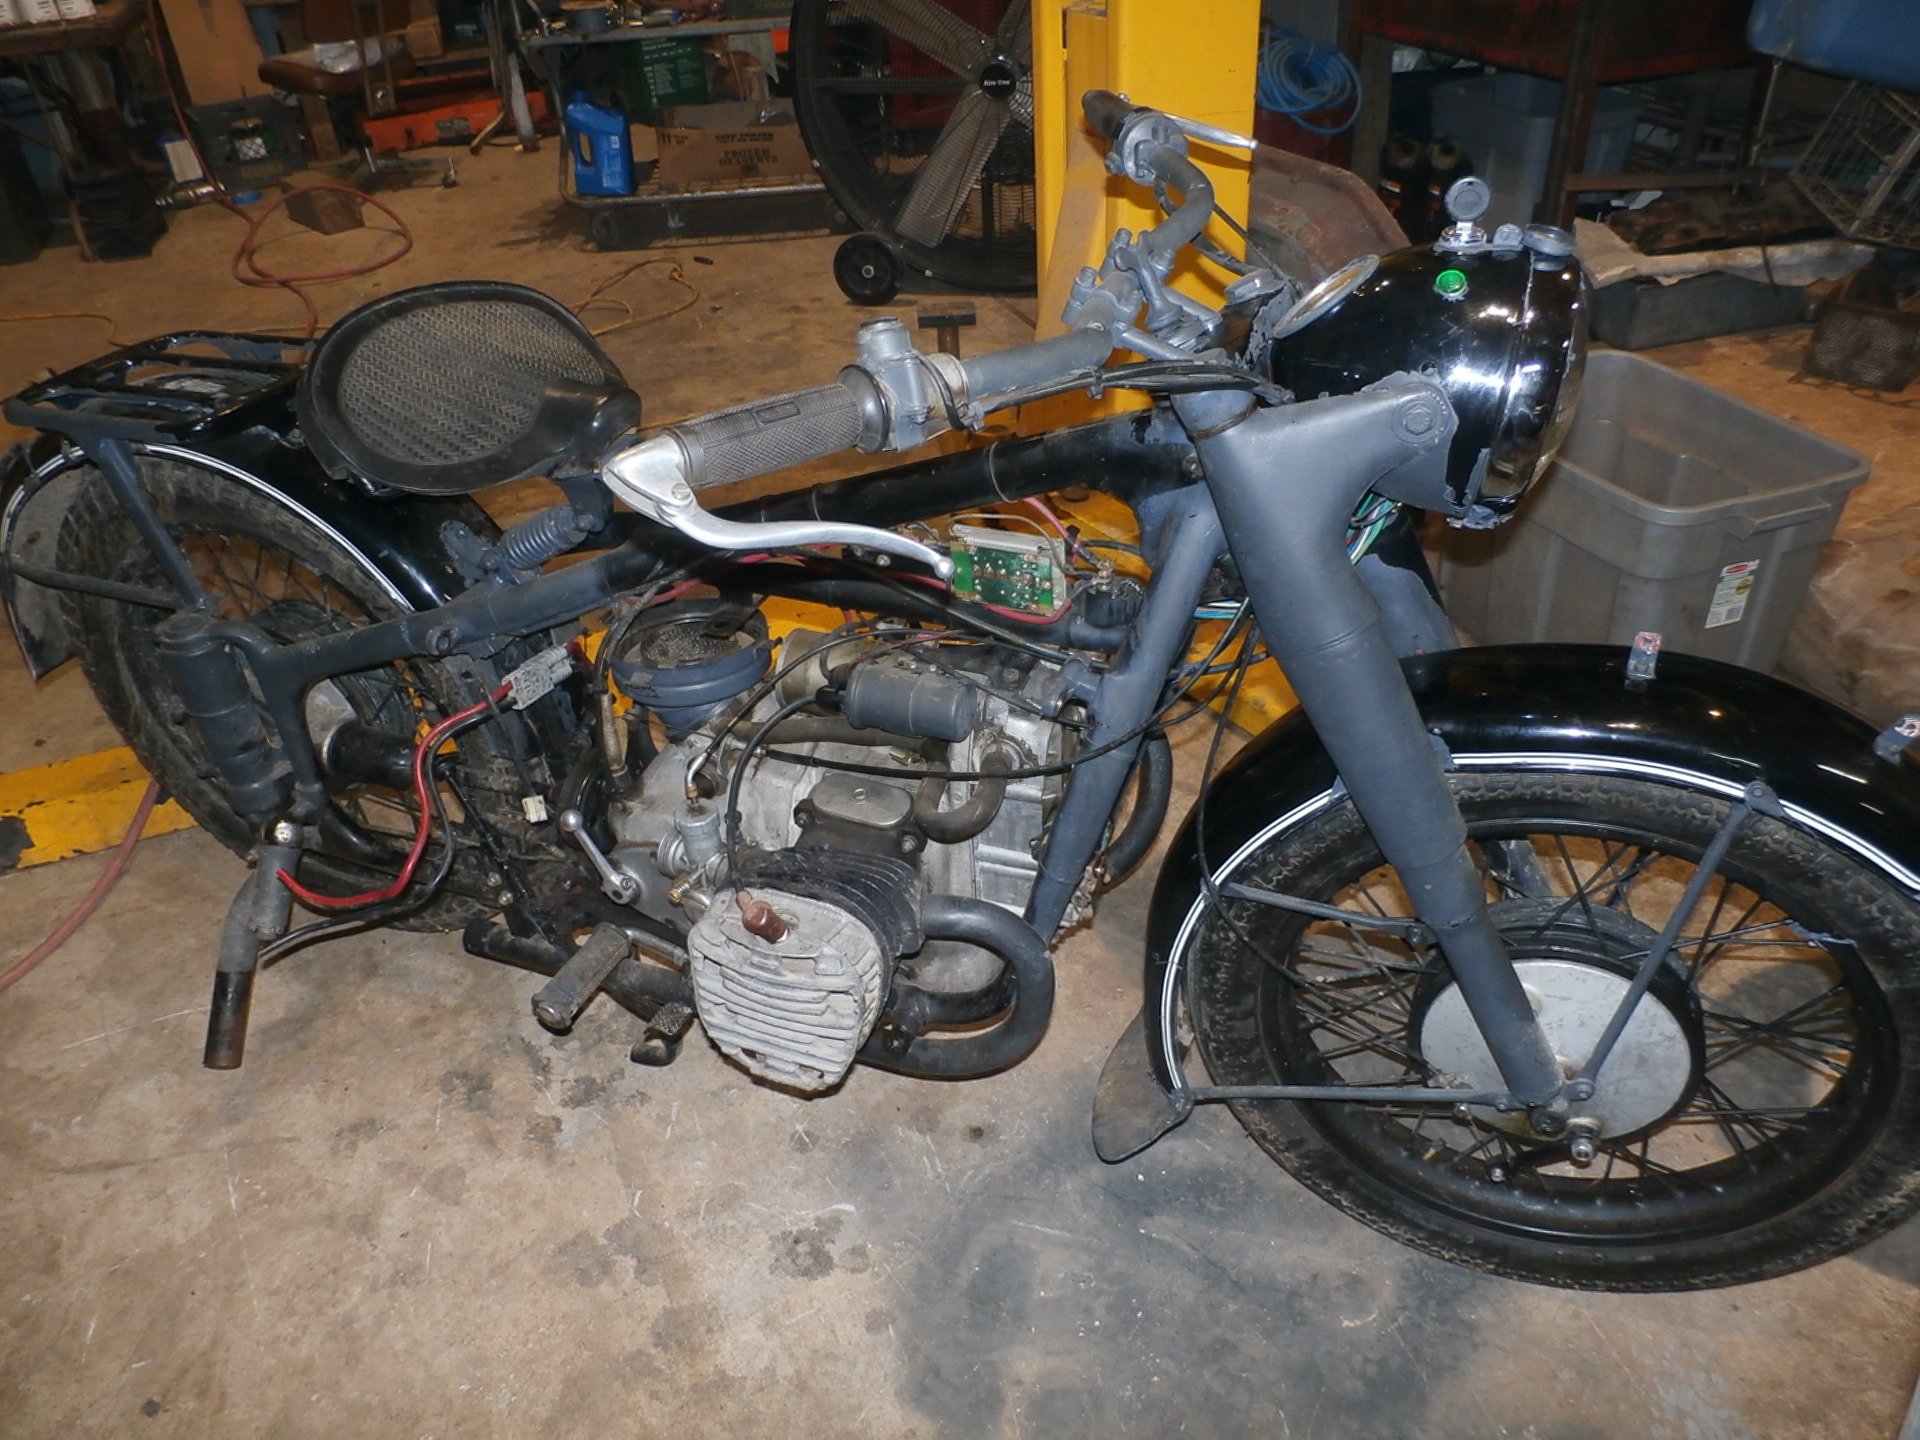
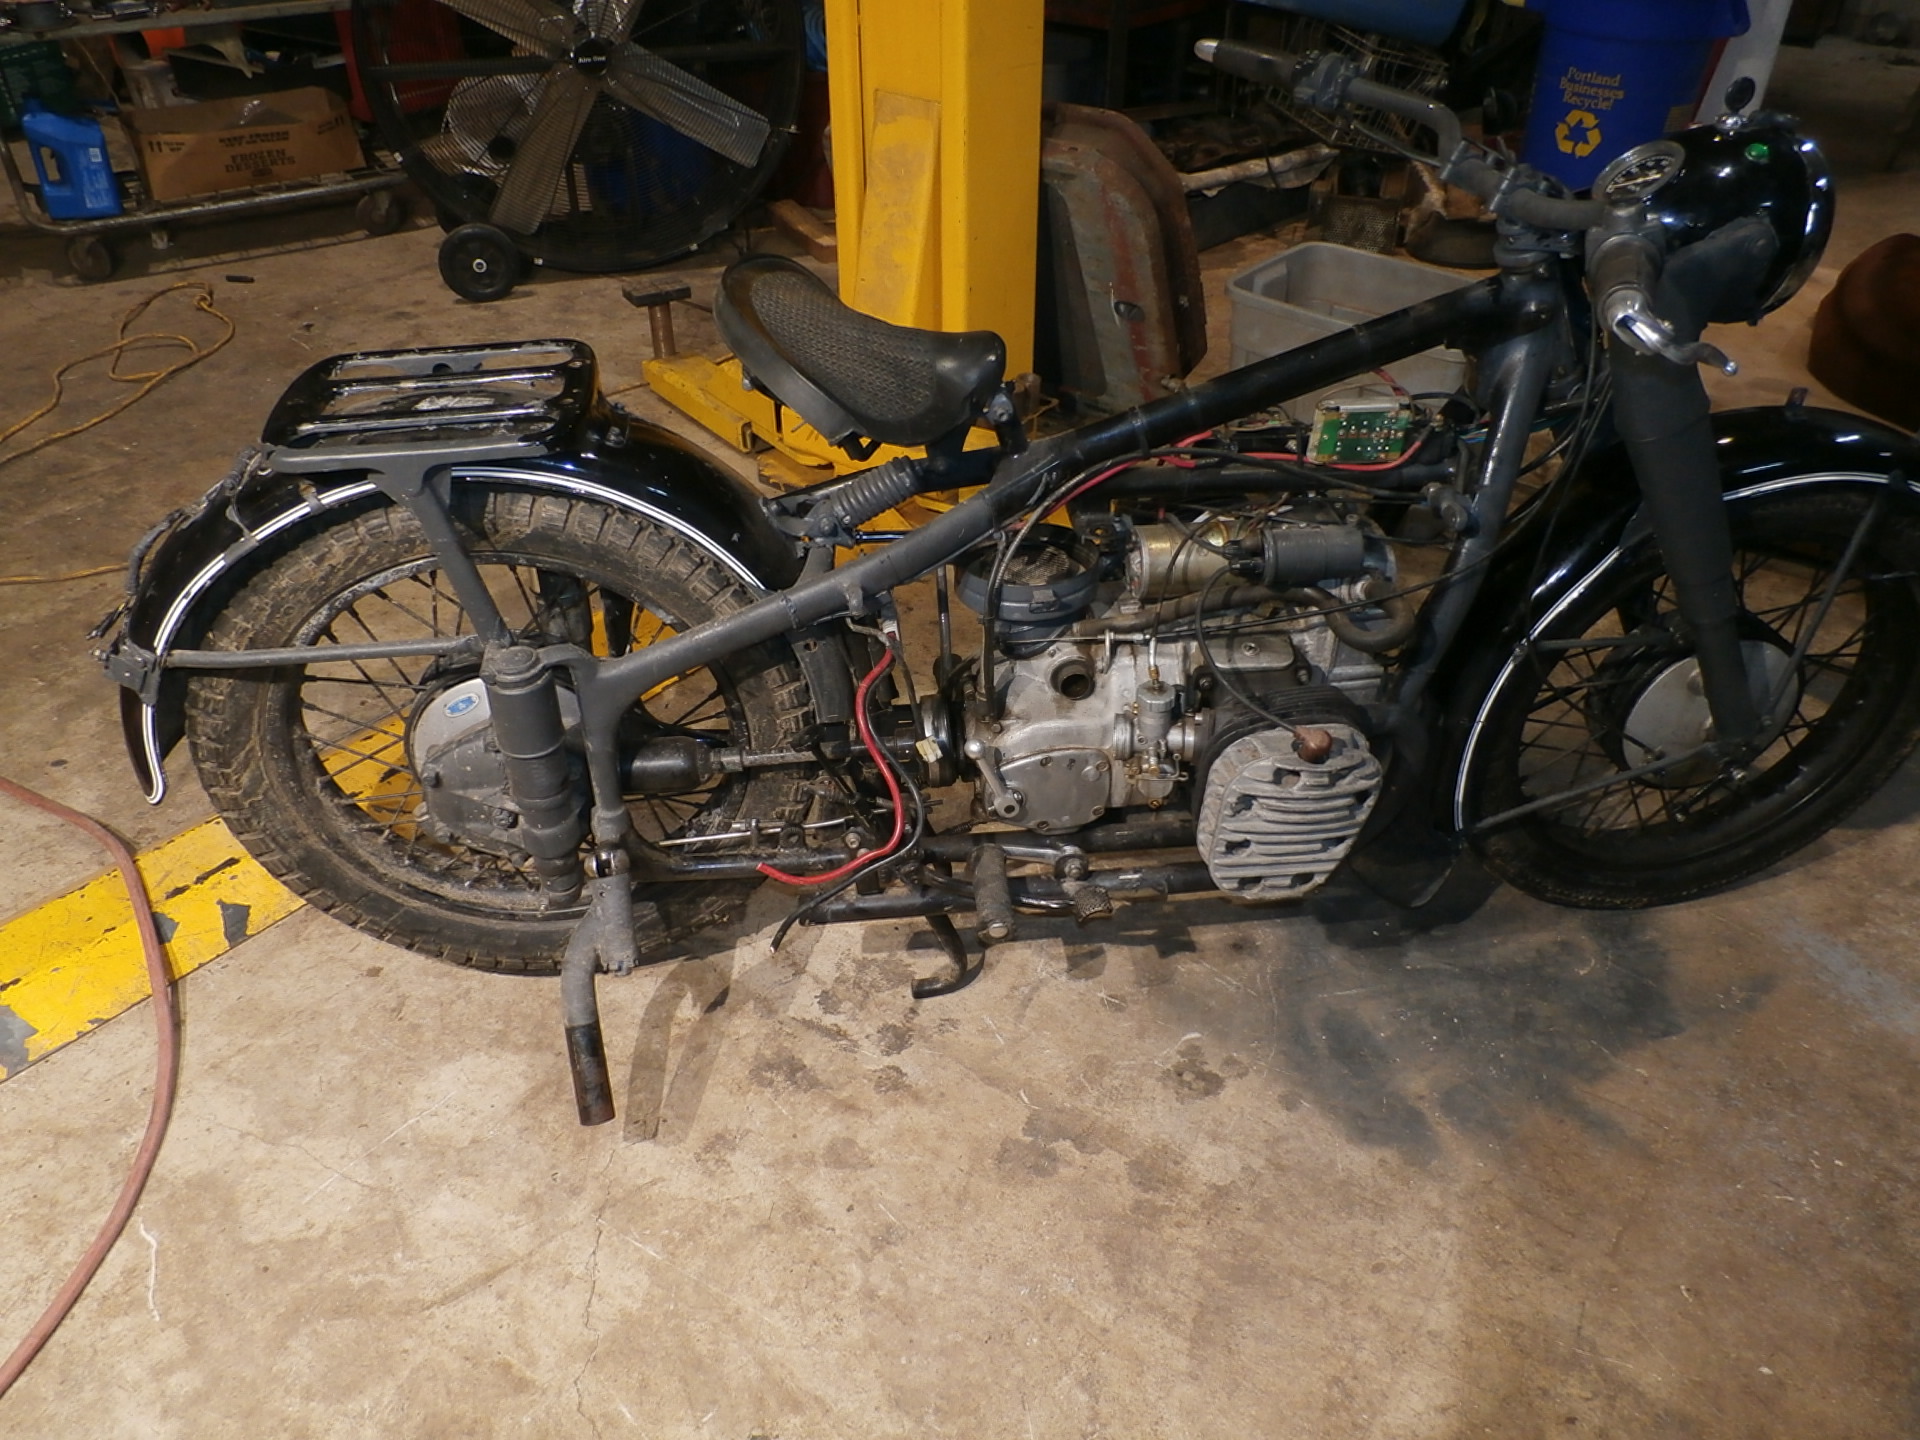
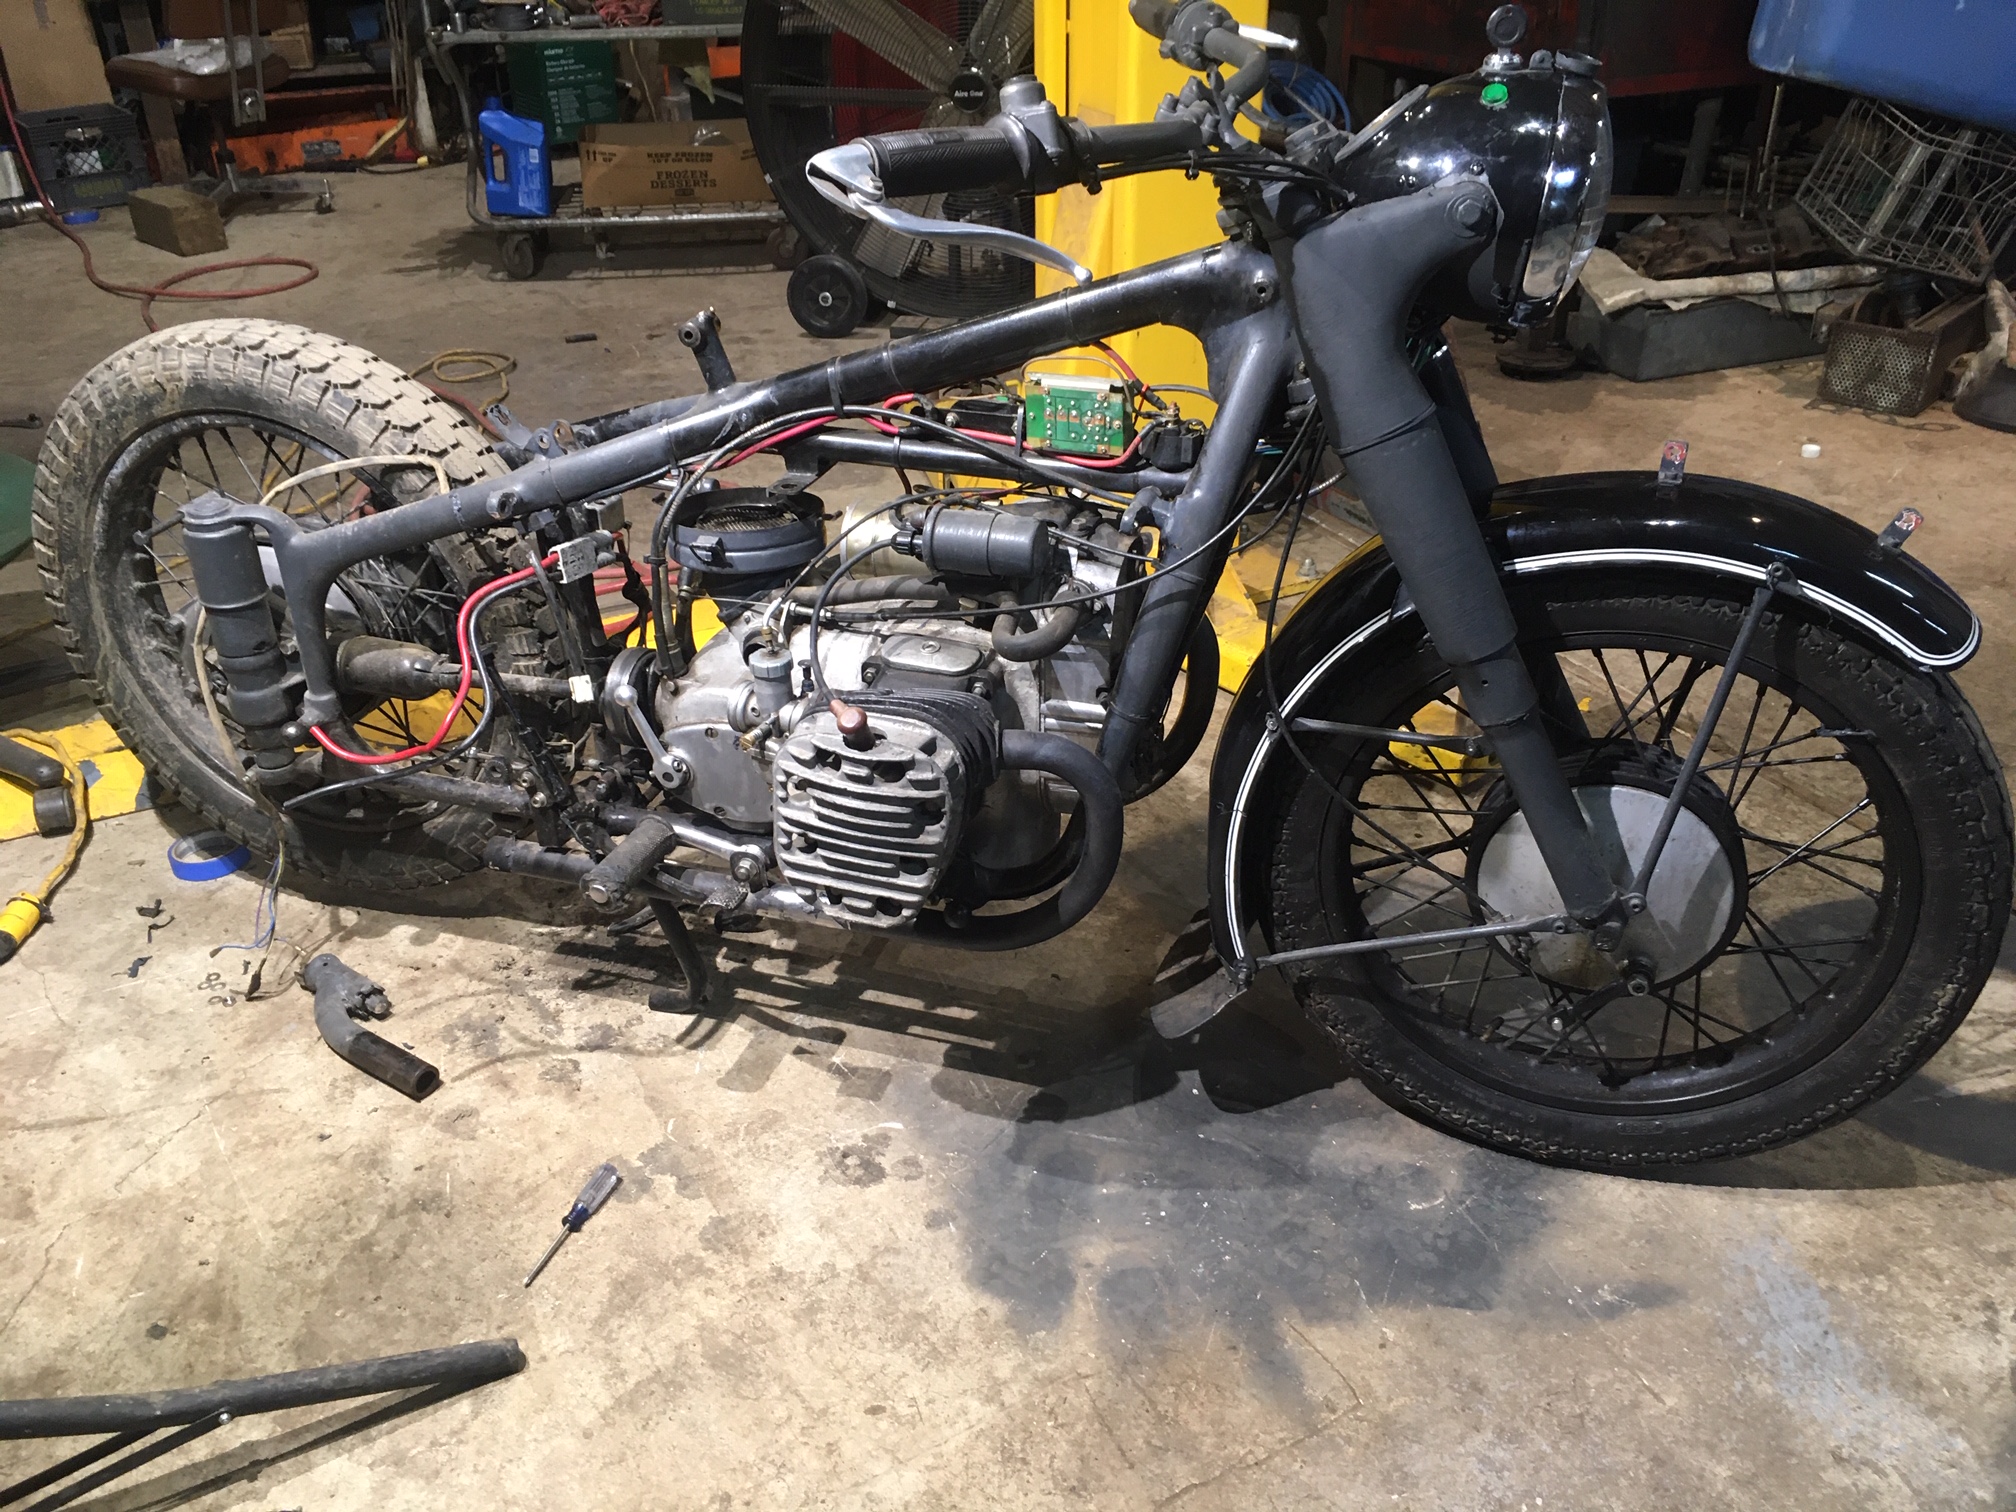
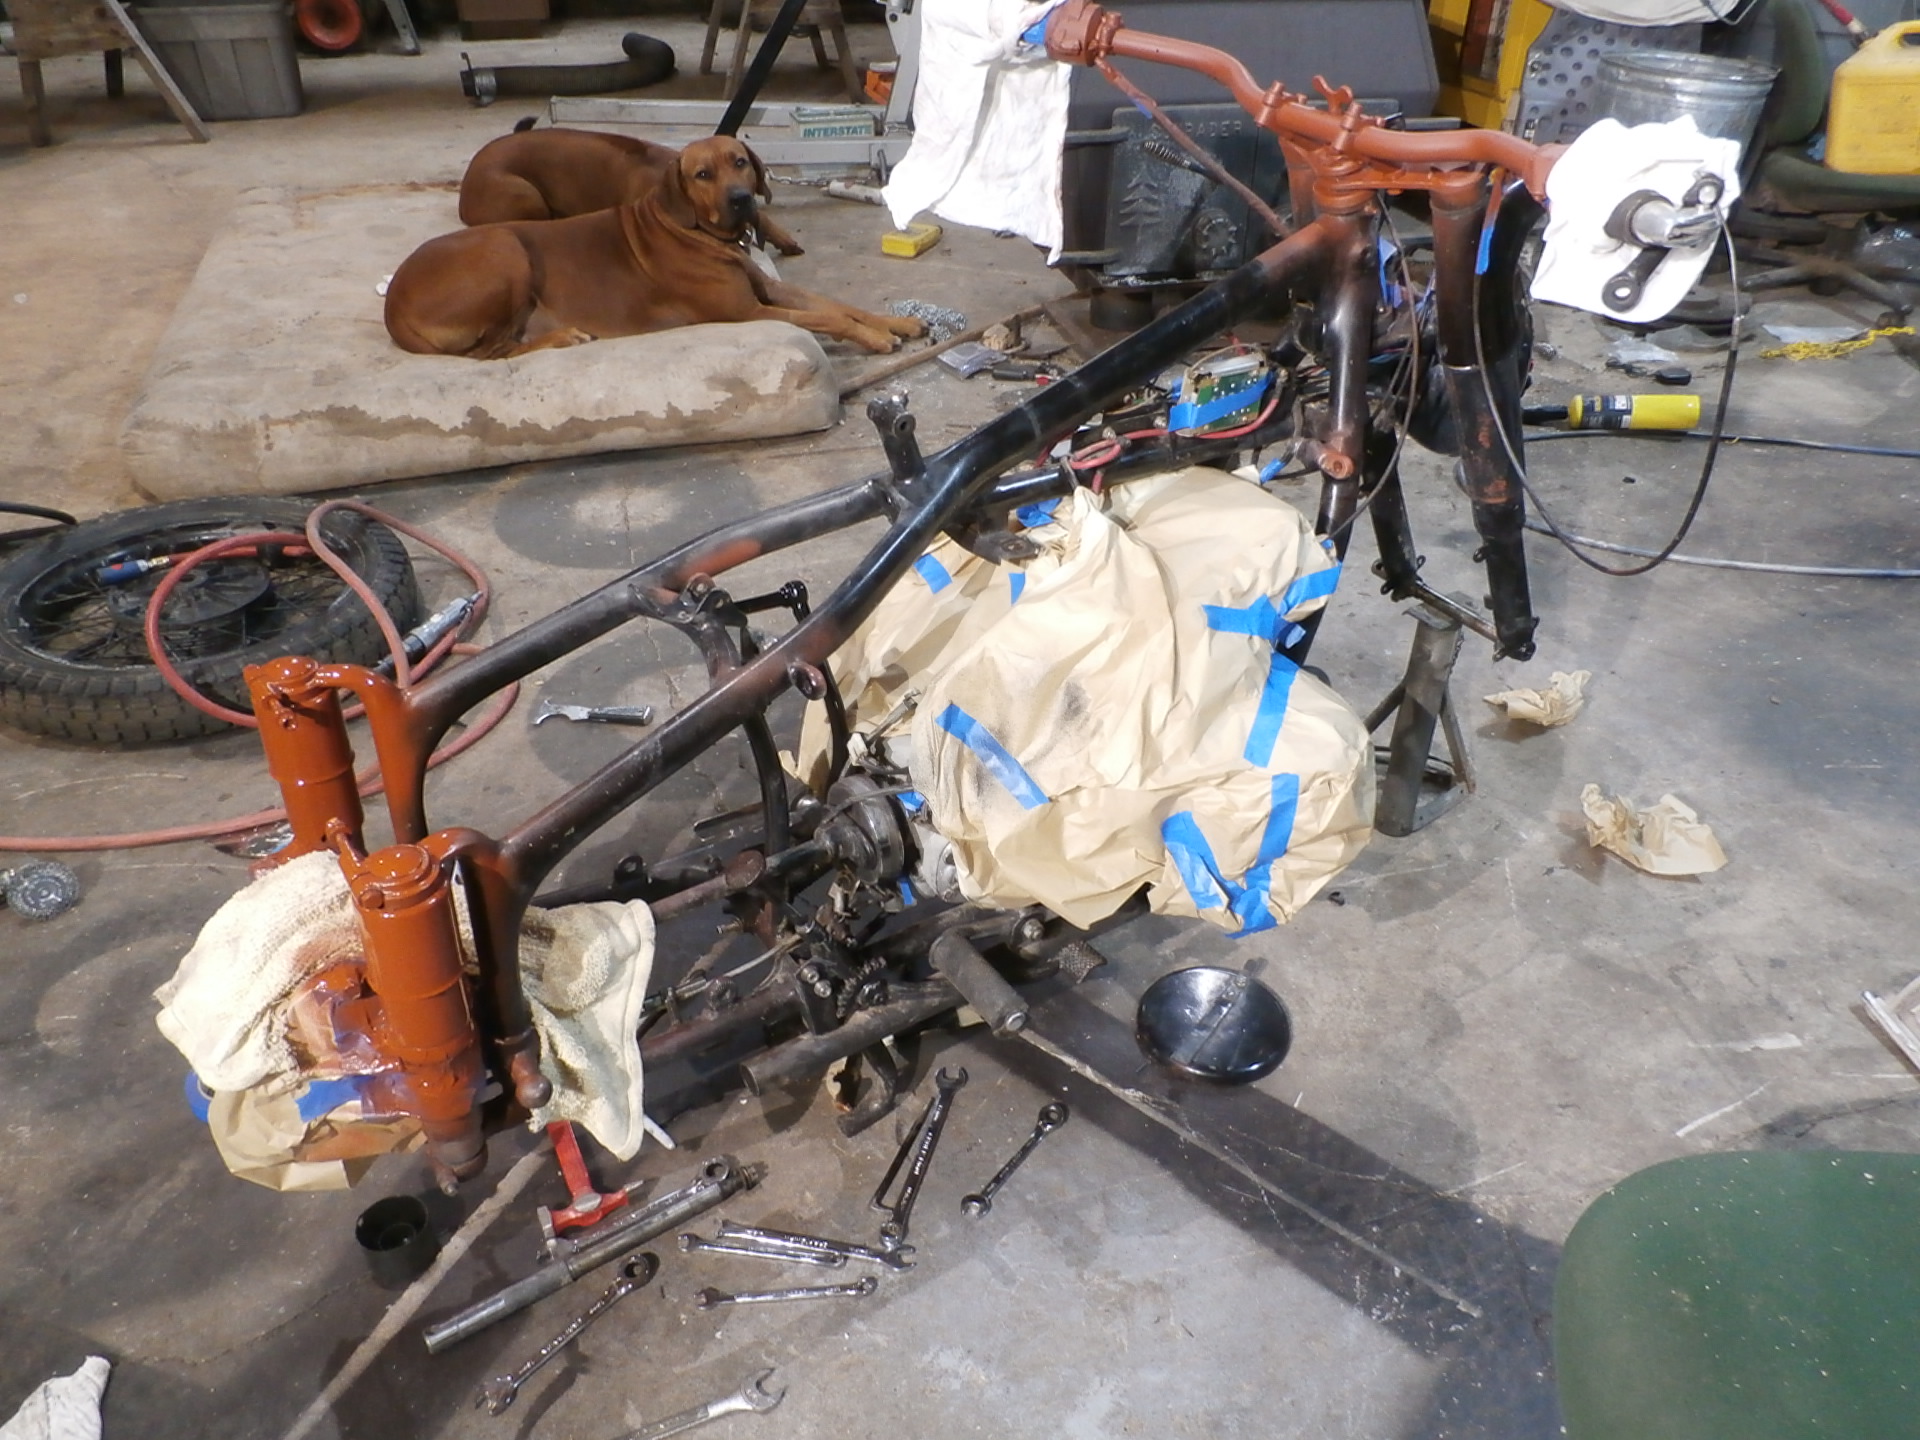
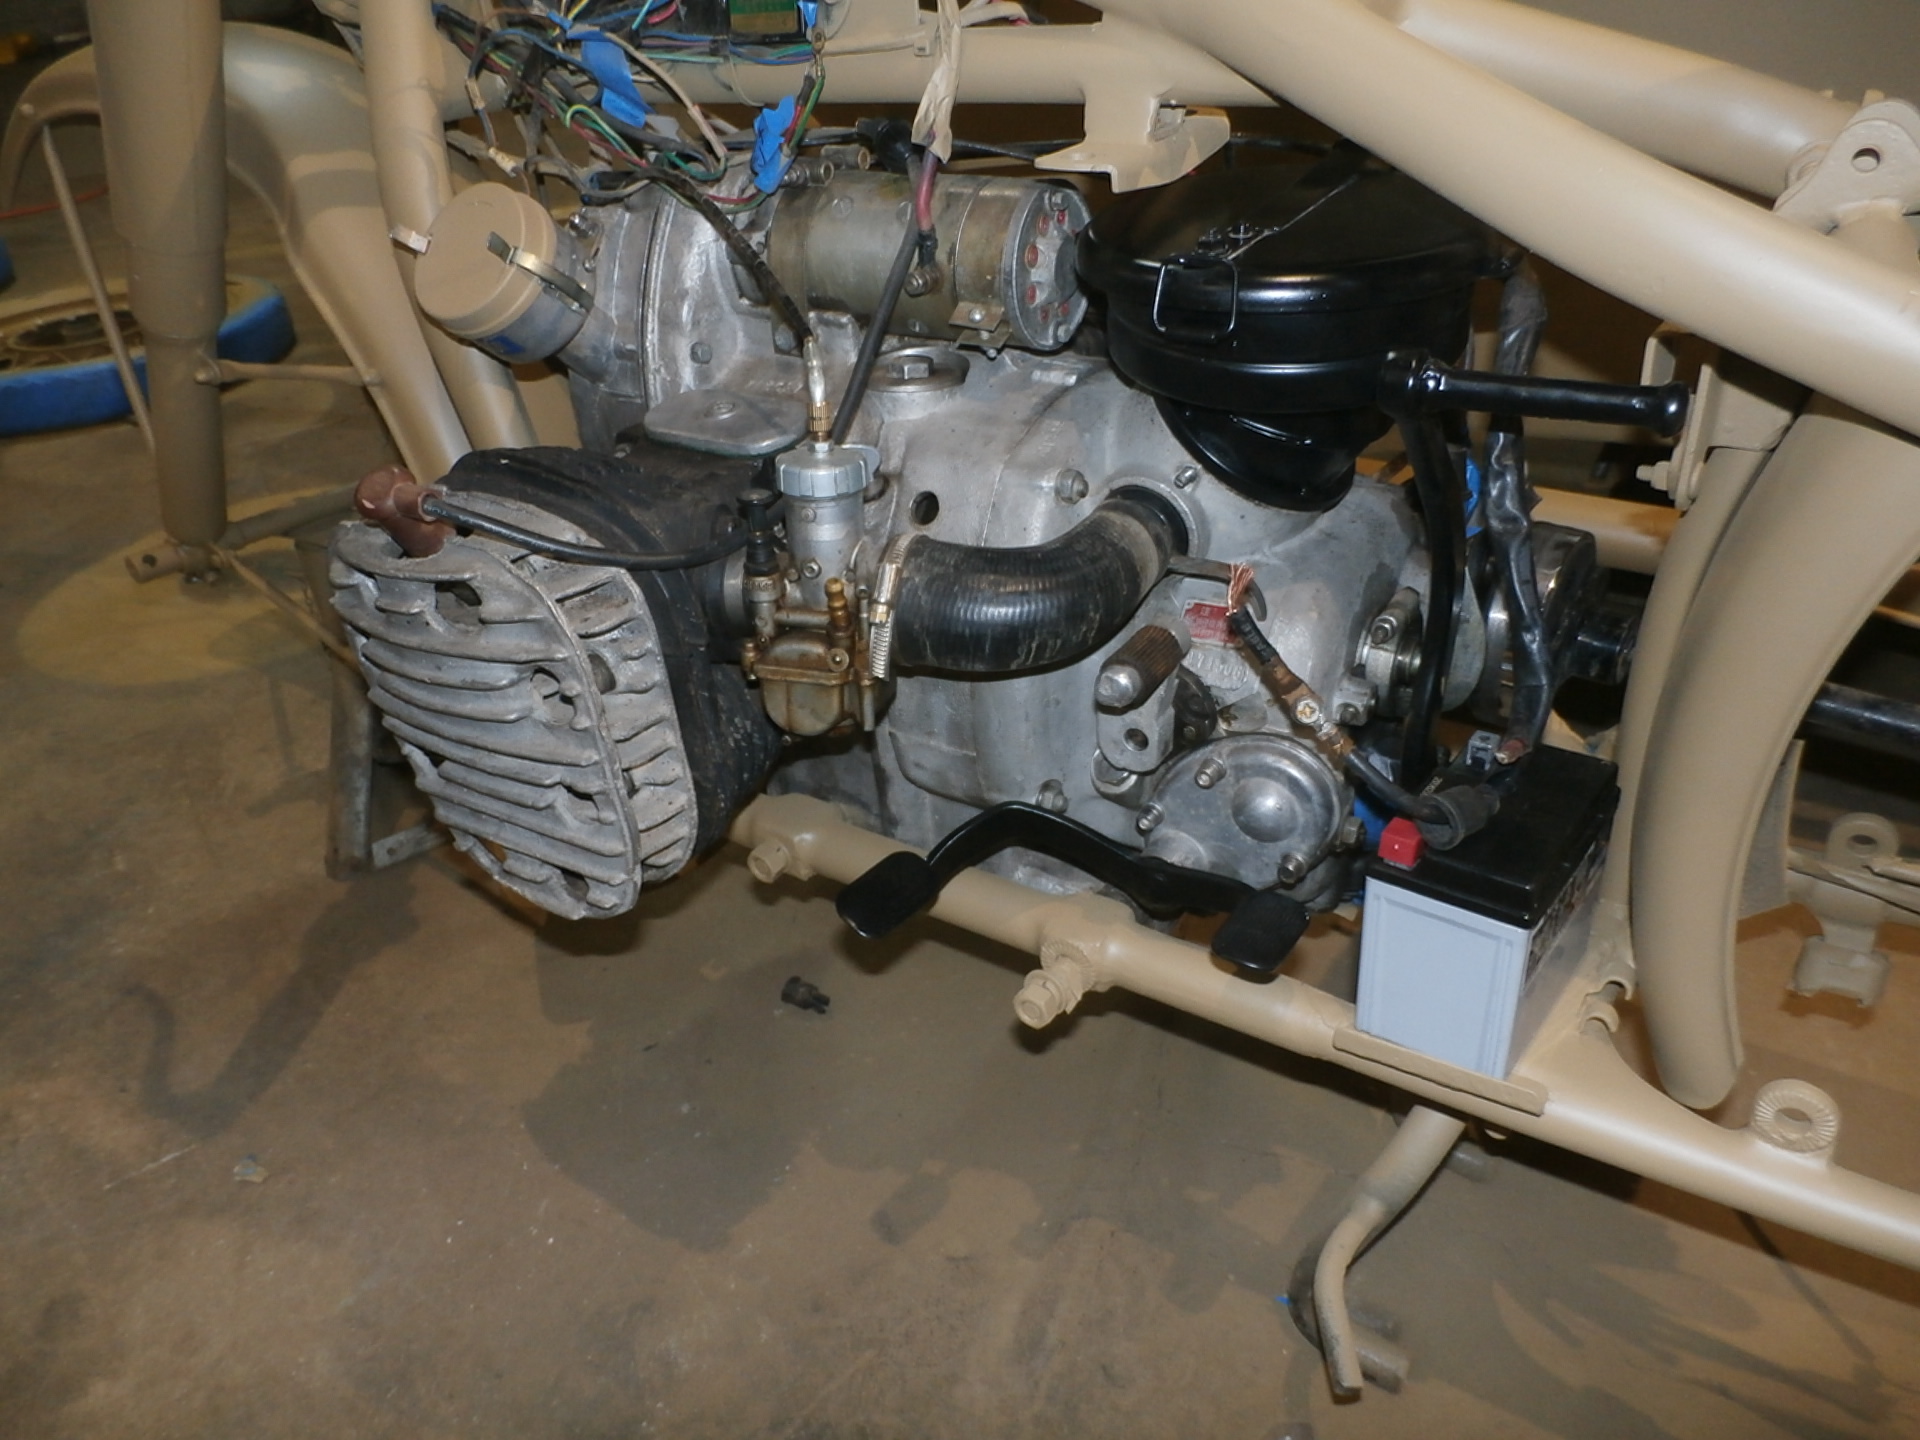
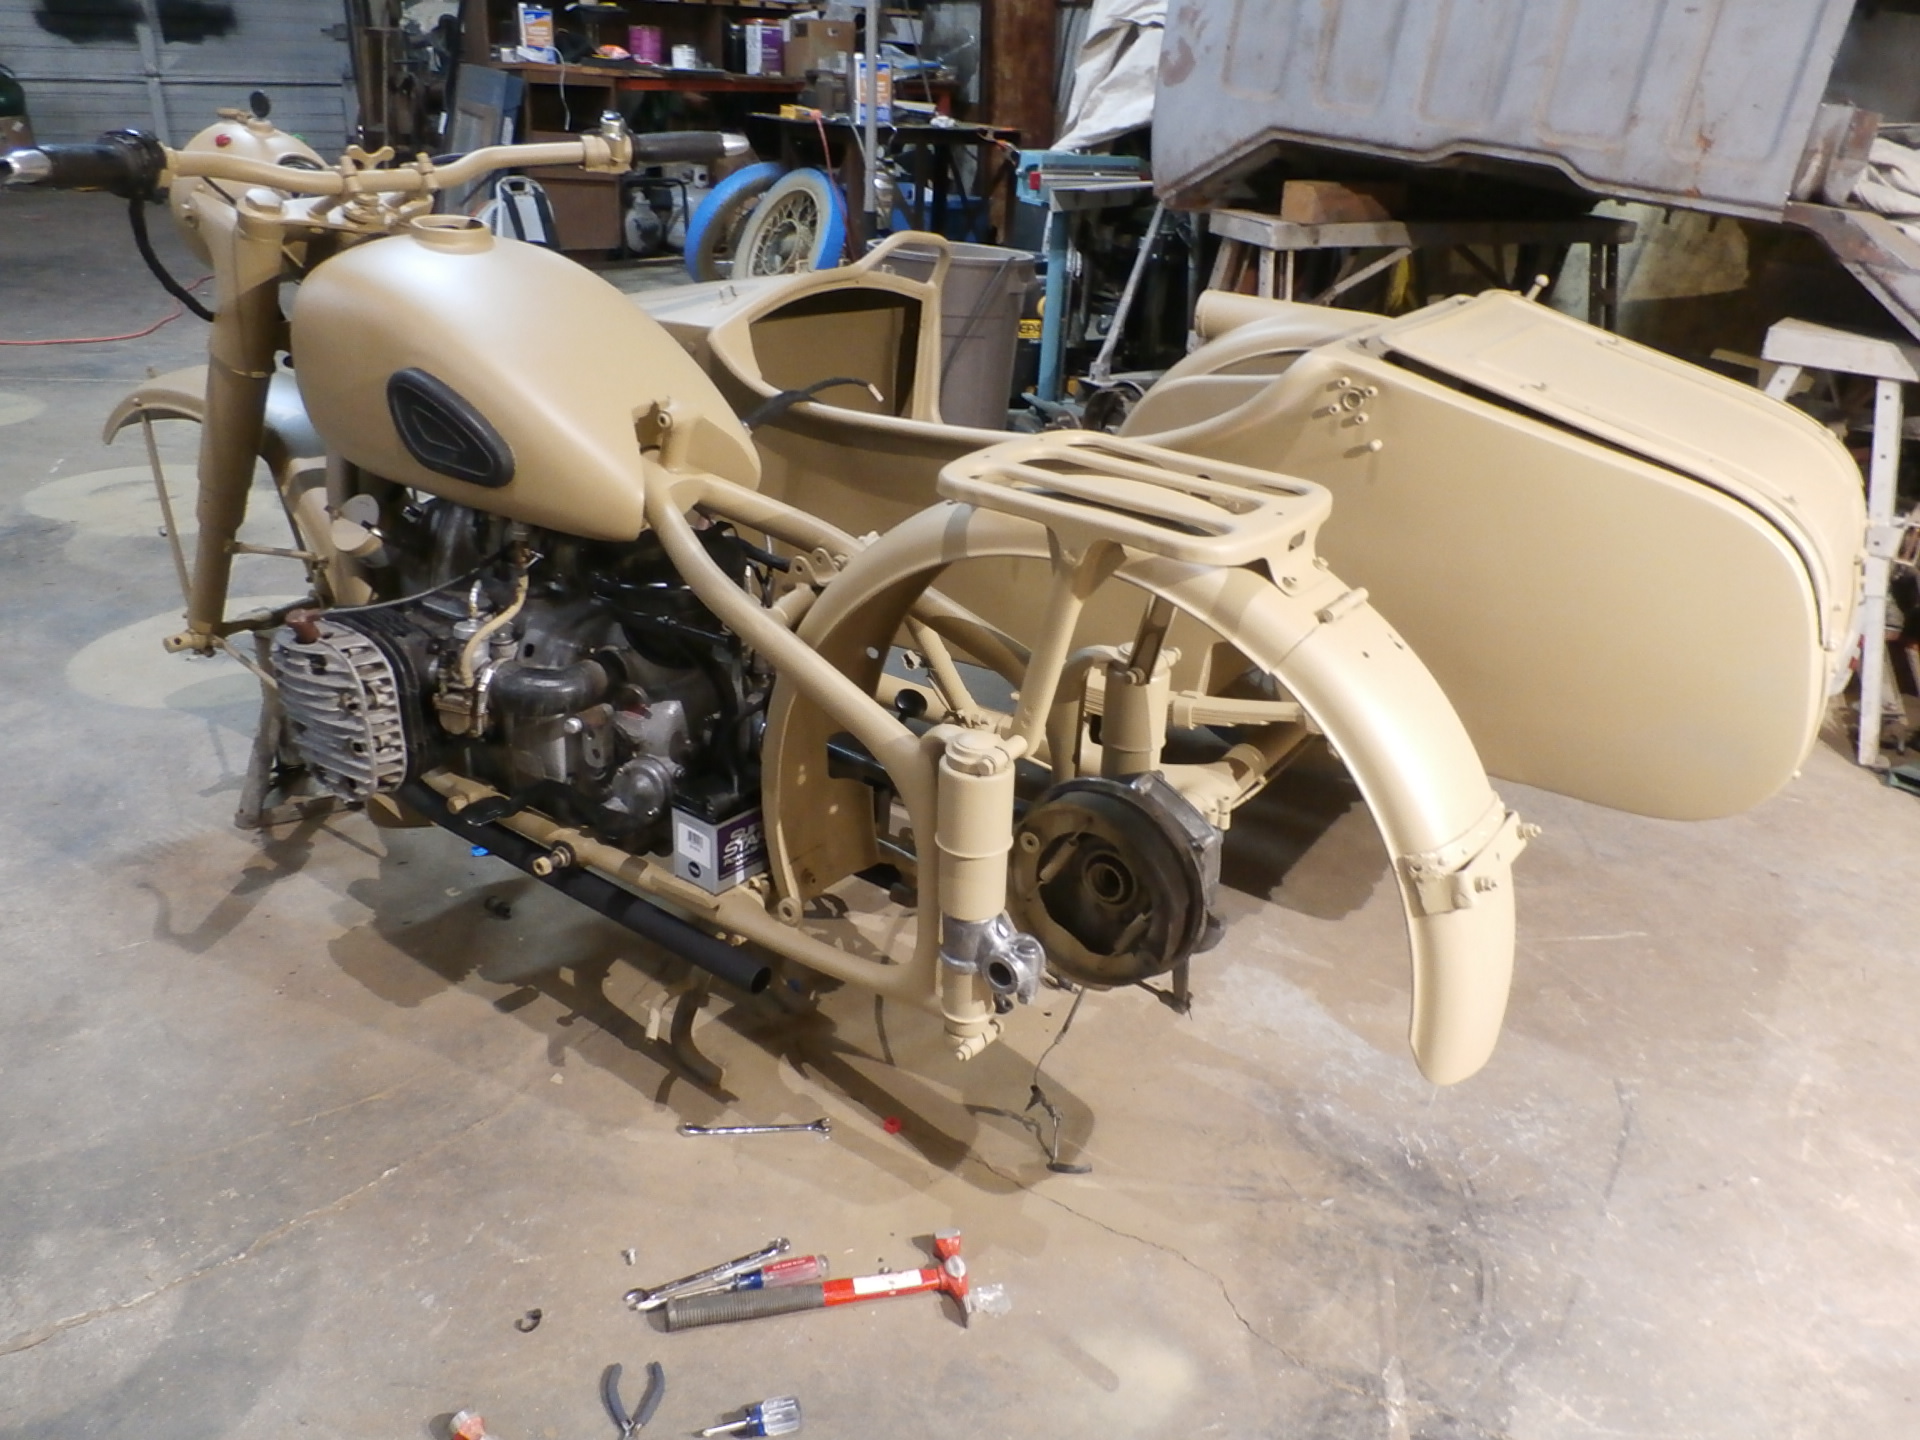
All the while, we are sorting out some wiring and getting the mechanicals all set before beginning the final prep for paint. This way, once we un-mask and re-assemble, we will not need to hazard to scratch anything trying to make adjustments to the drivetrain.
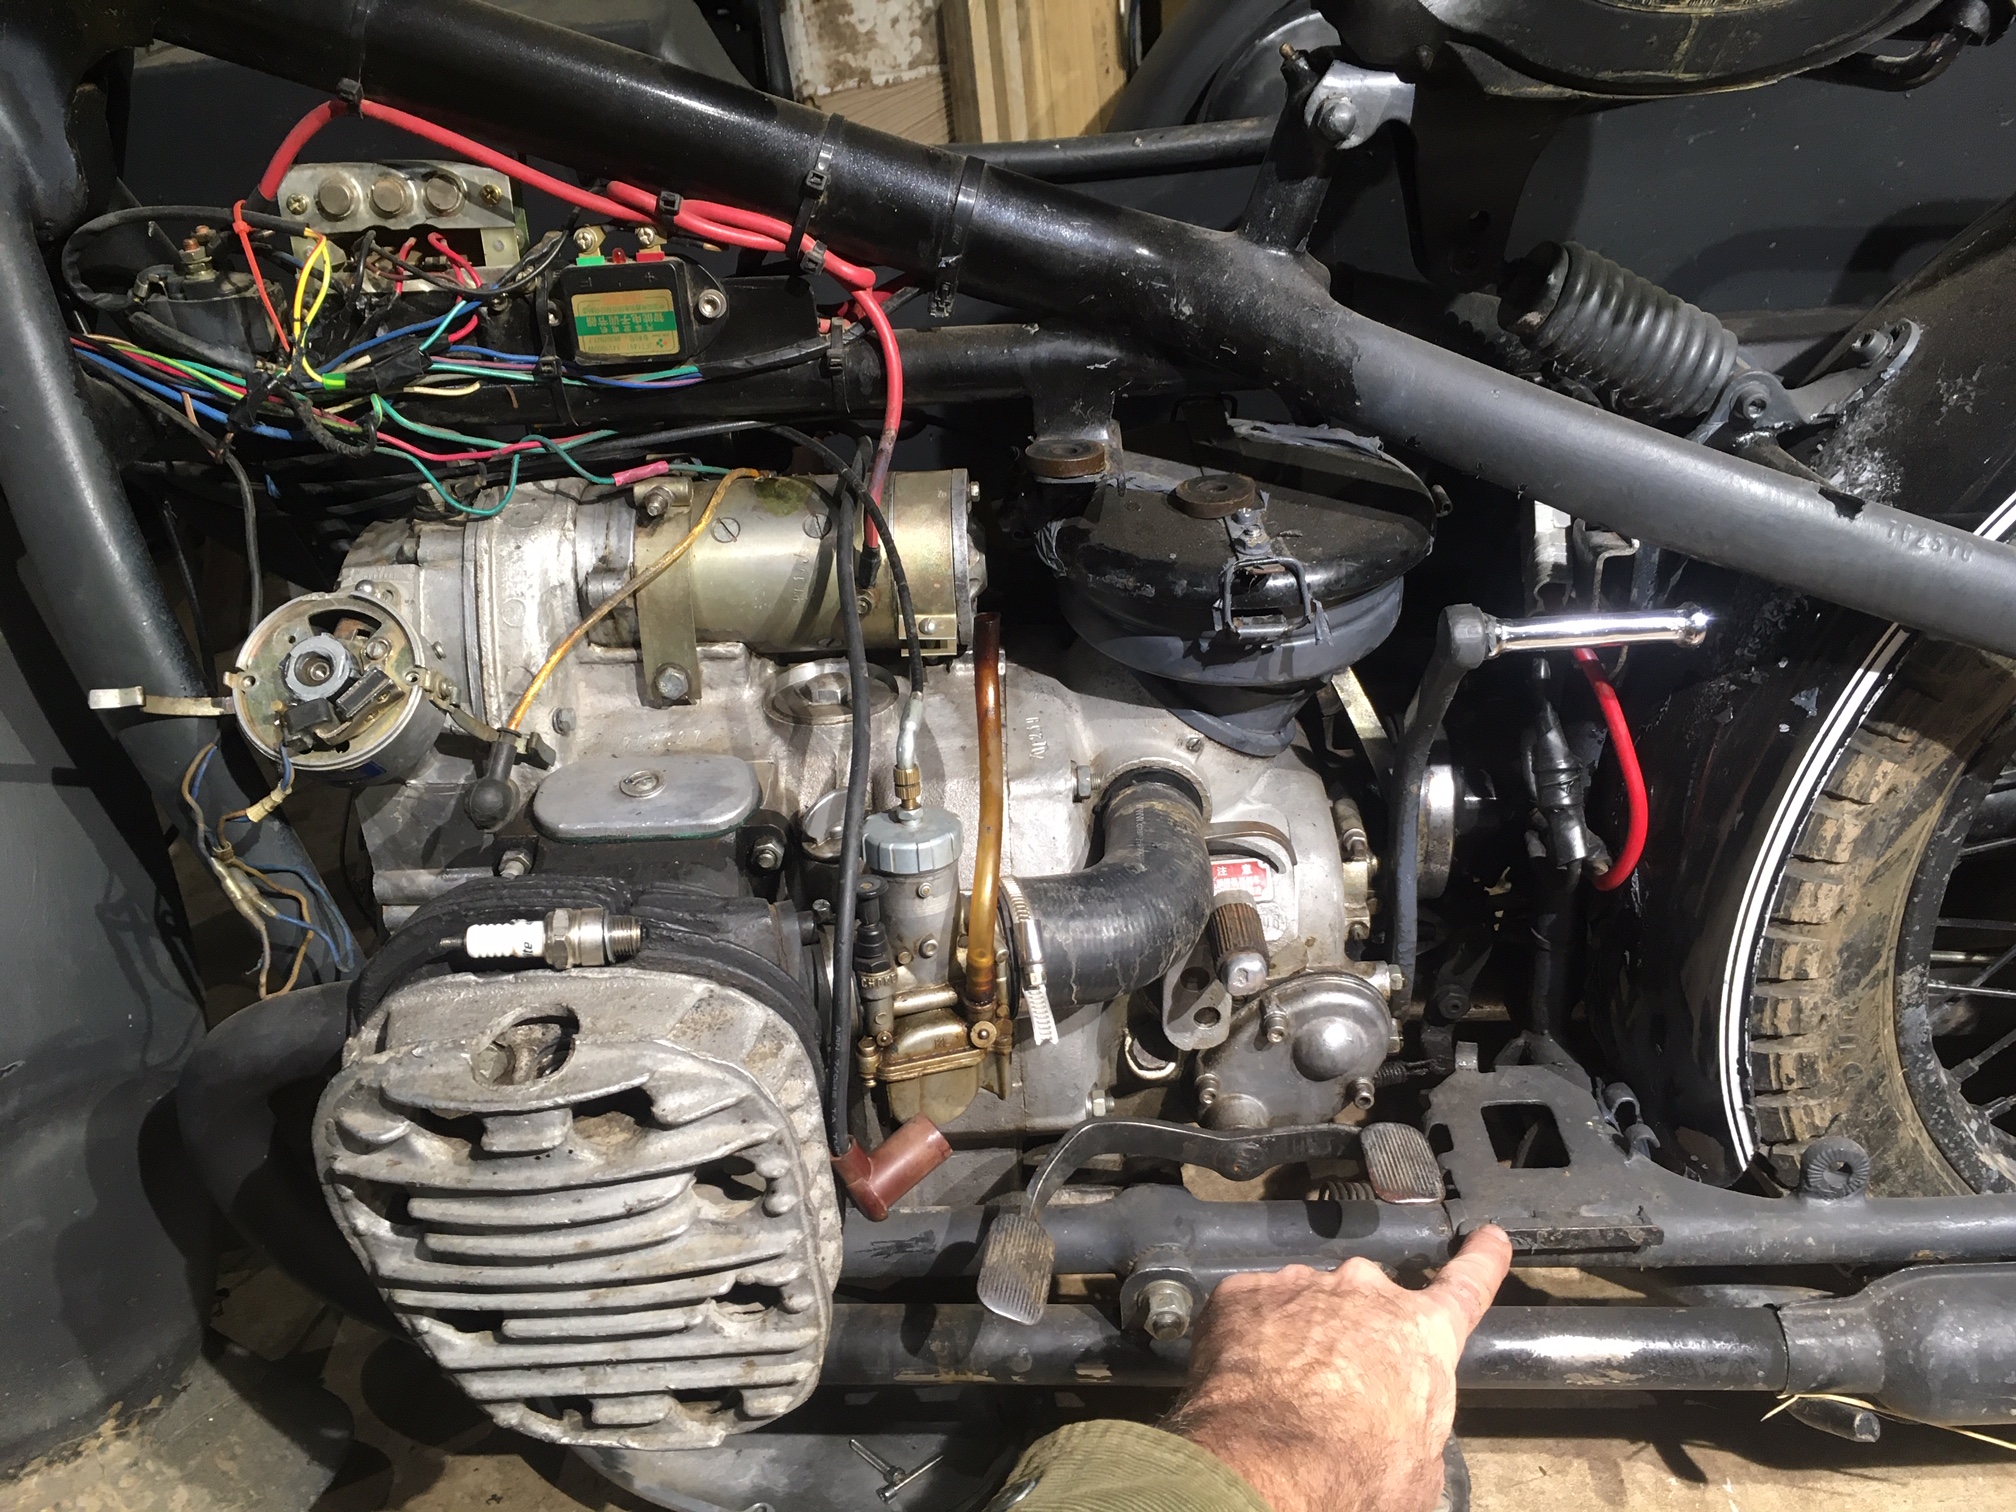
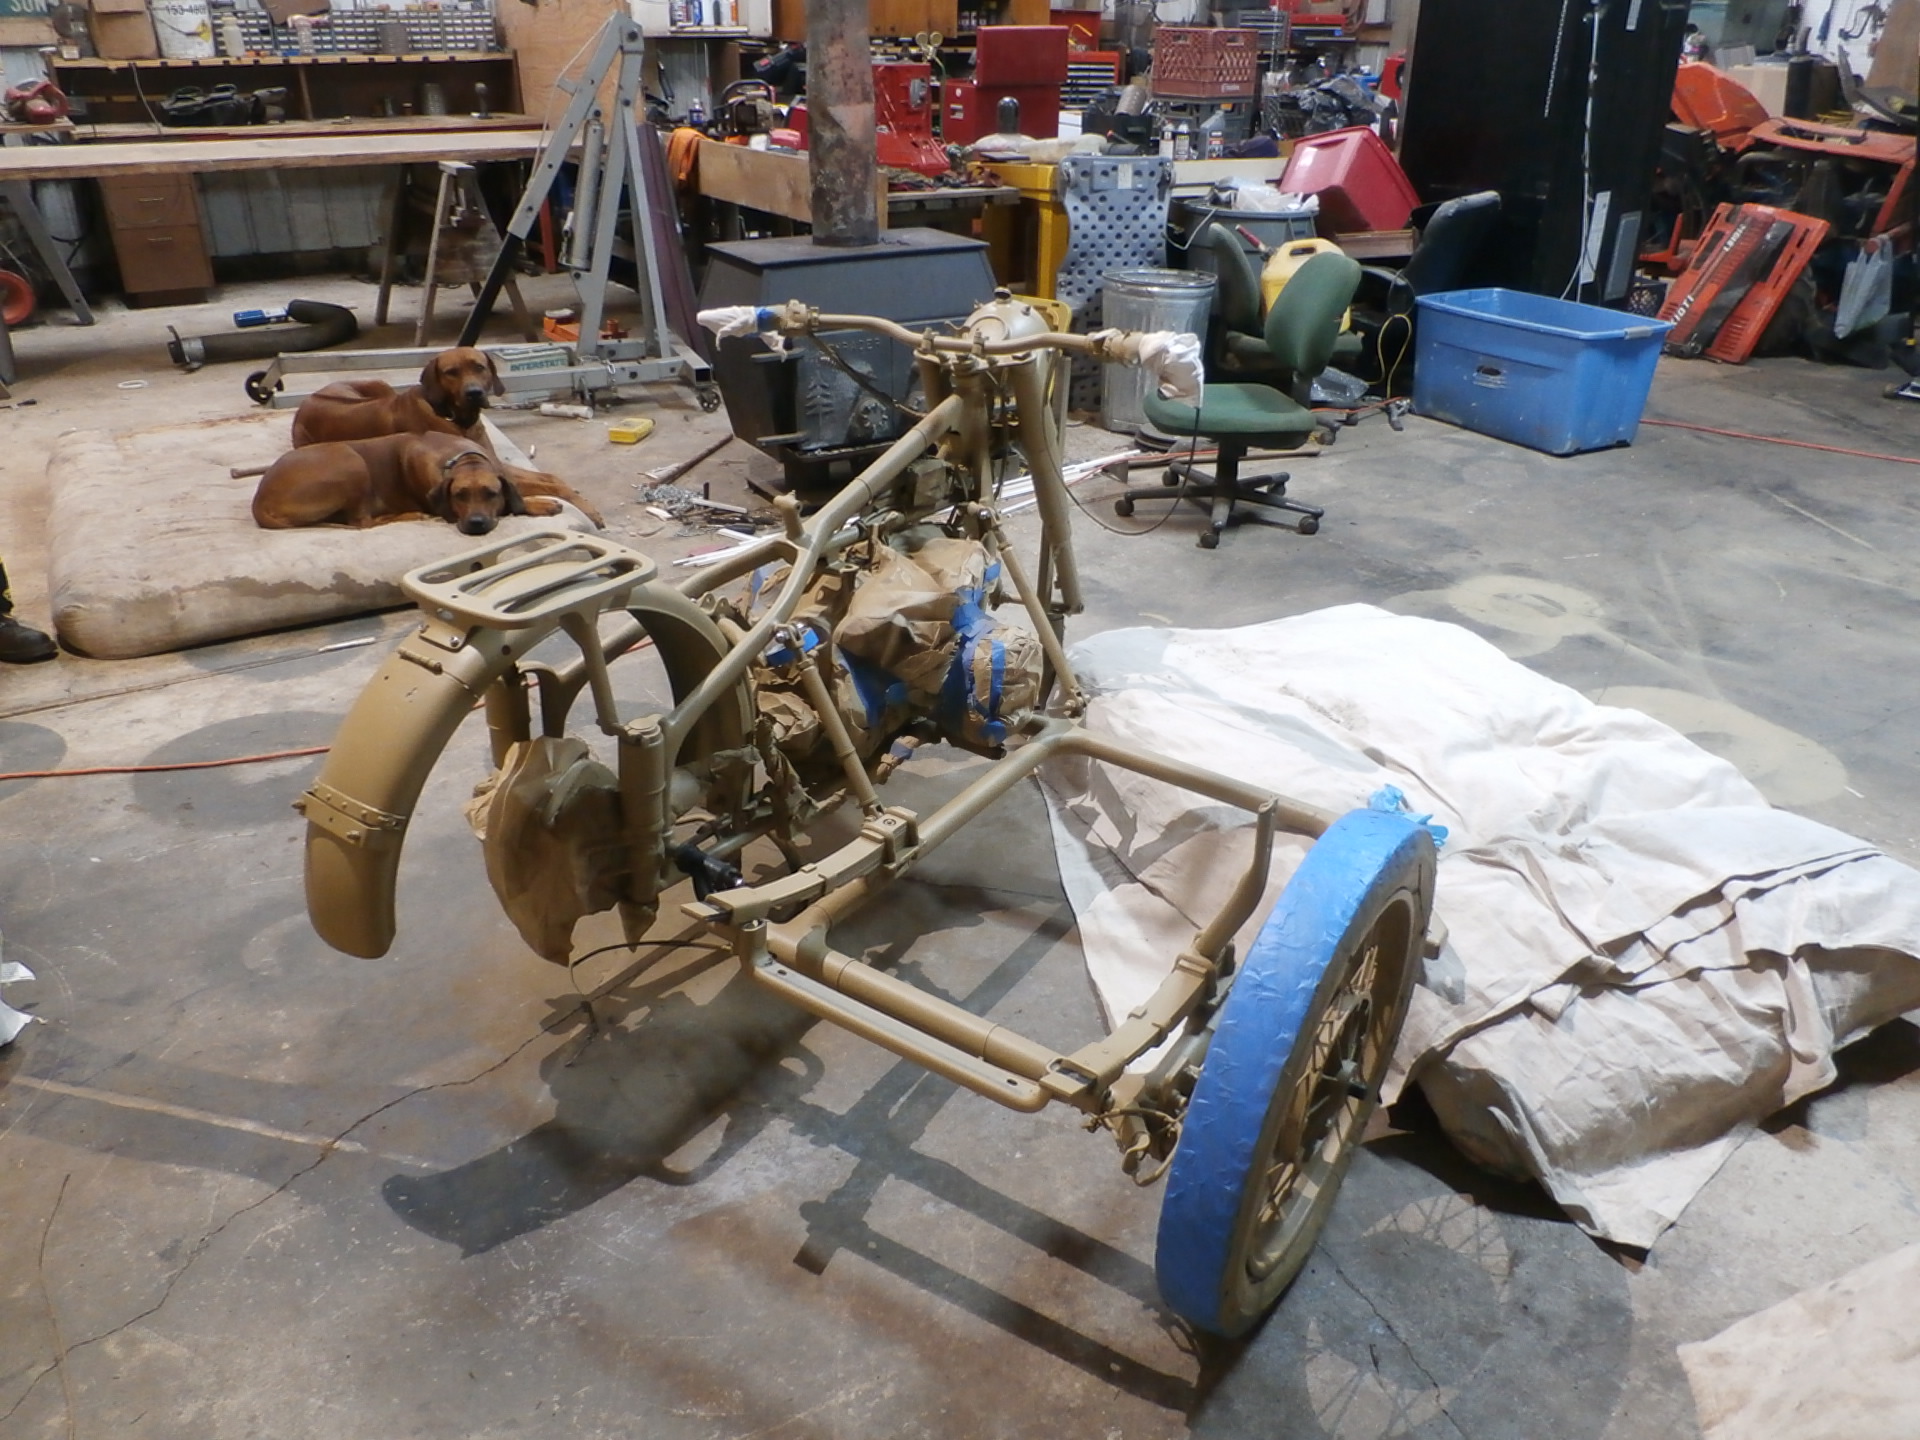
The previous owner had made a modification to the machine to carry a standard sized motorcycle battery; A common sight on US imported bikes that were brought in during the 80’s and 90’s. It is a modern made ammunition can, and is seen mounted between the right side of the bike, and the inside wall of the side-car. It will be removed and the proper sized battery will be sourced and placed in the correct location, which I am pointing to – We have already fabricated the new replacement straps.

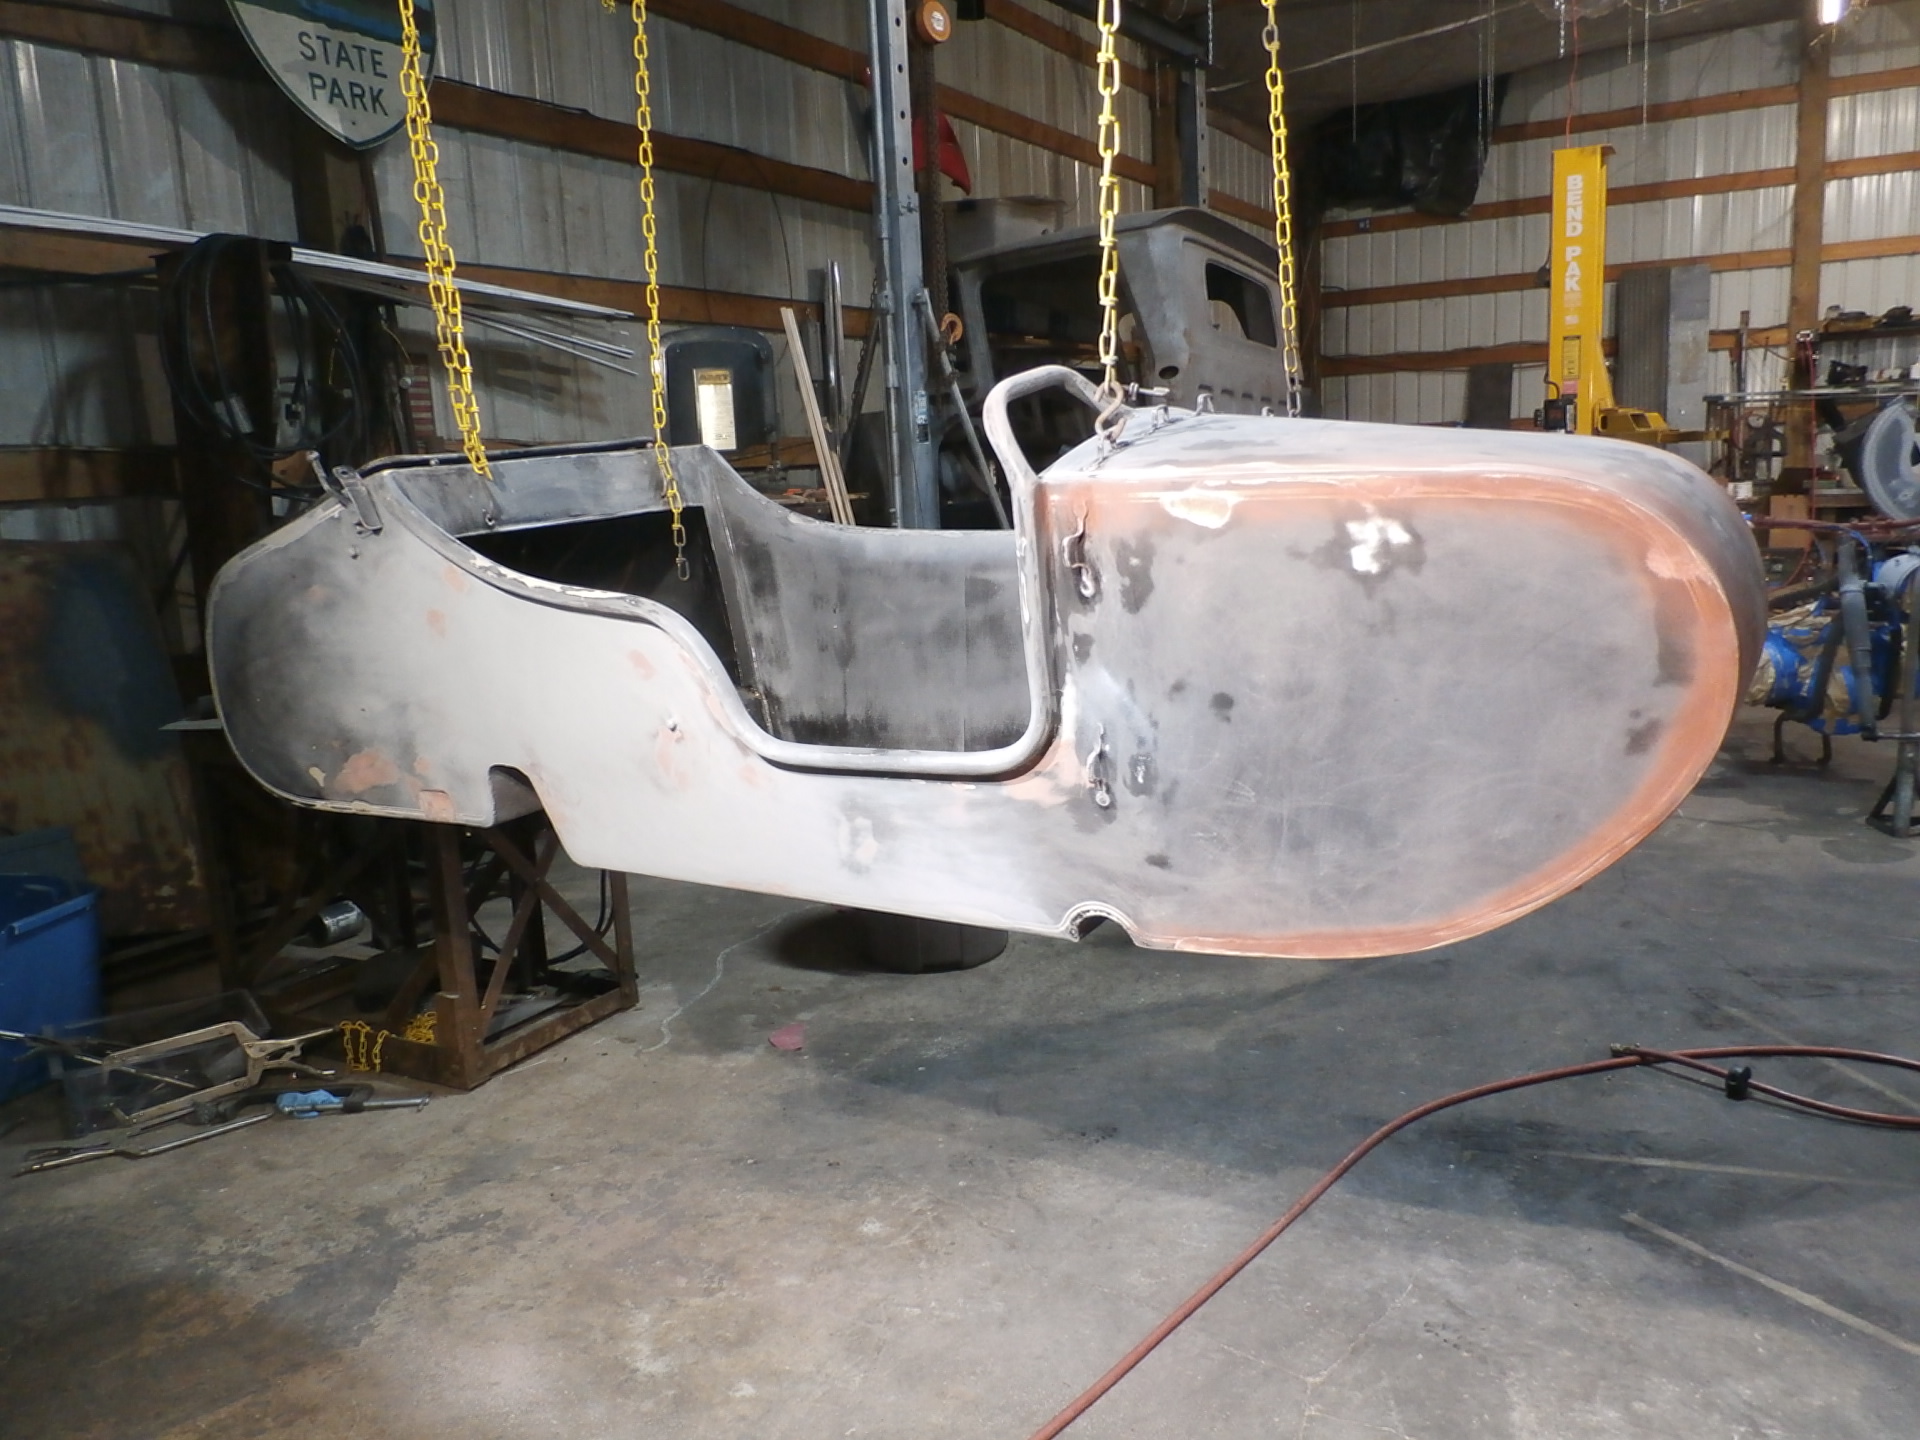
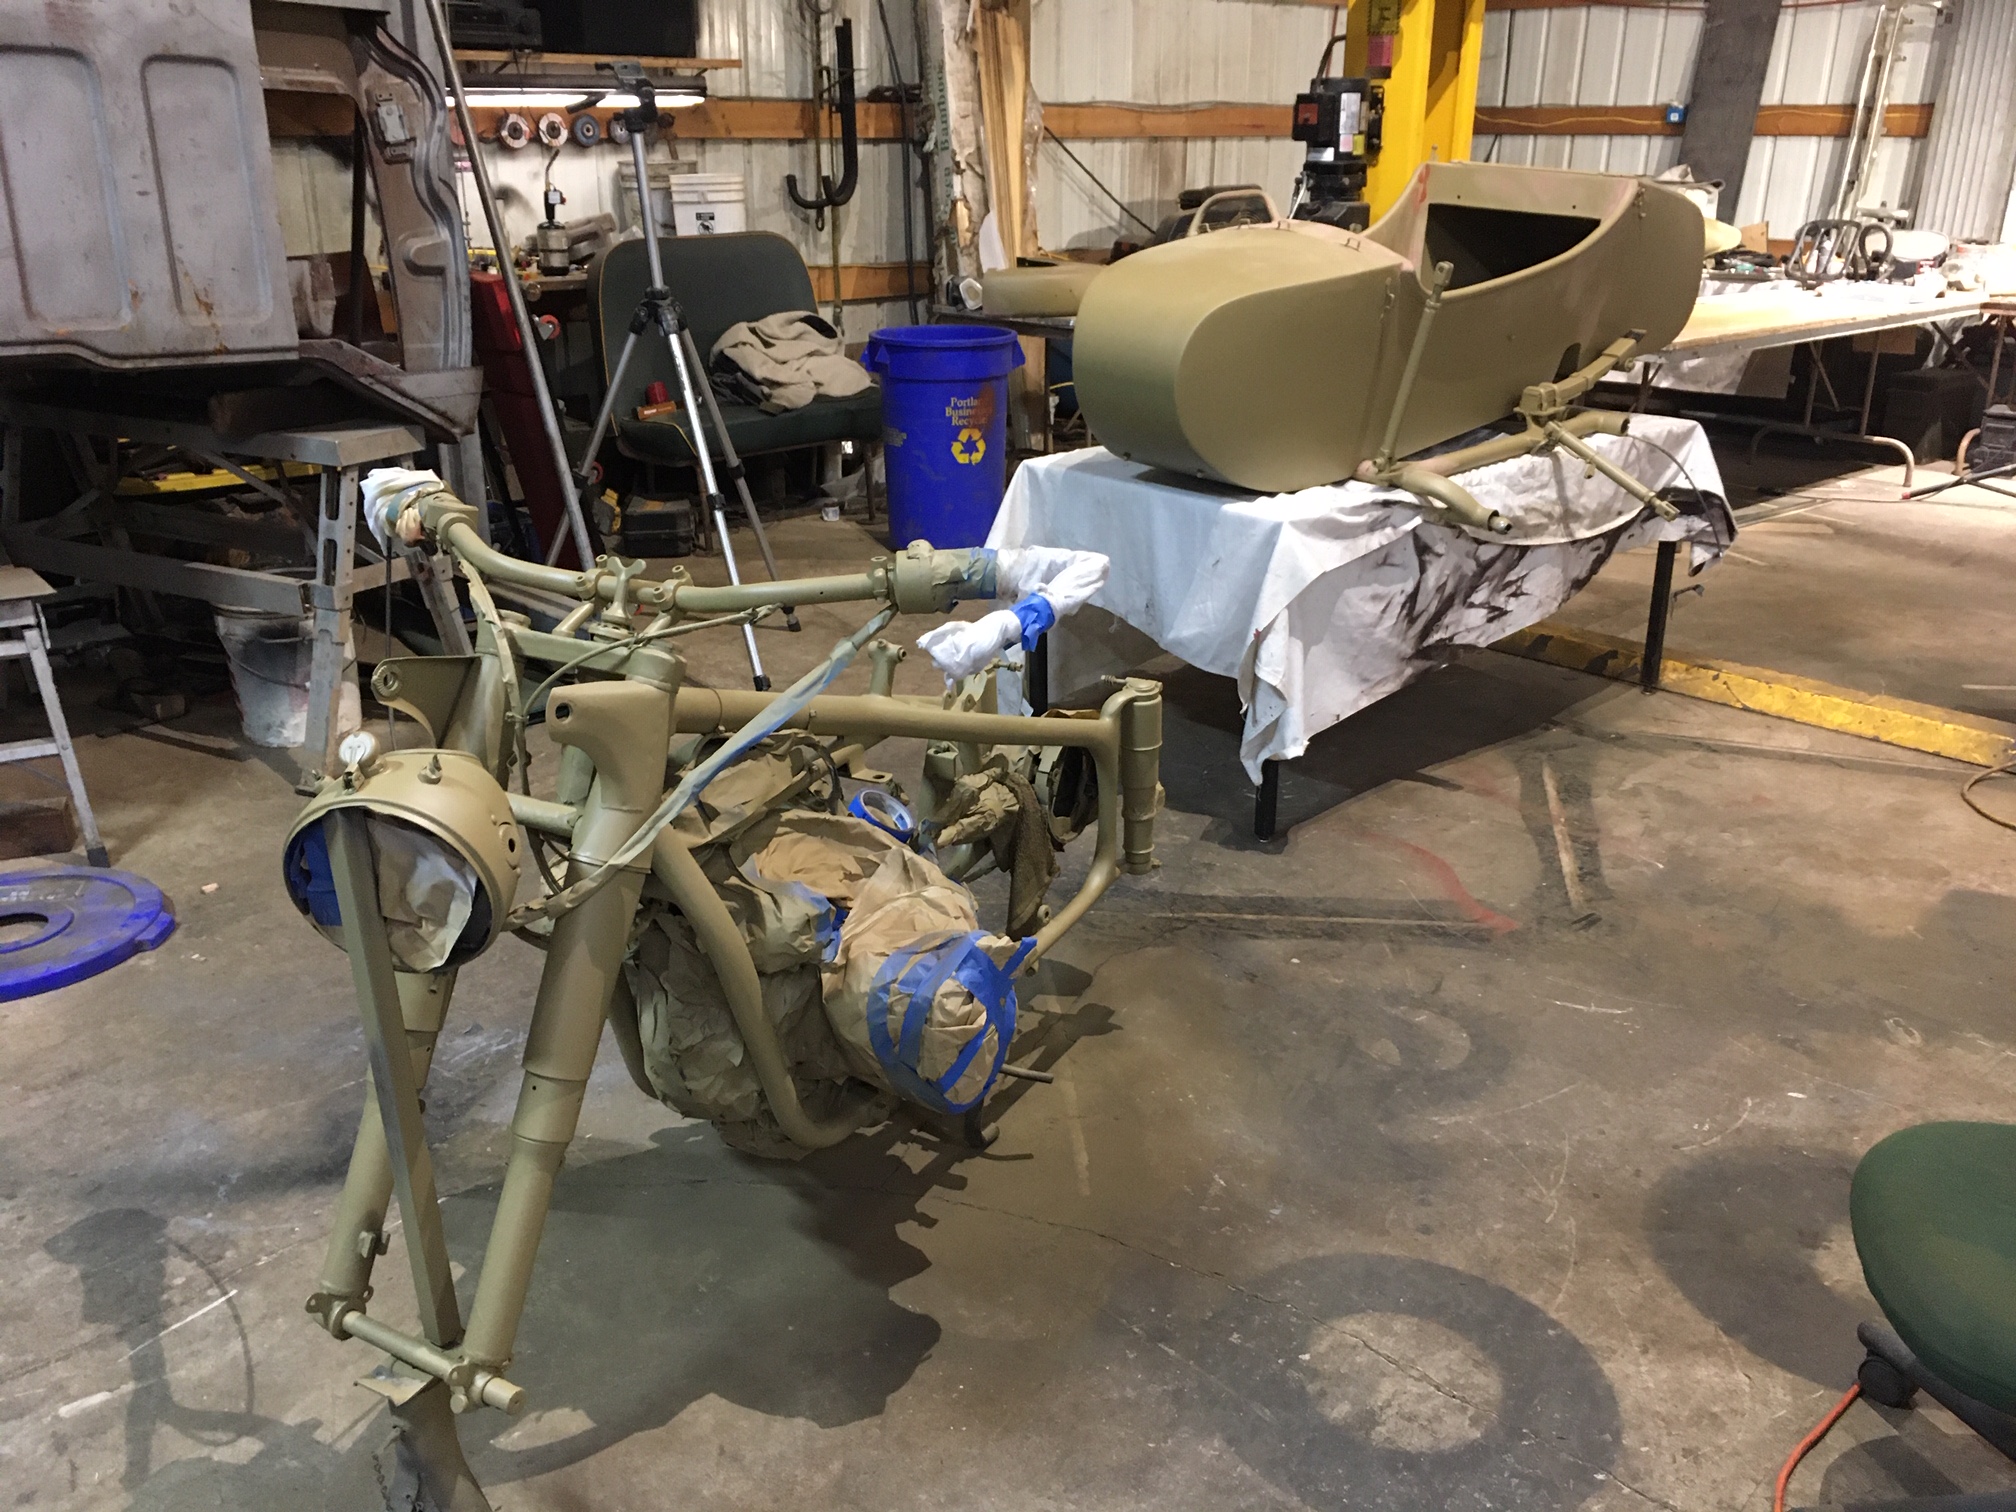
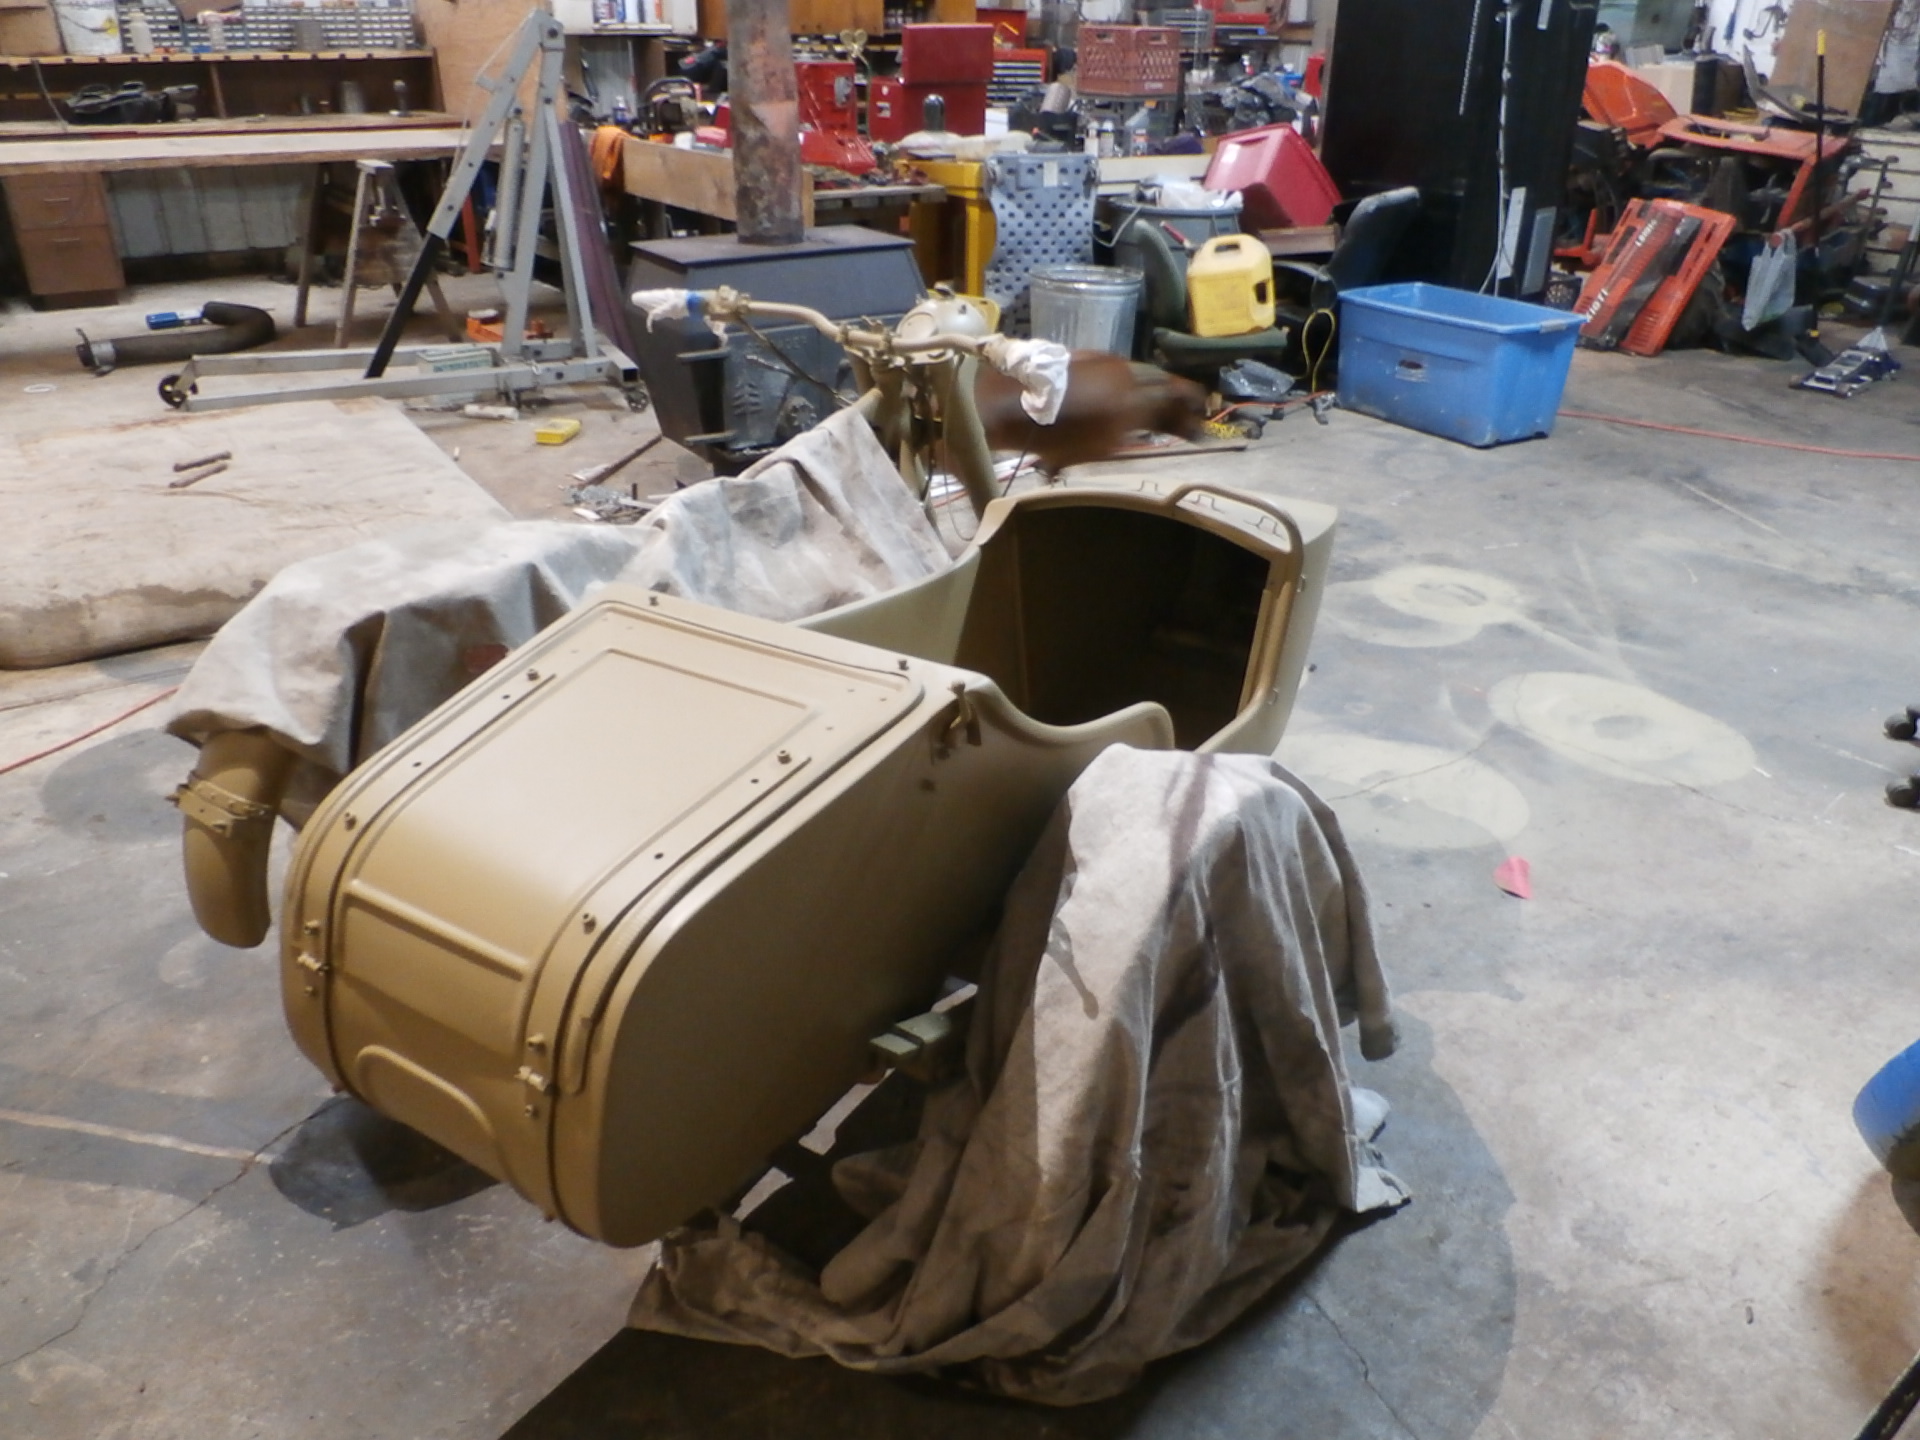
Once the bike is pretty close to being stripped of the plastic dip coating that was the former top coat of Panzergrau, that the former owner had applied, we were ready to divorce the bike from the side-car, to carry on stripping. The black gloss with white pinstripe will be sanded down, and any imperfections will be addressed. A sealer/primer will be applied, and then three coats of the Lacquer.

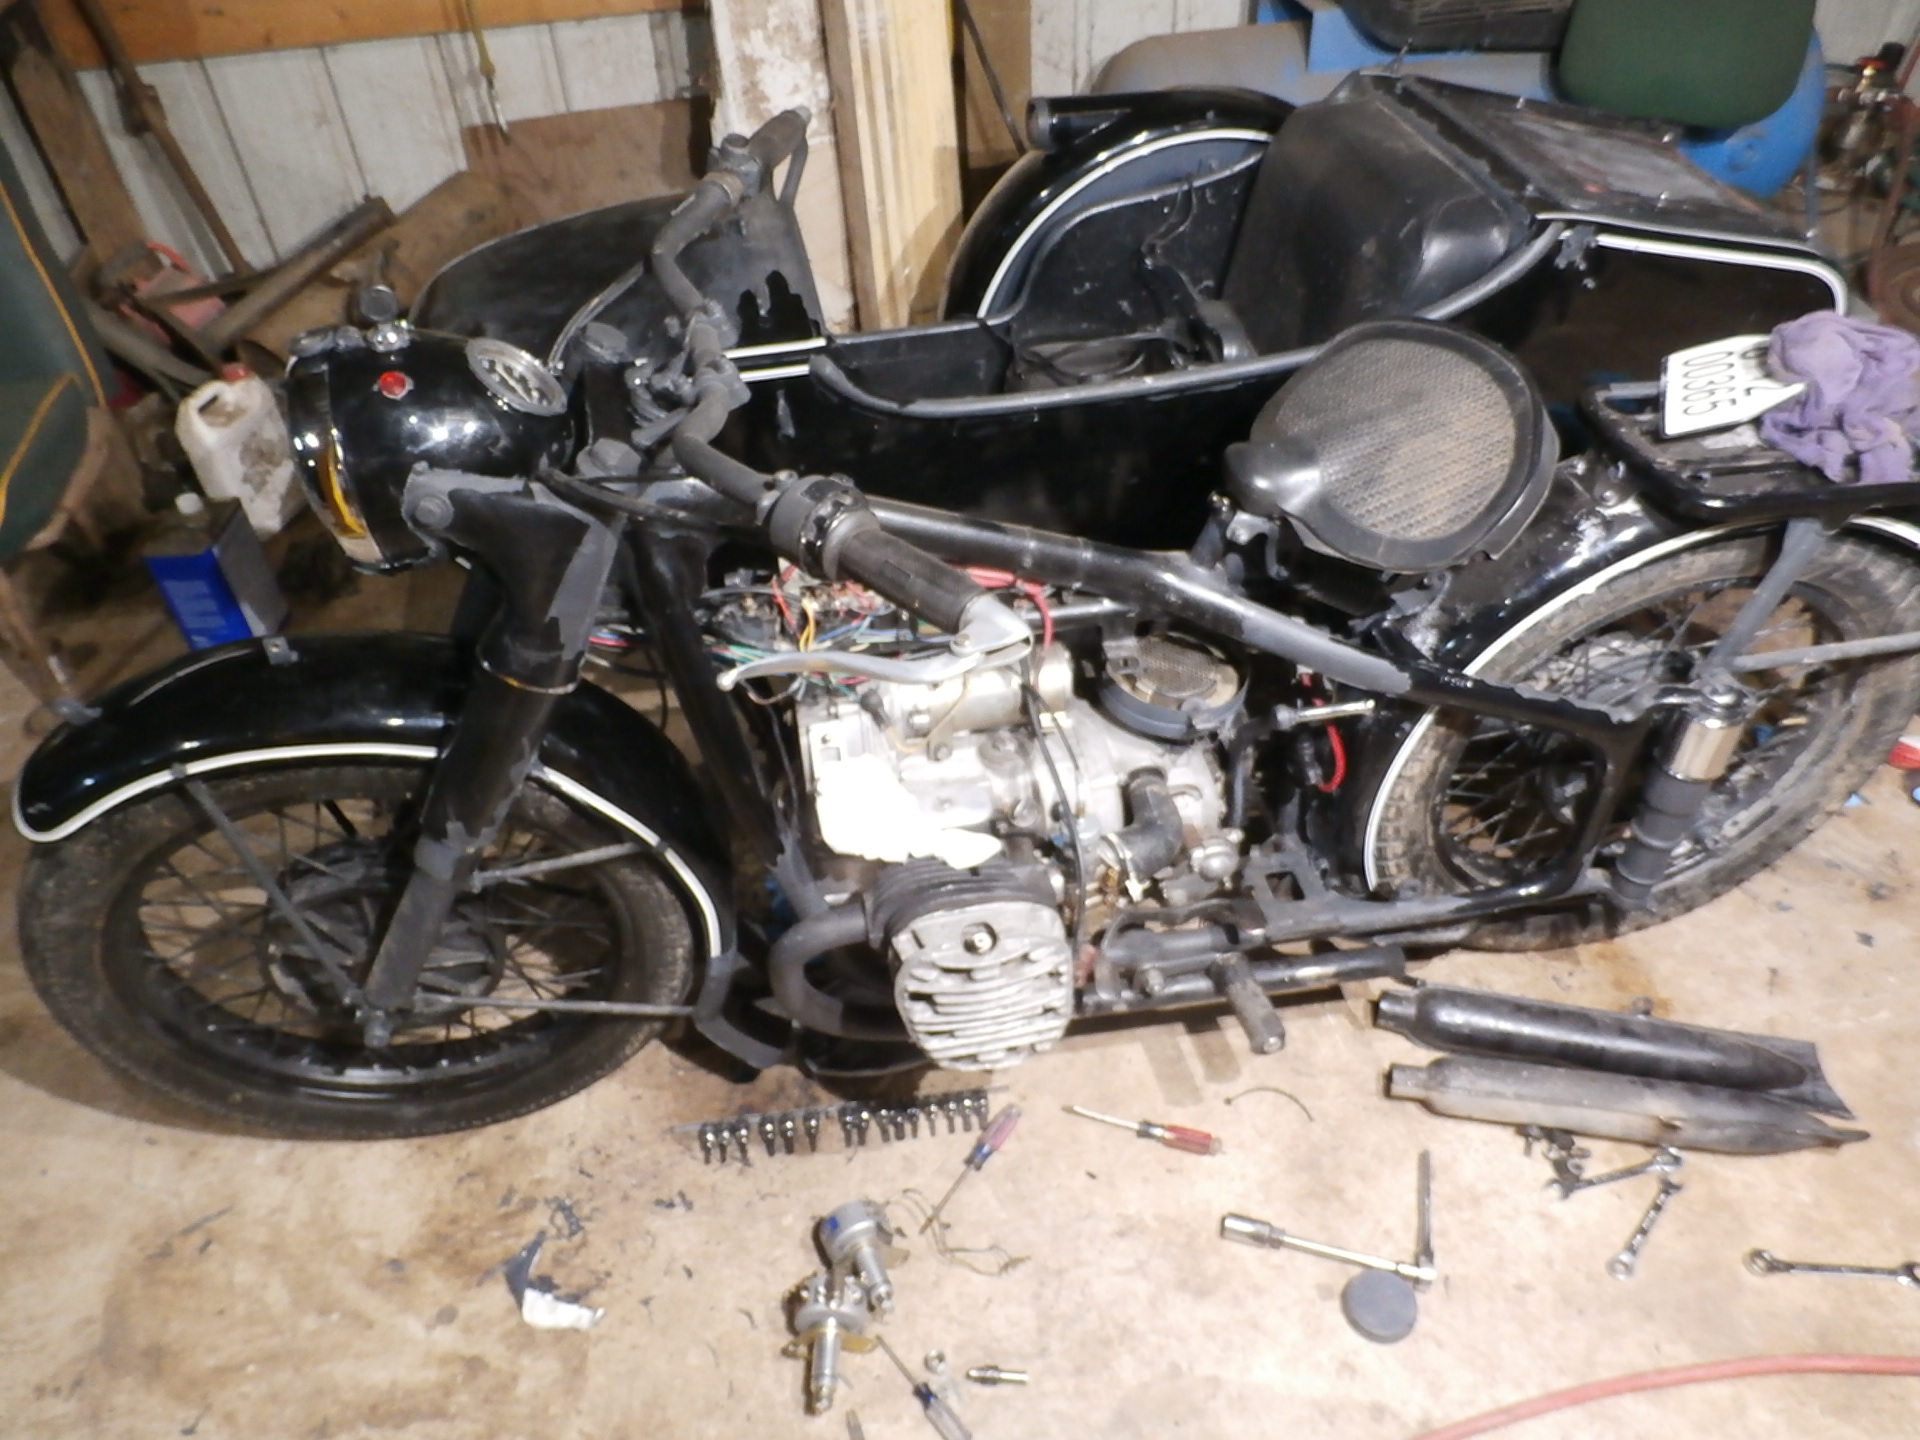
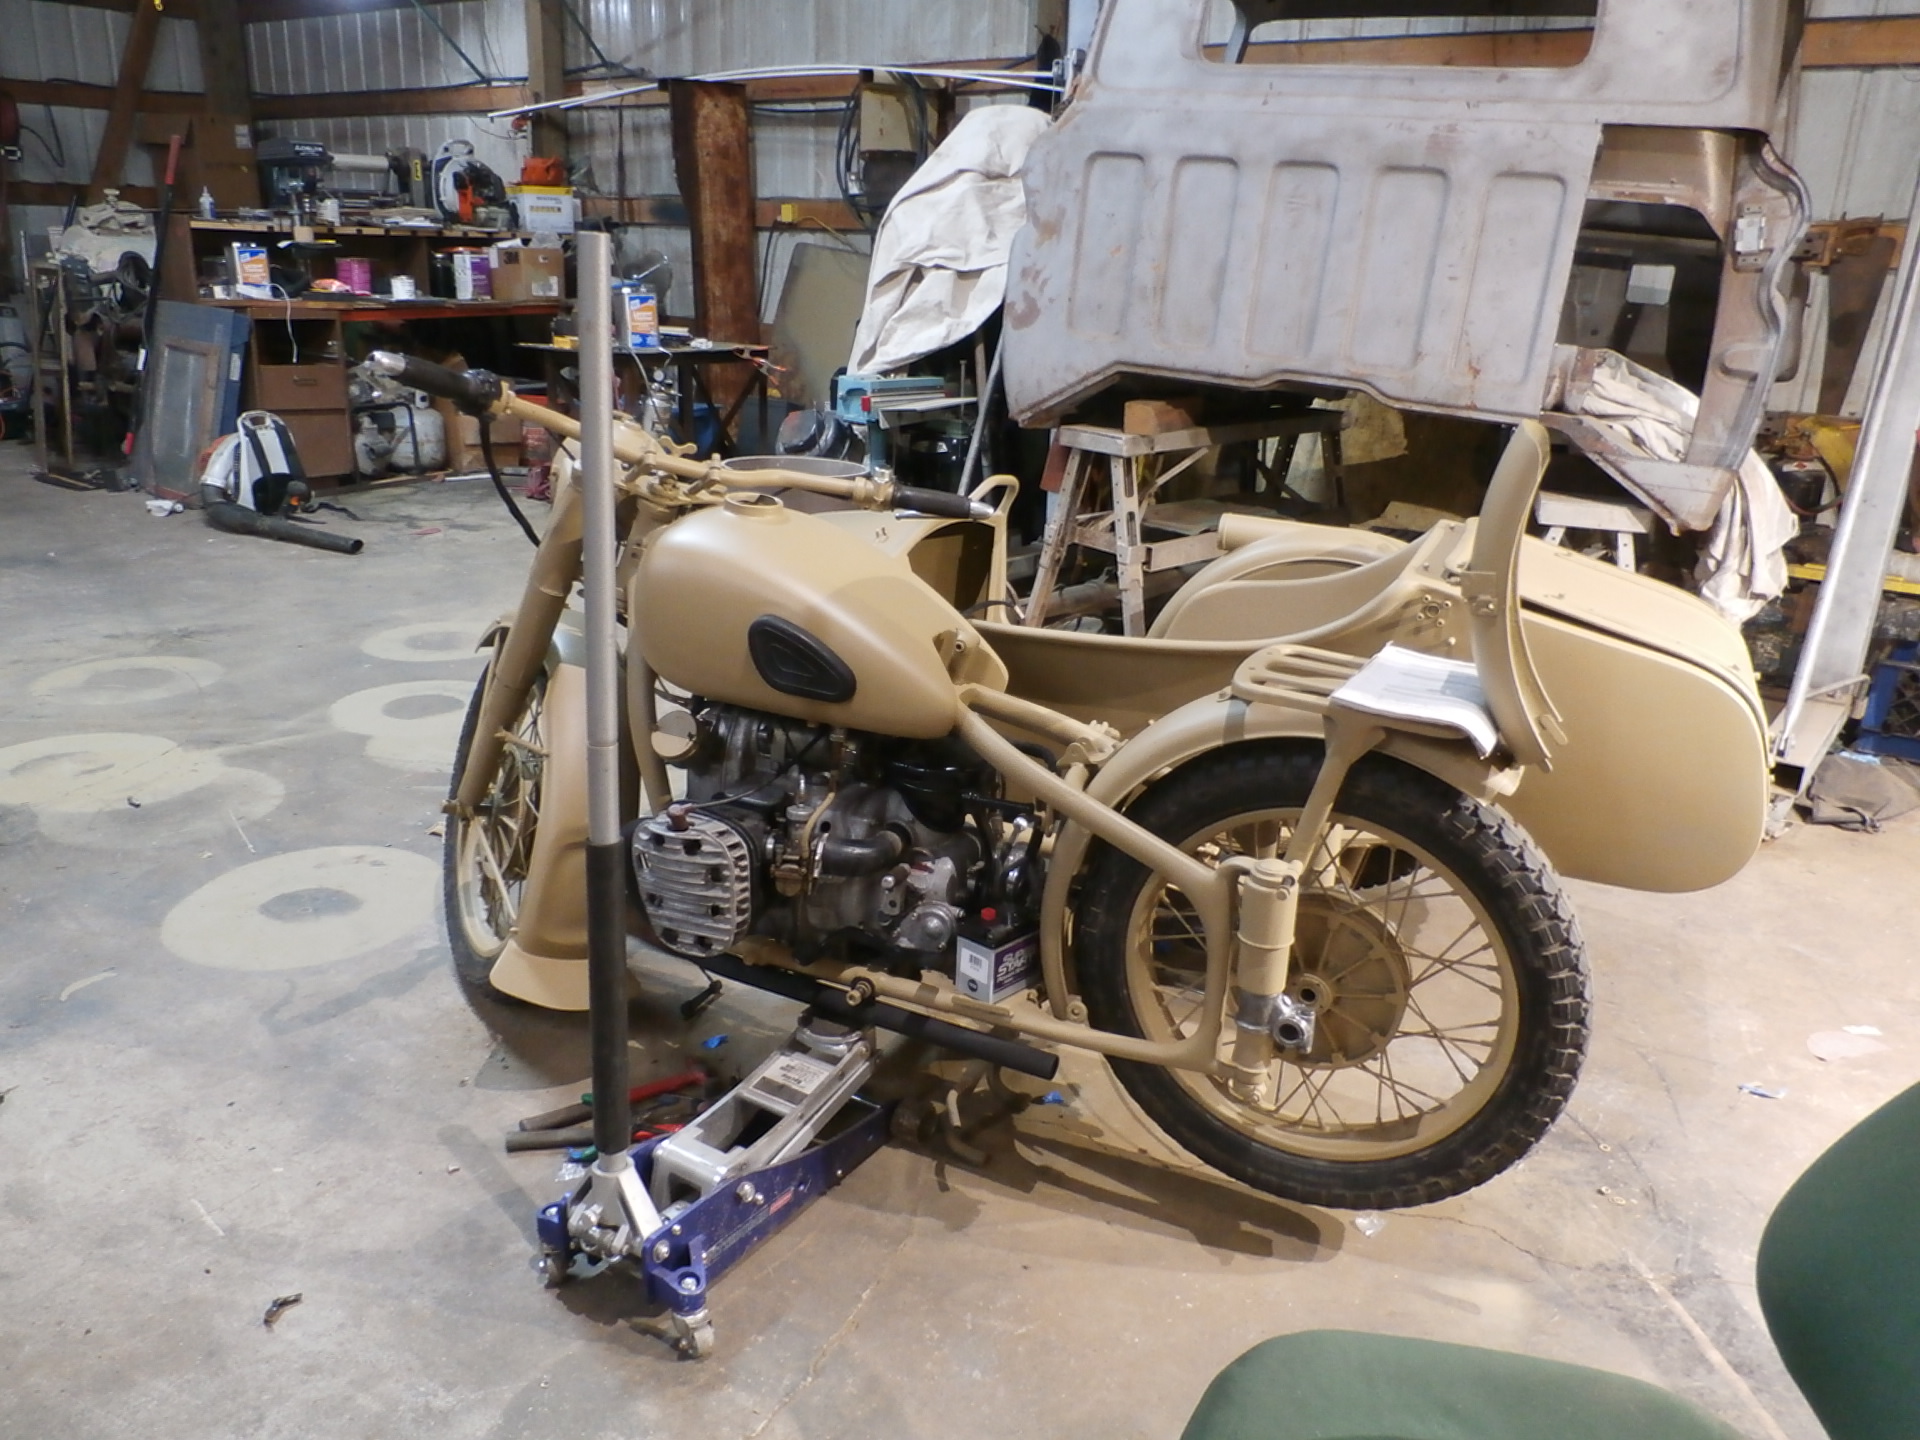
The incorrect, previous placement of the battery has been removed, and the sidecar lower rear brace is slid out of it’s pocket, as we divorce the sidecar from the motorcycle chassis. I decided to add an electric connector to allow the easy disconnection of the electric for making this easier in the future.


It the next updates, we will have begun the process of doing the bodywork in preparation for the application of primer.
It came clear that there was a noise coming from the front of the engine before we tore it down for paint, and on further inspection, I located a broken distributor drive shaft. It made a distinct rattle- metallic and tinny sounding and not proper. A new one will arrive in a couple of weeks, thanks to Covid-19 slowing global shipping.

Another day of teardown and more stripping, but we are getting closer to doing body work.
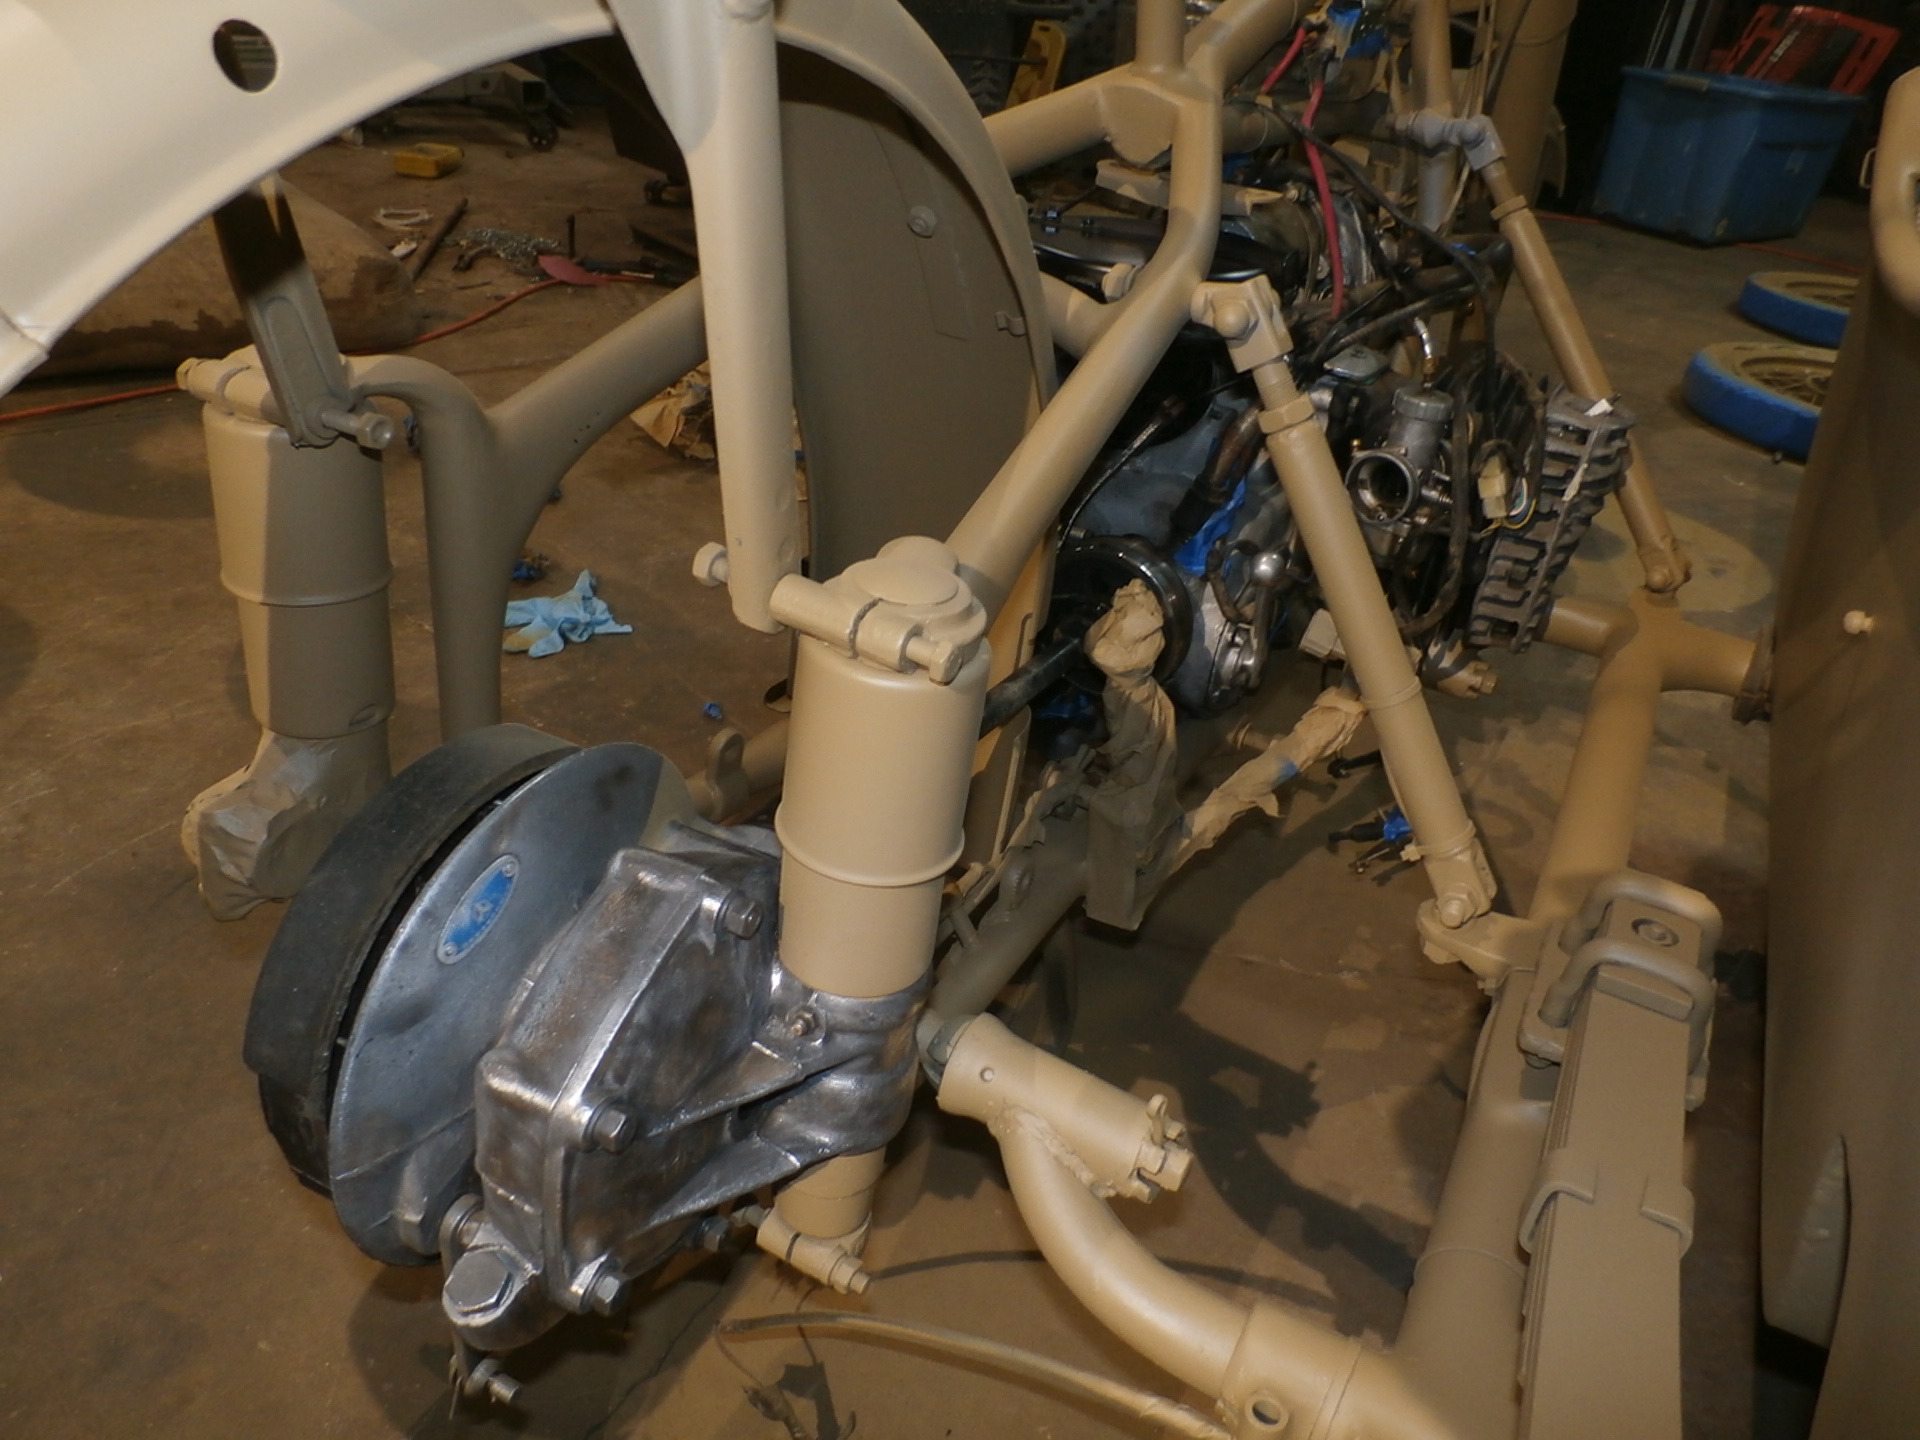
The chassis for the sidecar is lowered out of the way, allowing access to the belly for prep. When we paint it, the frame will be completely removed, but leaving it attached at the front steadies the side car tub while sanding is done.
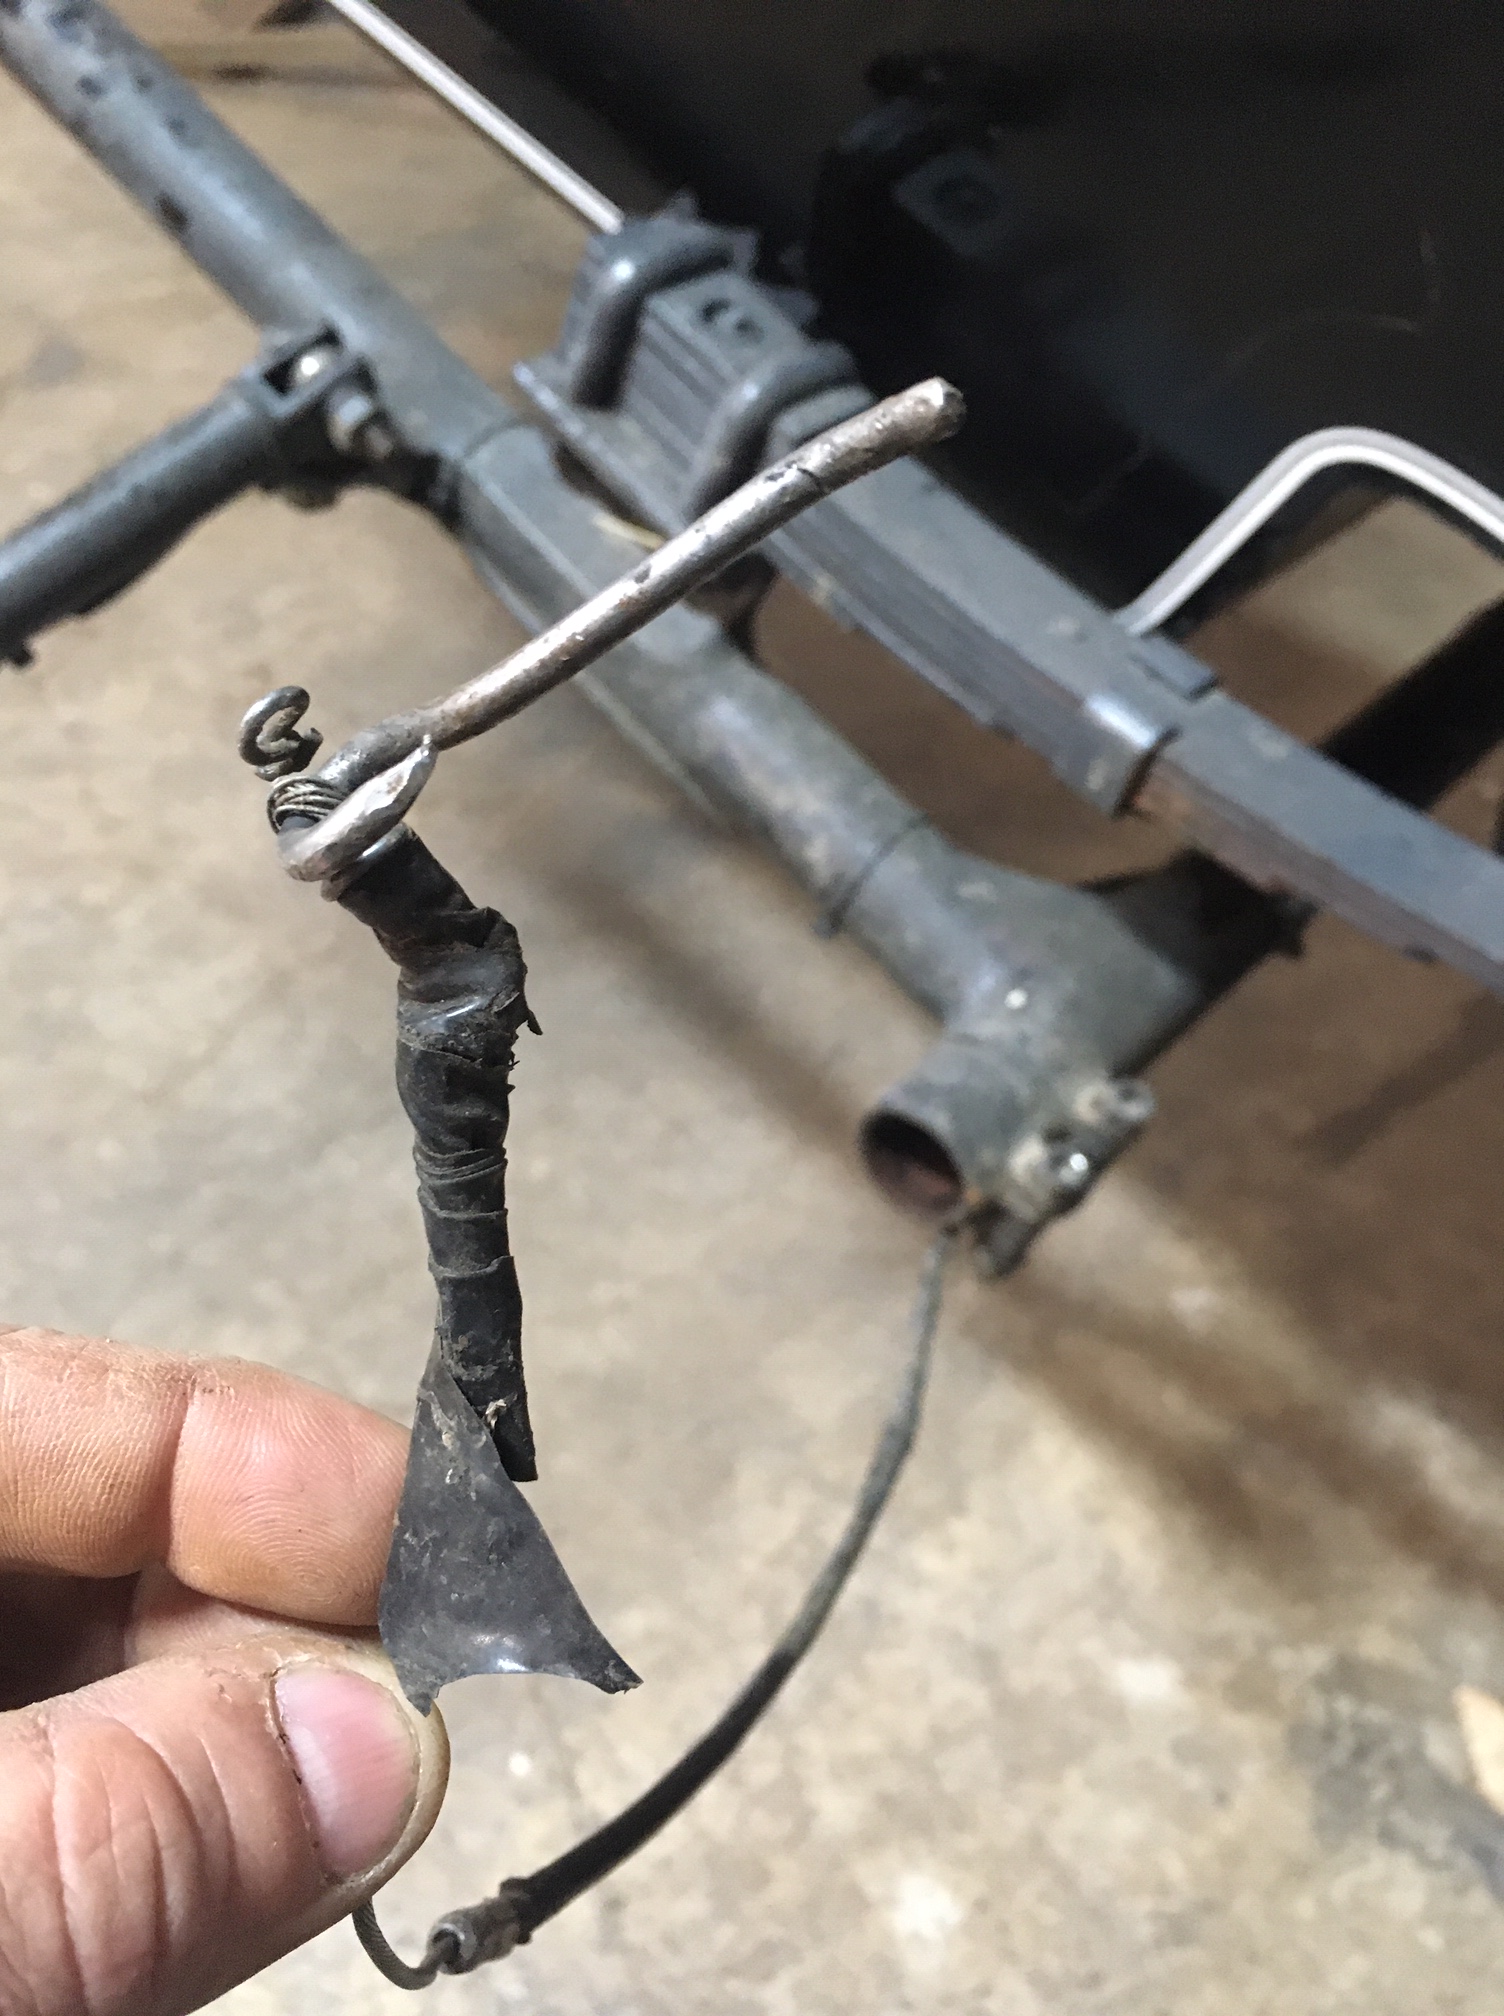
These machines usually have some odd form of butchered repair, and this is a photo of the mend someone performed on the side car brake cable. This is a 16Penny nail, bent to make a hook, with the snapped end of the steel cable doubled back on itself, then wrapped with electrical tape. Needless to say, this will be fixed properly.
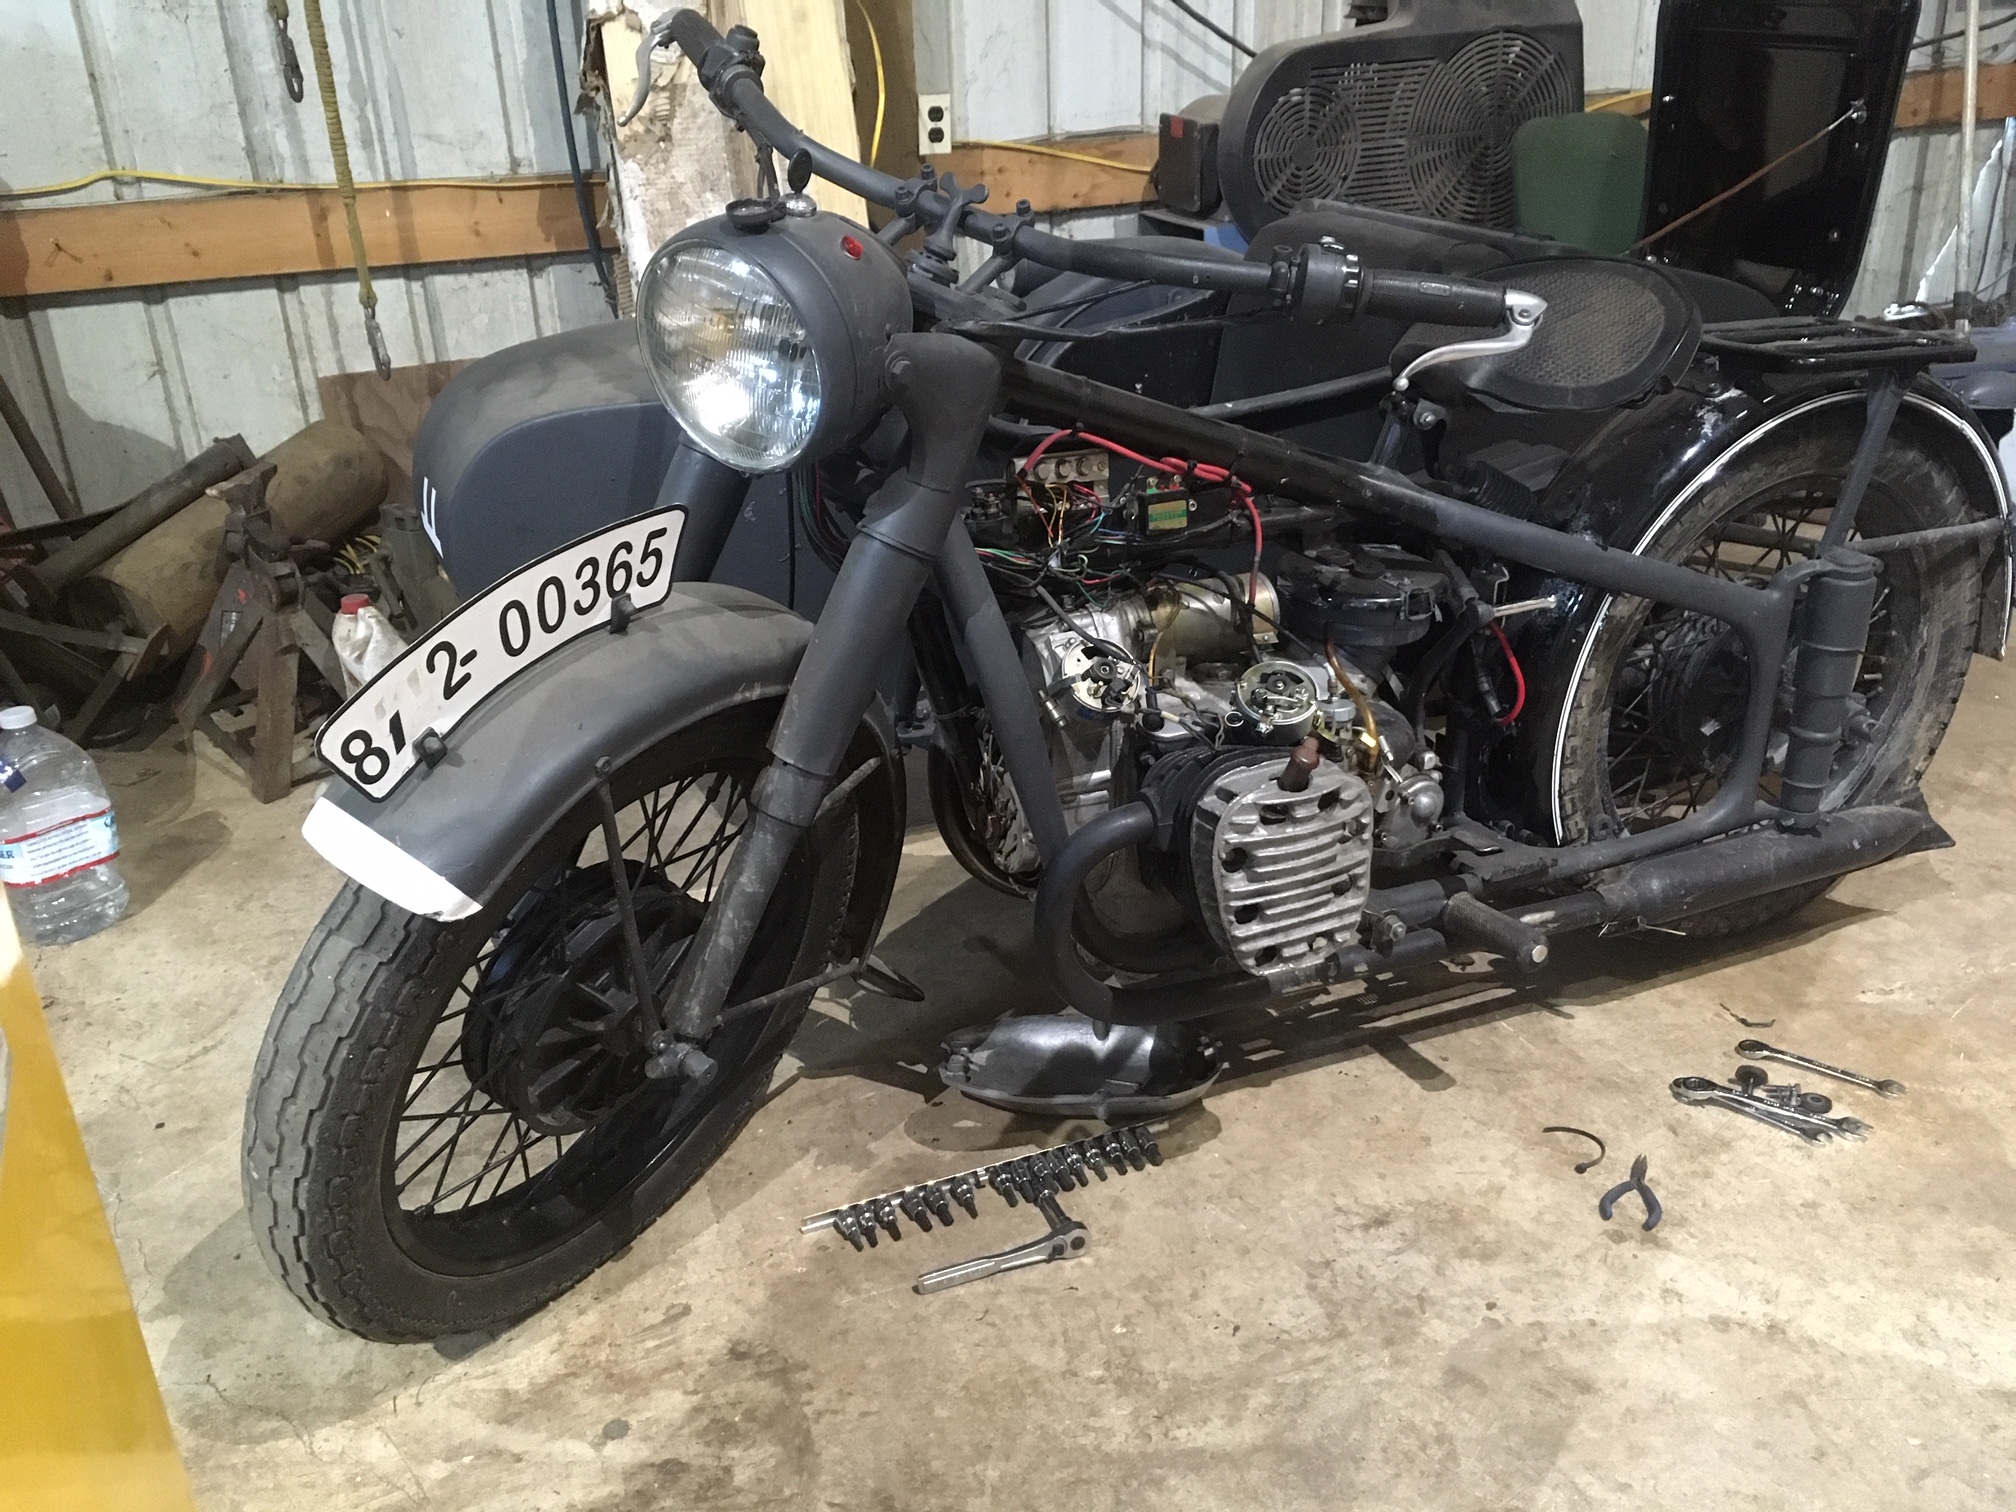
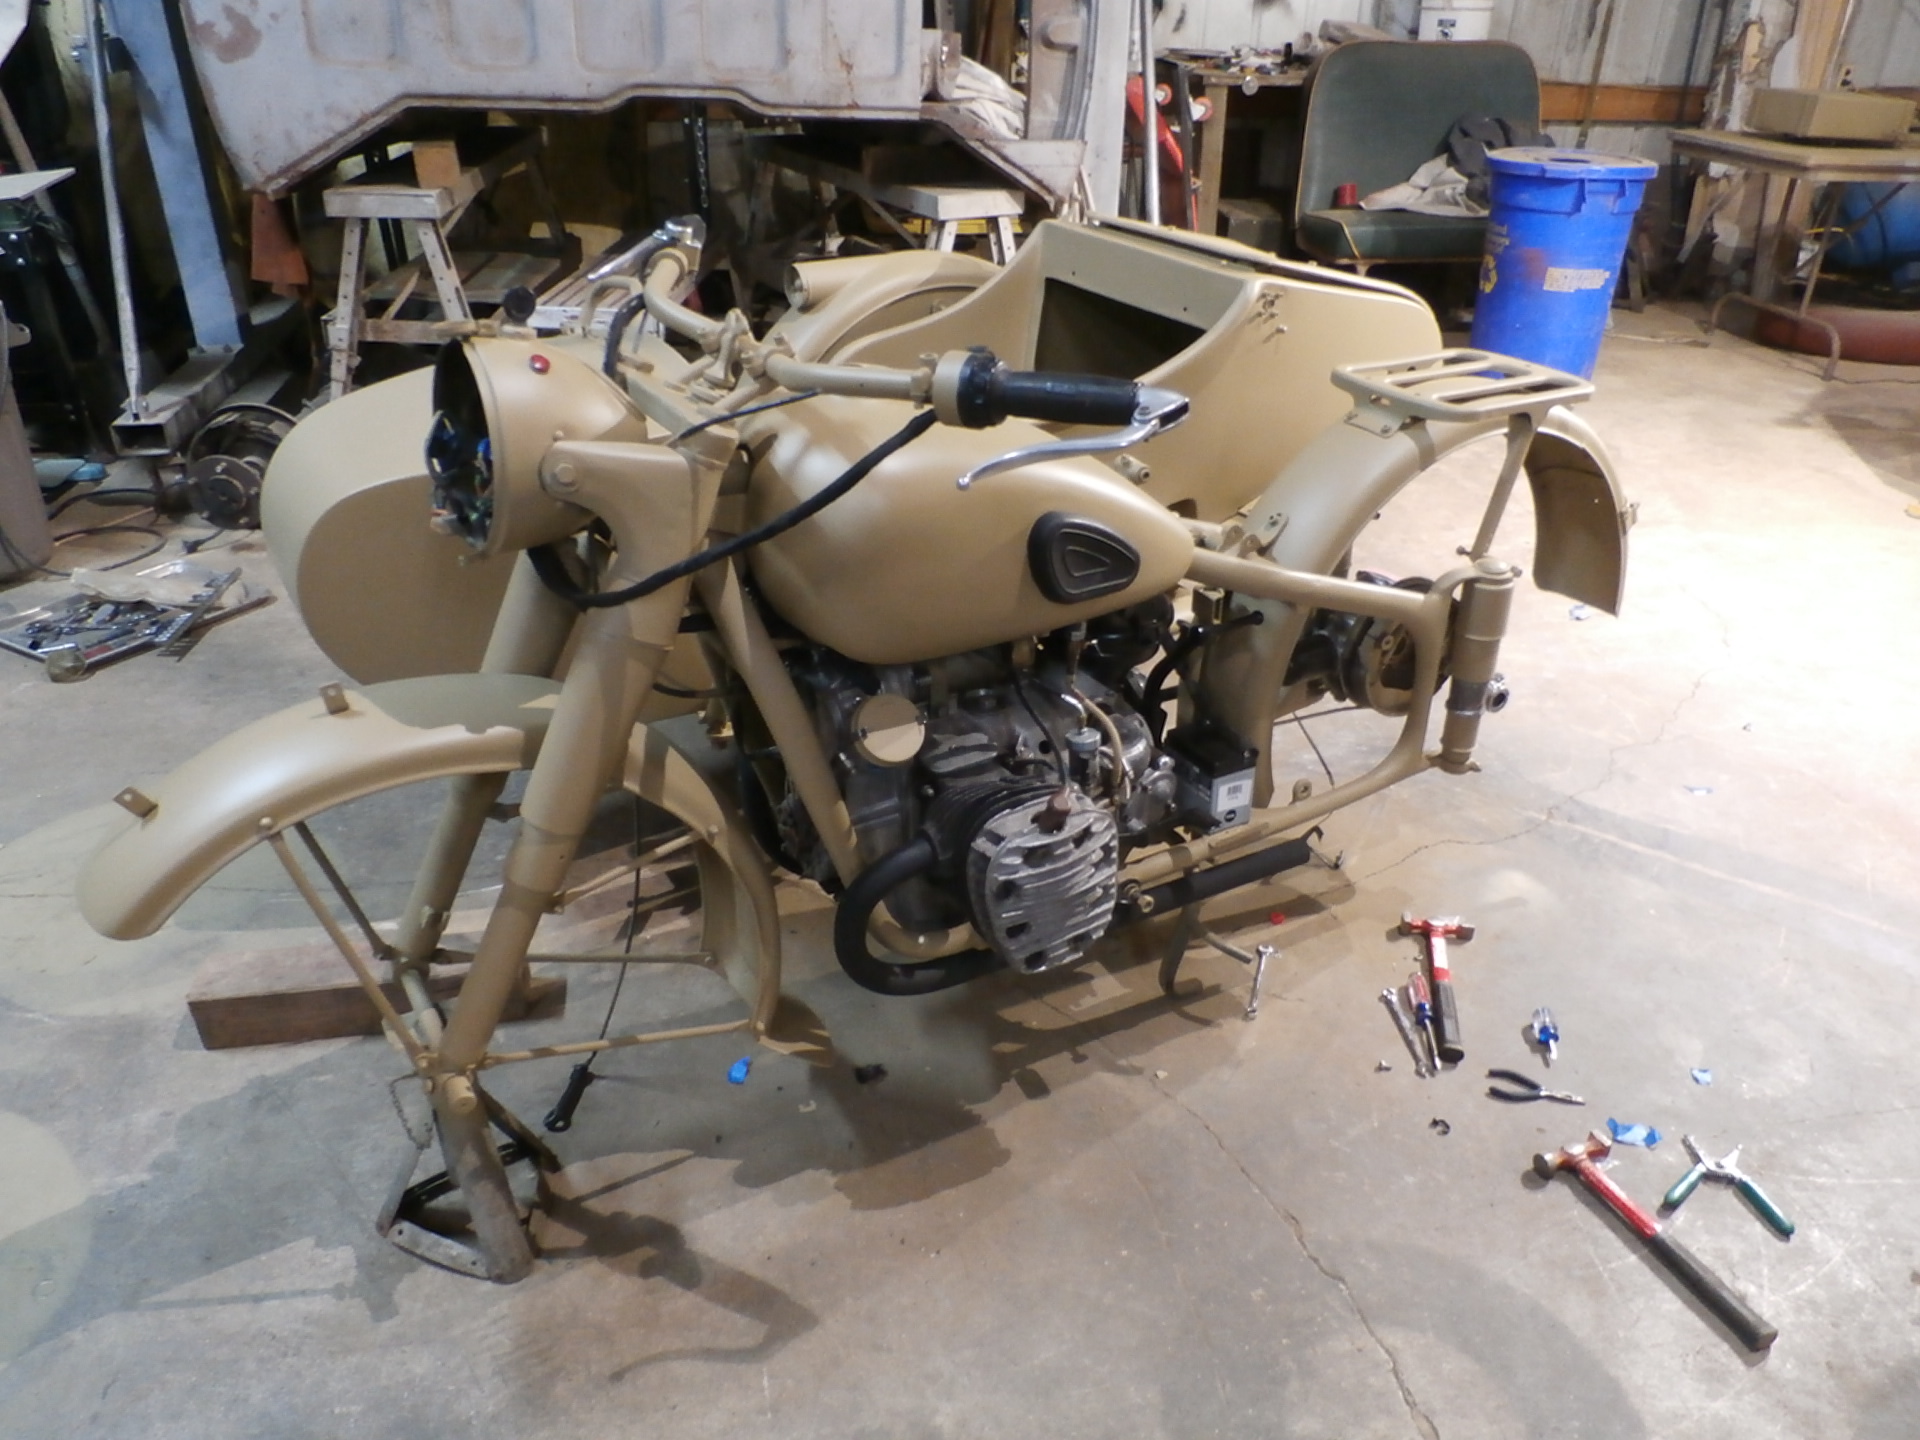
Often, when we are getting things ready for final painting, we find a mechanical bug that needs tending to. After a few issues with the distributor drive, and points sets, it is running very smoothly.
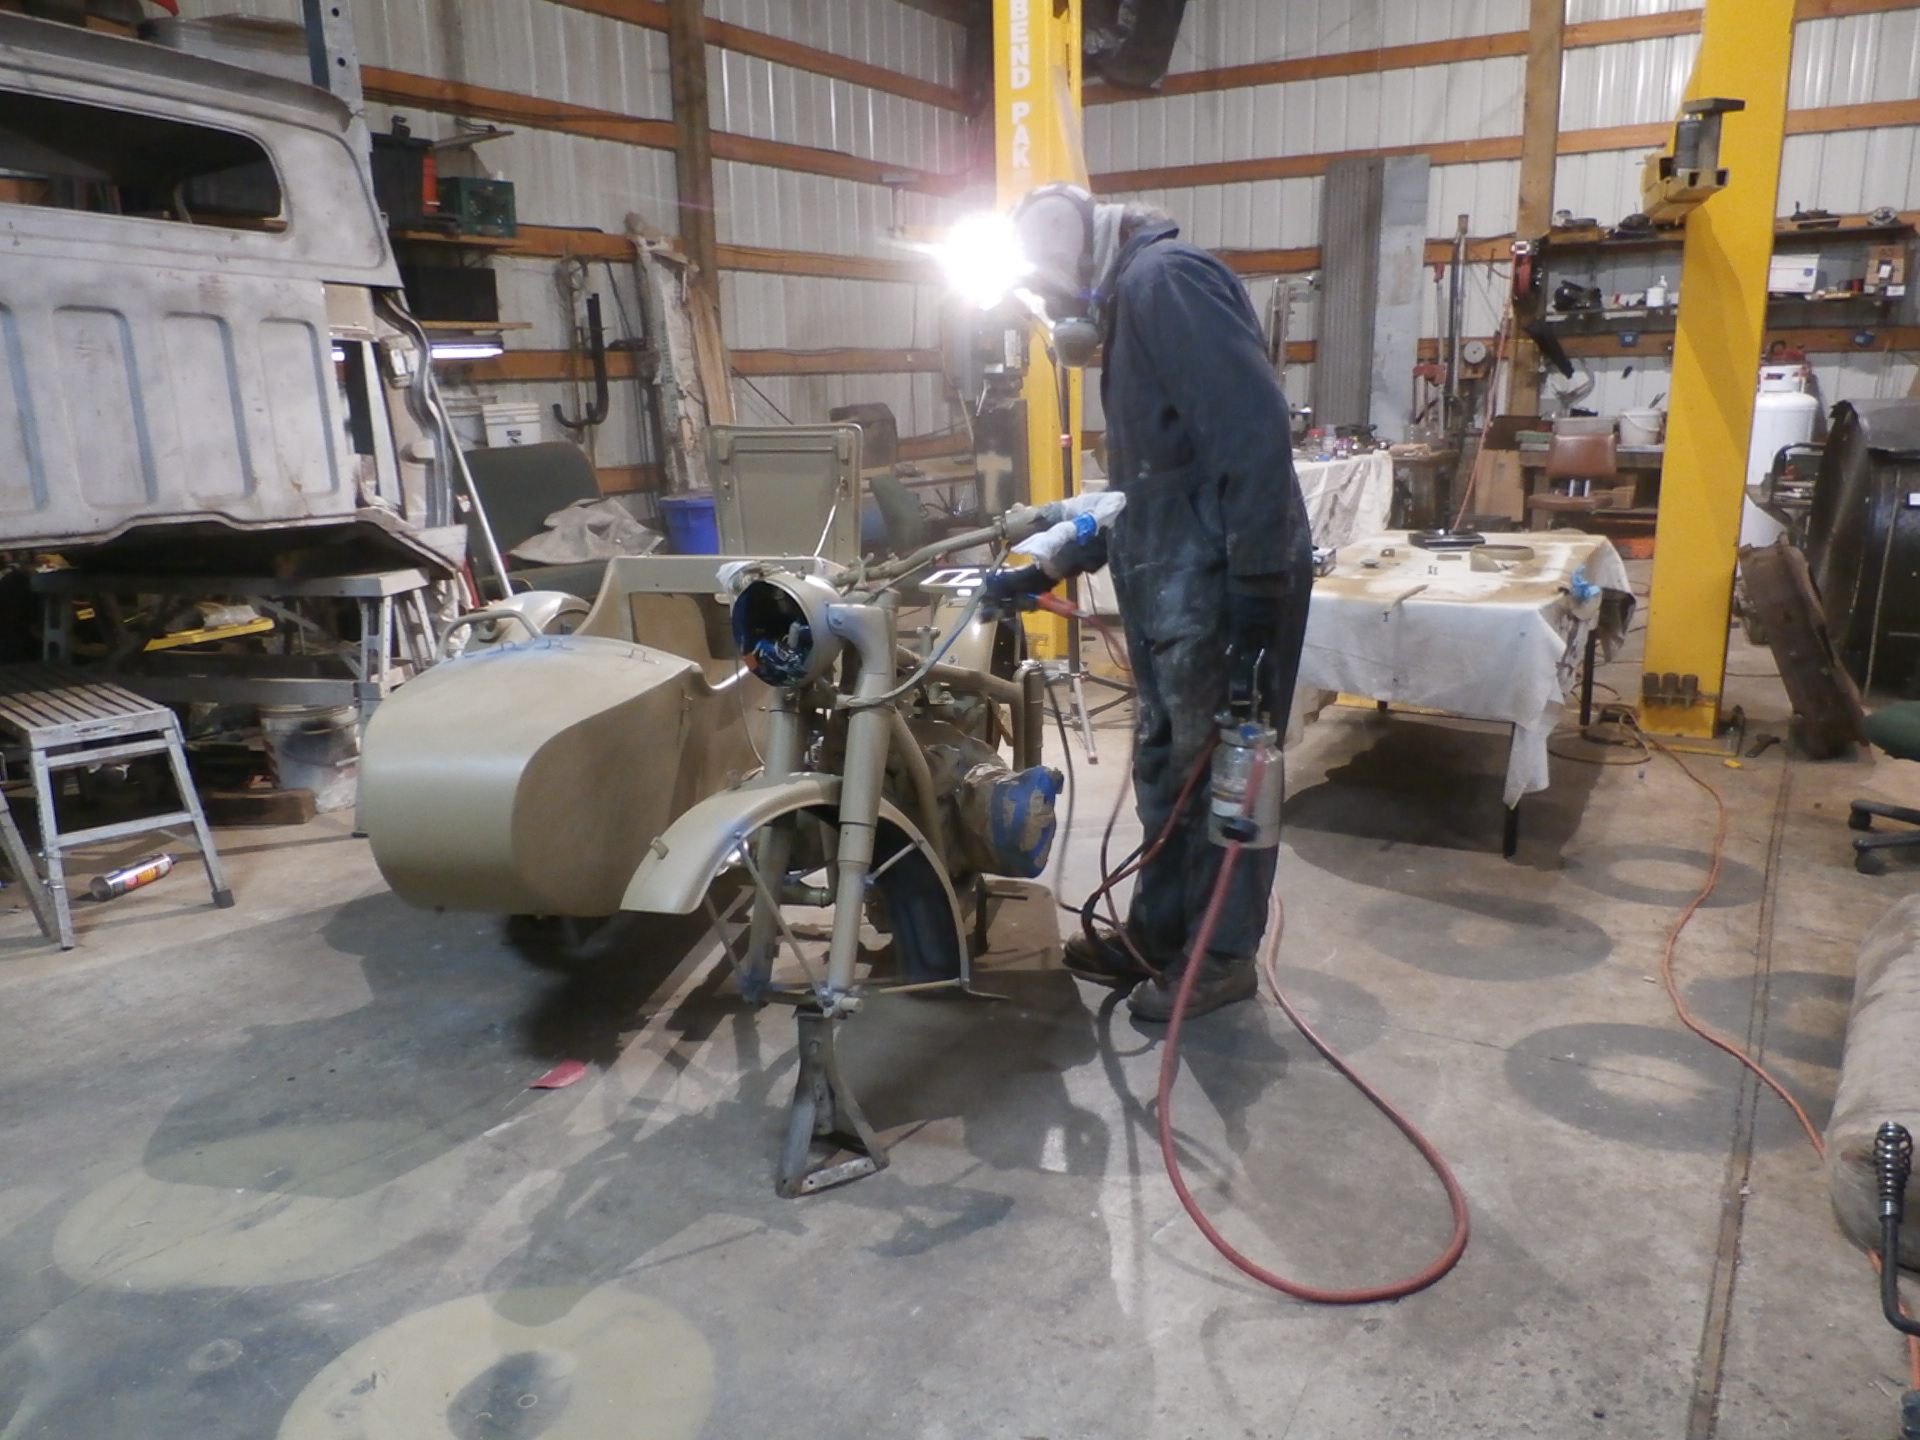
We just added an electronic ignition unit to this bike, and fired it up with the fuel tank loosely set in place, to get it tuned and ready The mufflers are already removed and being coated in the correct flat black. We will paint it next, and once the masking is removed, and everything is bolted back in, we know it will run well, and start easily. As a side note, our shop has a metal roof, and it is raining heavily, which you will hear in the video.

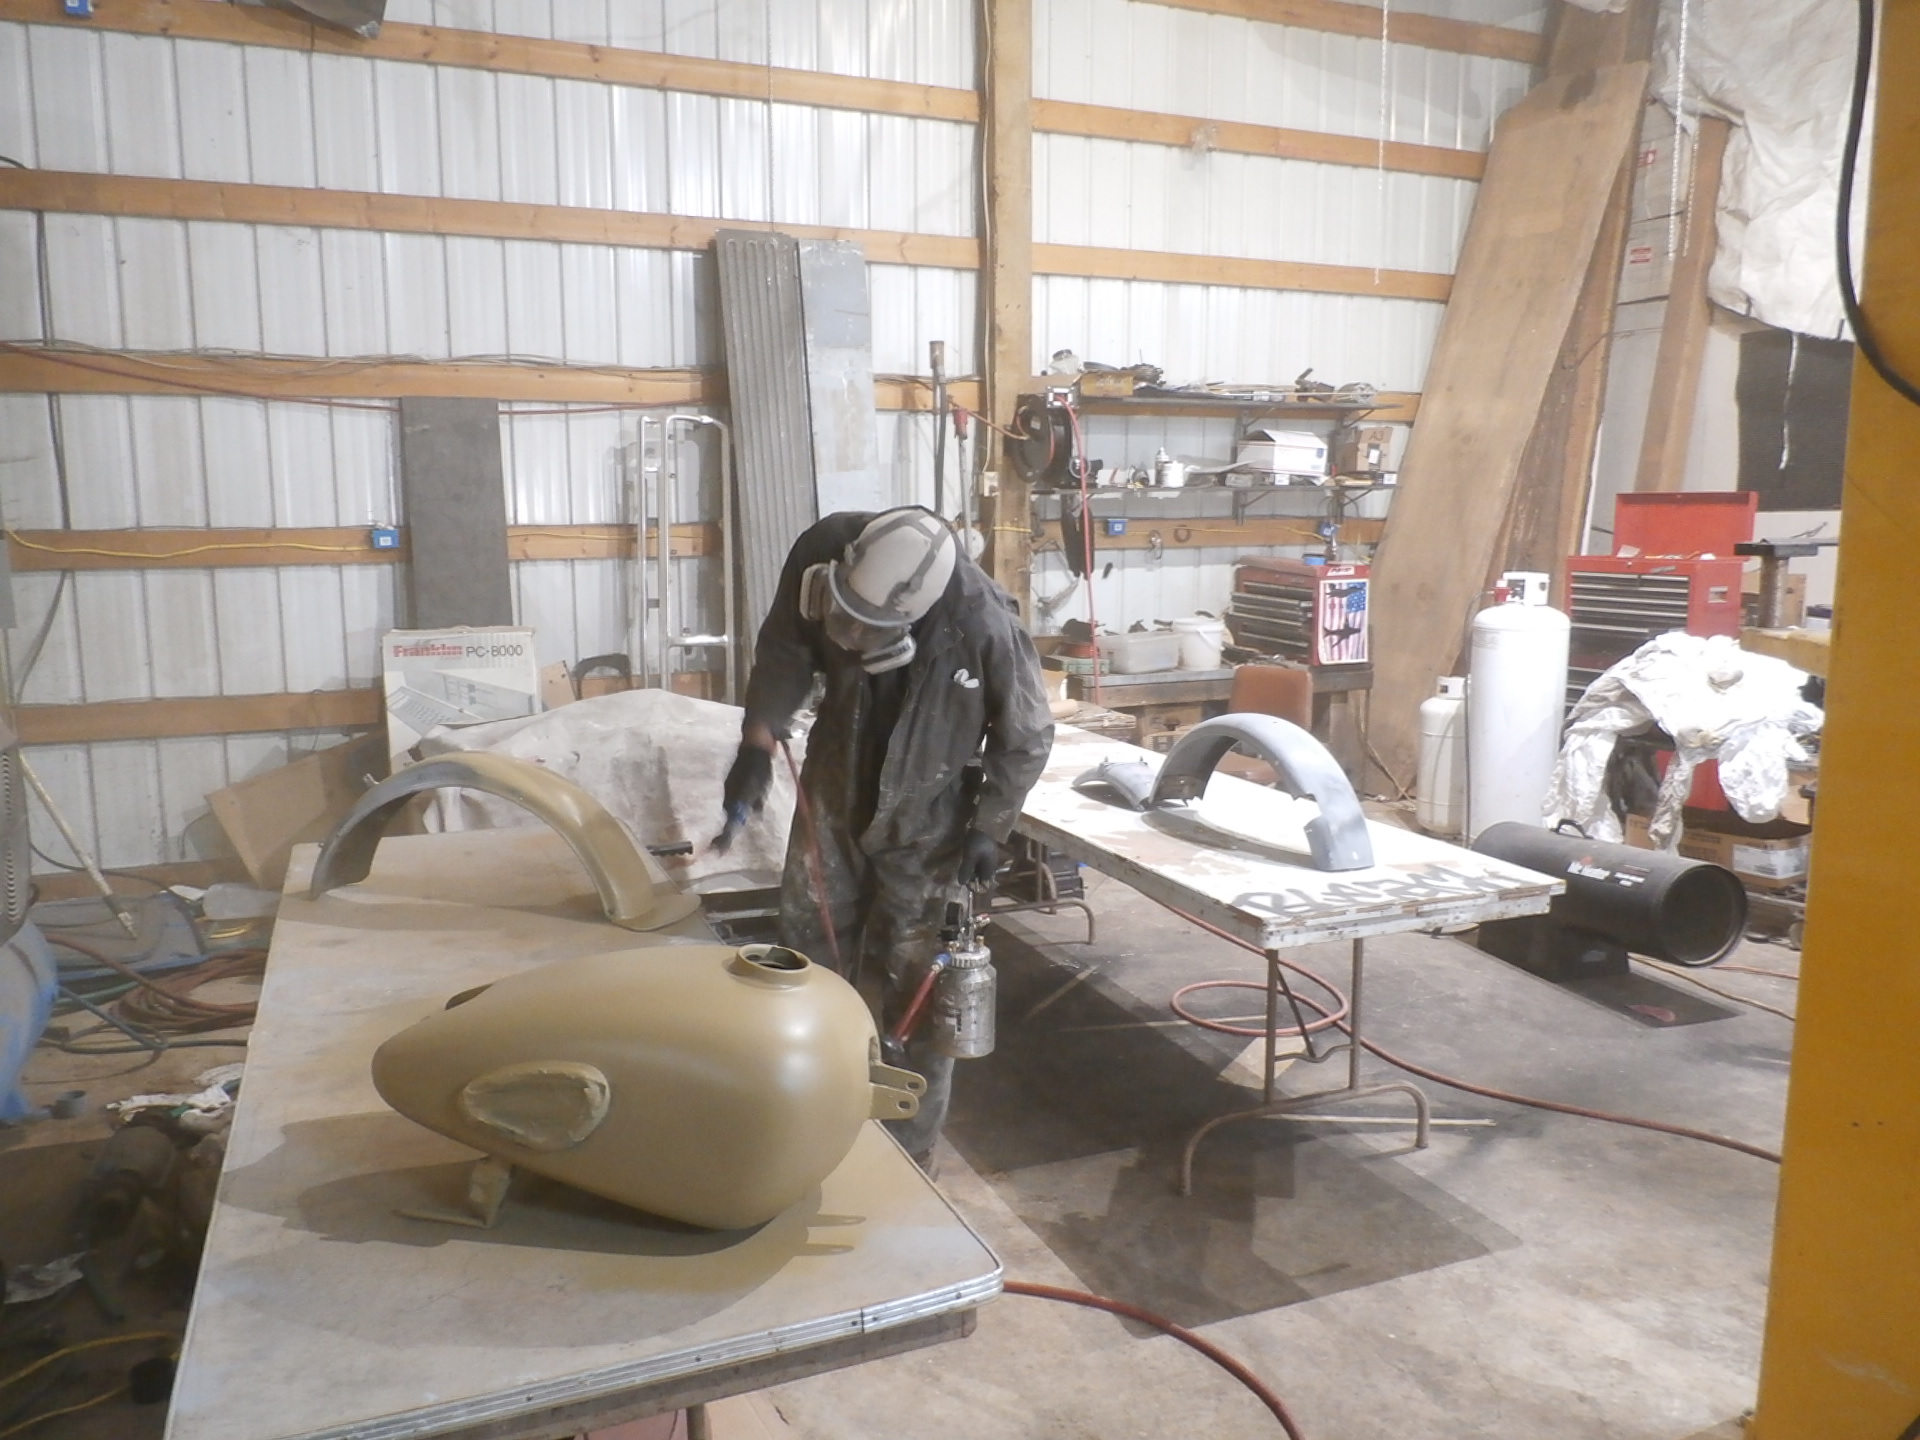
We are now at the phase of getting the last little things sorted out on the bike, and are doing the bodywork on the tub of the sidecar. We uncovered some previous work, and some needed tending to.
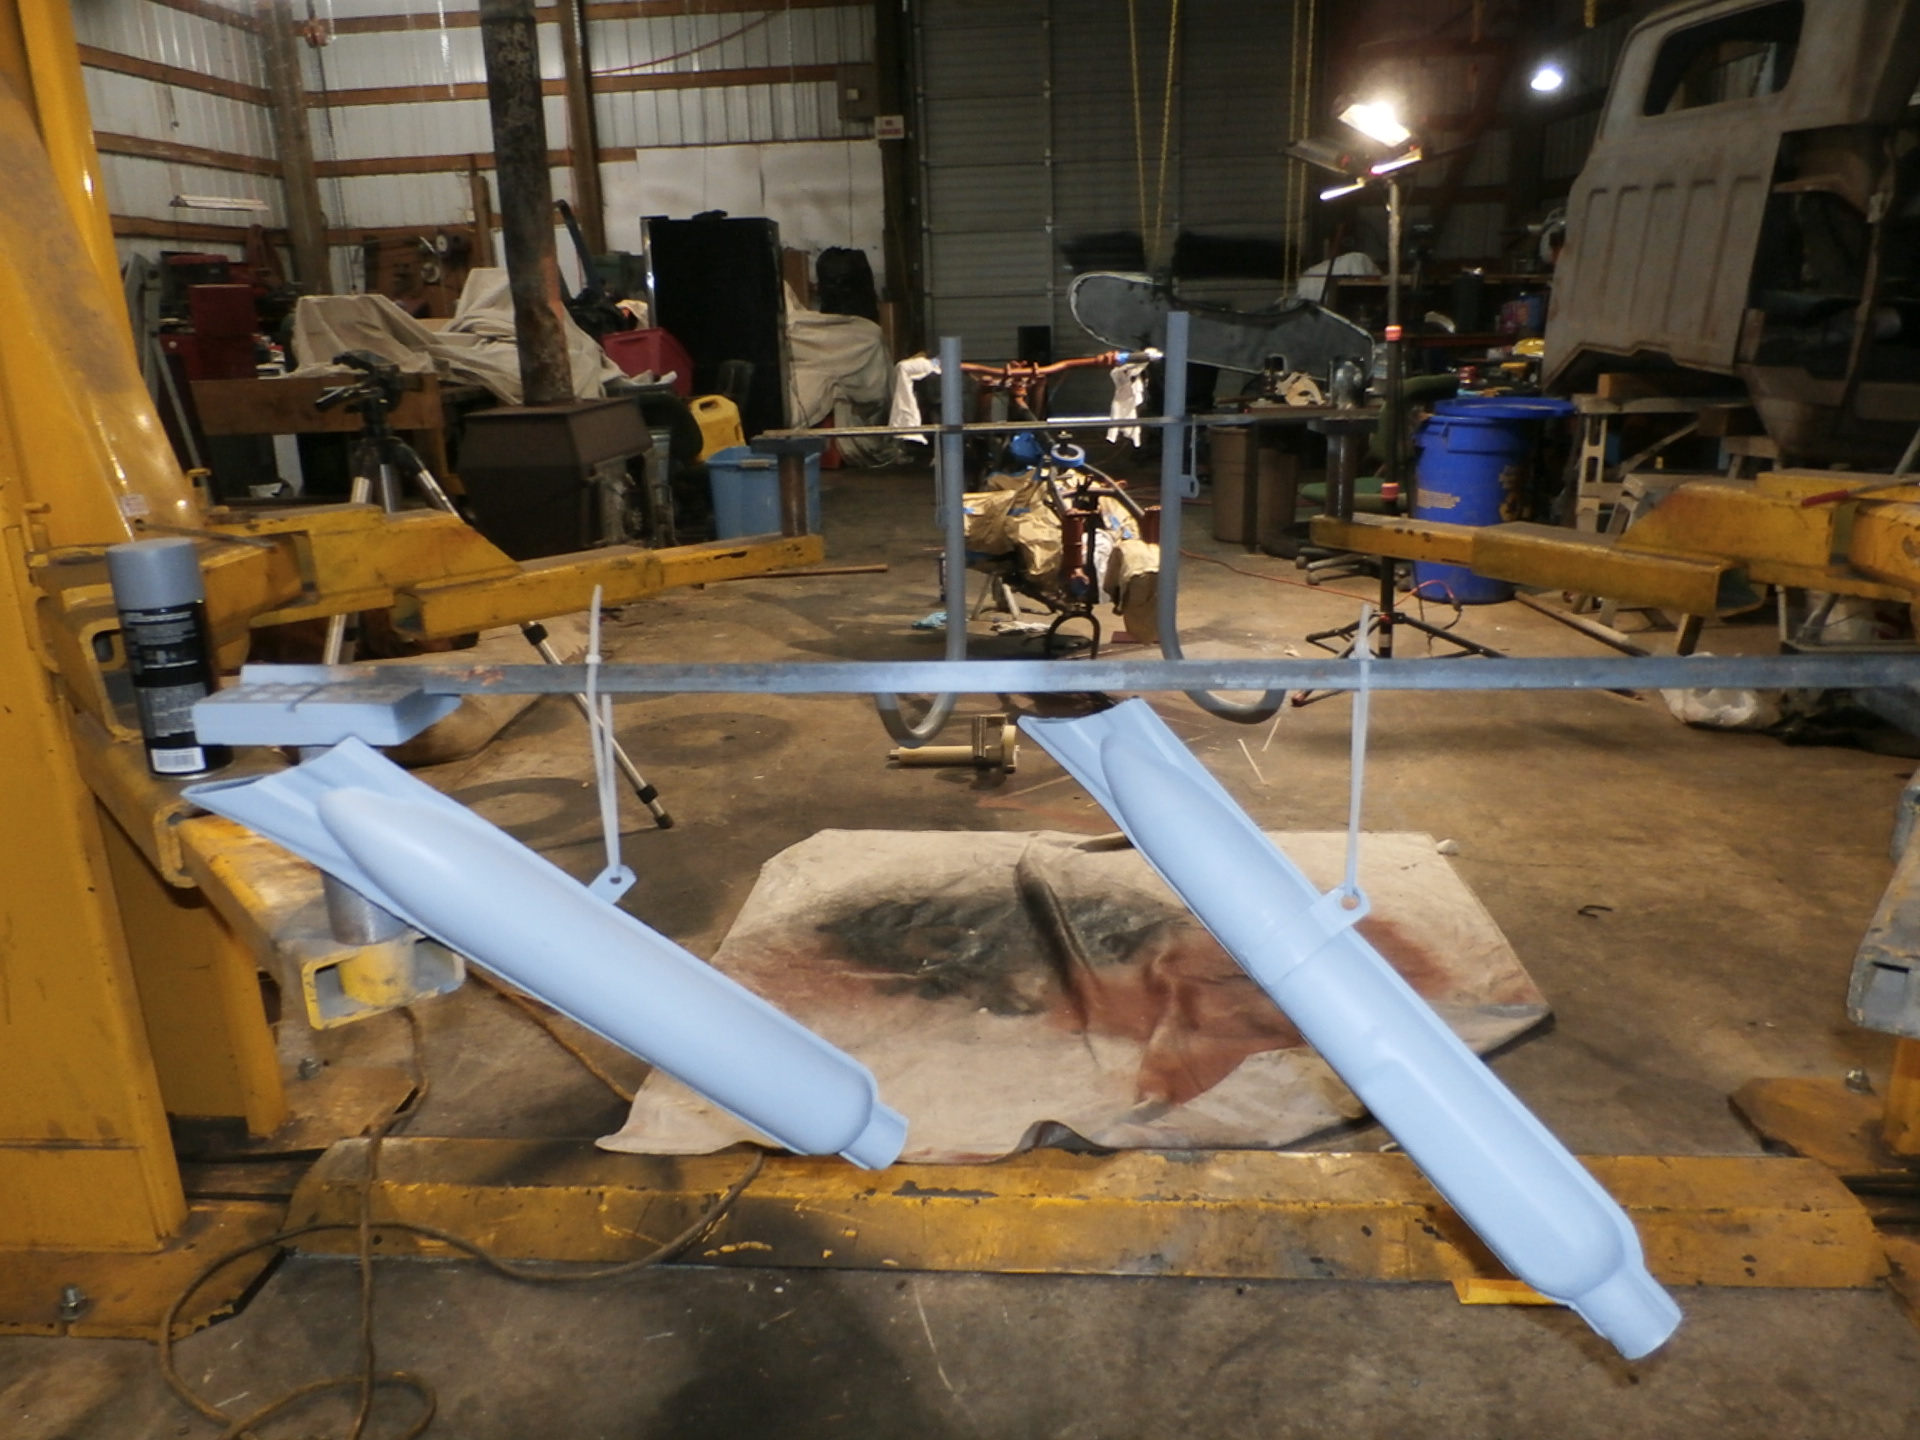
The exhaust will get it’s final coating of Ceramic Hi-Temp paint today, now that the previous two coats of Hi-Temp primer are well cured.

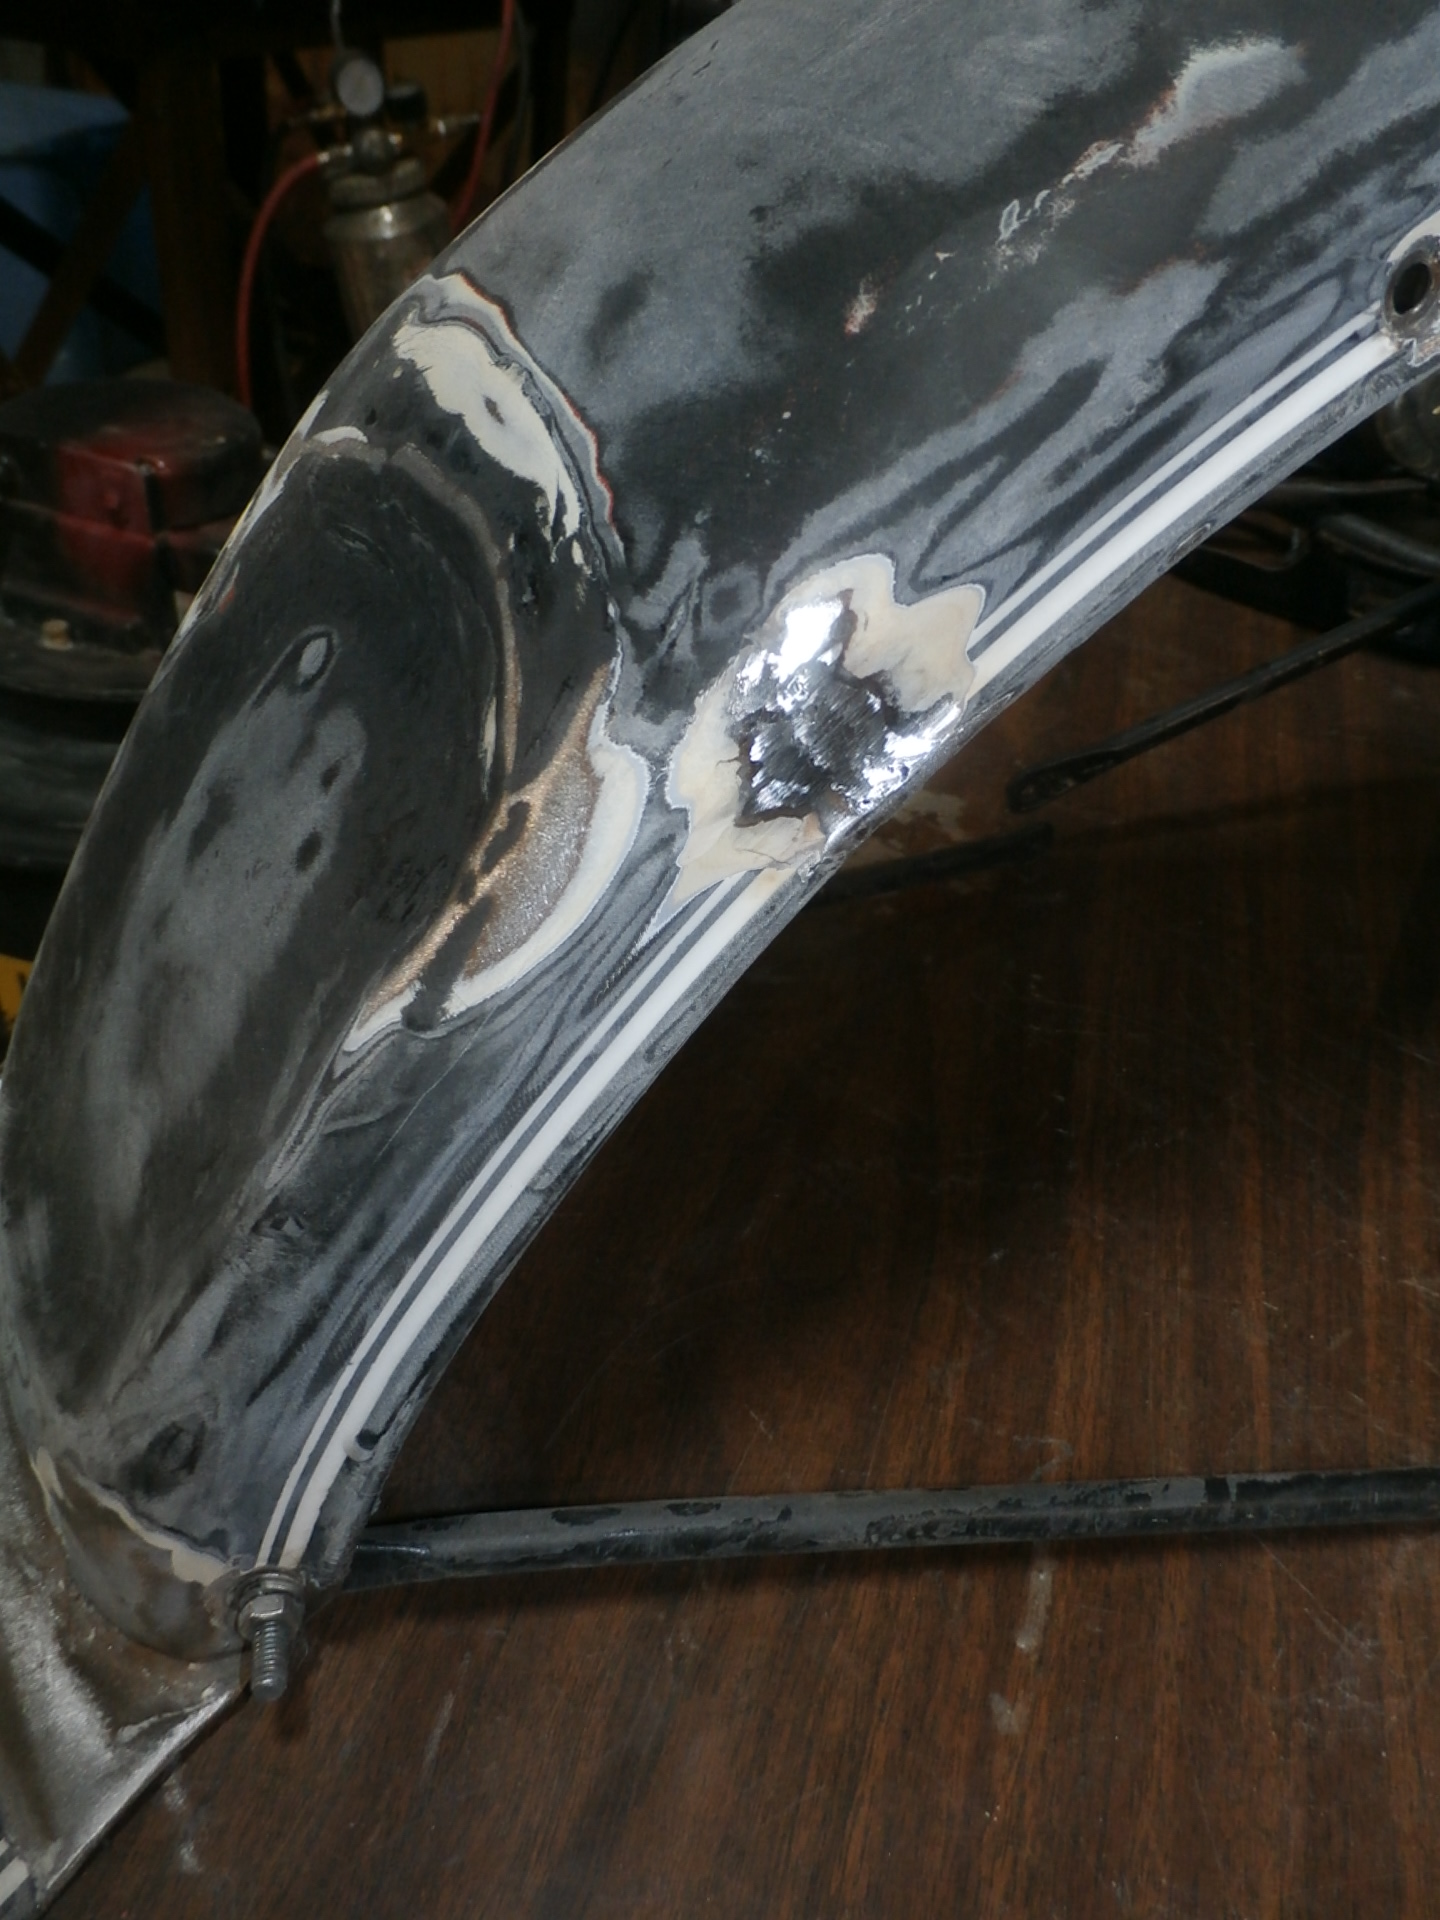
A crack in the front fender was located, once paint prep had begun. A bit of wire-feed welding and grinding, and that was done.


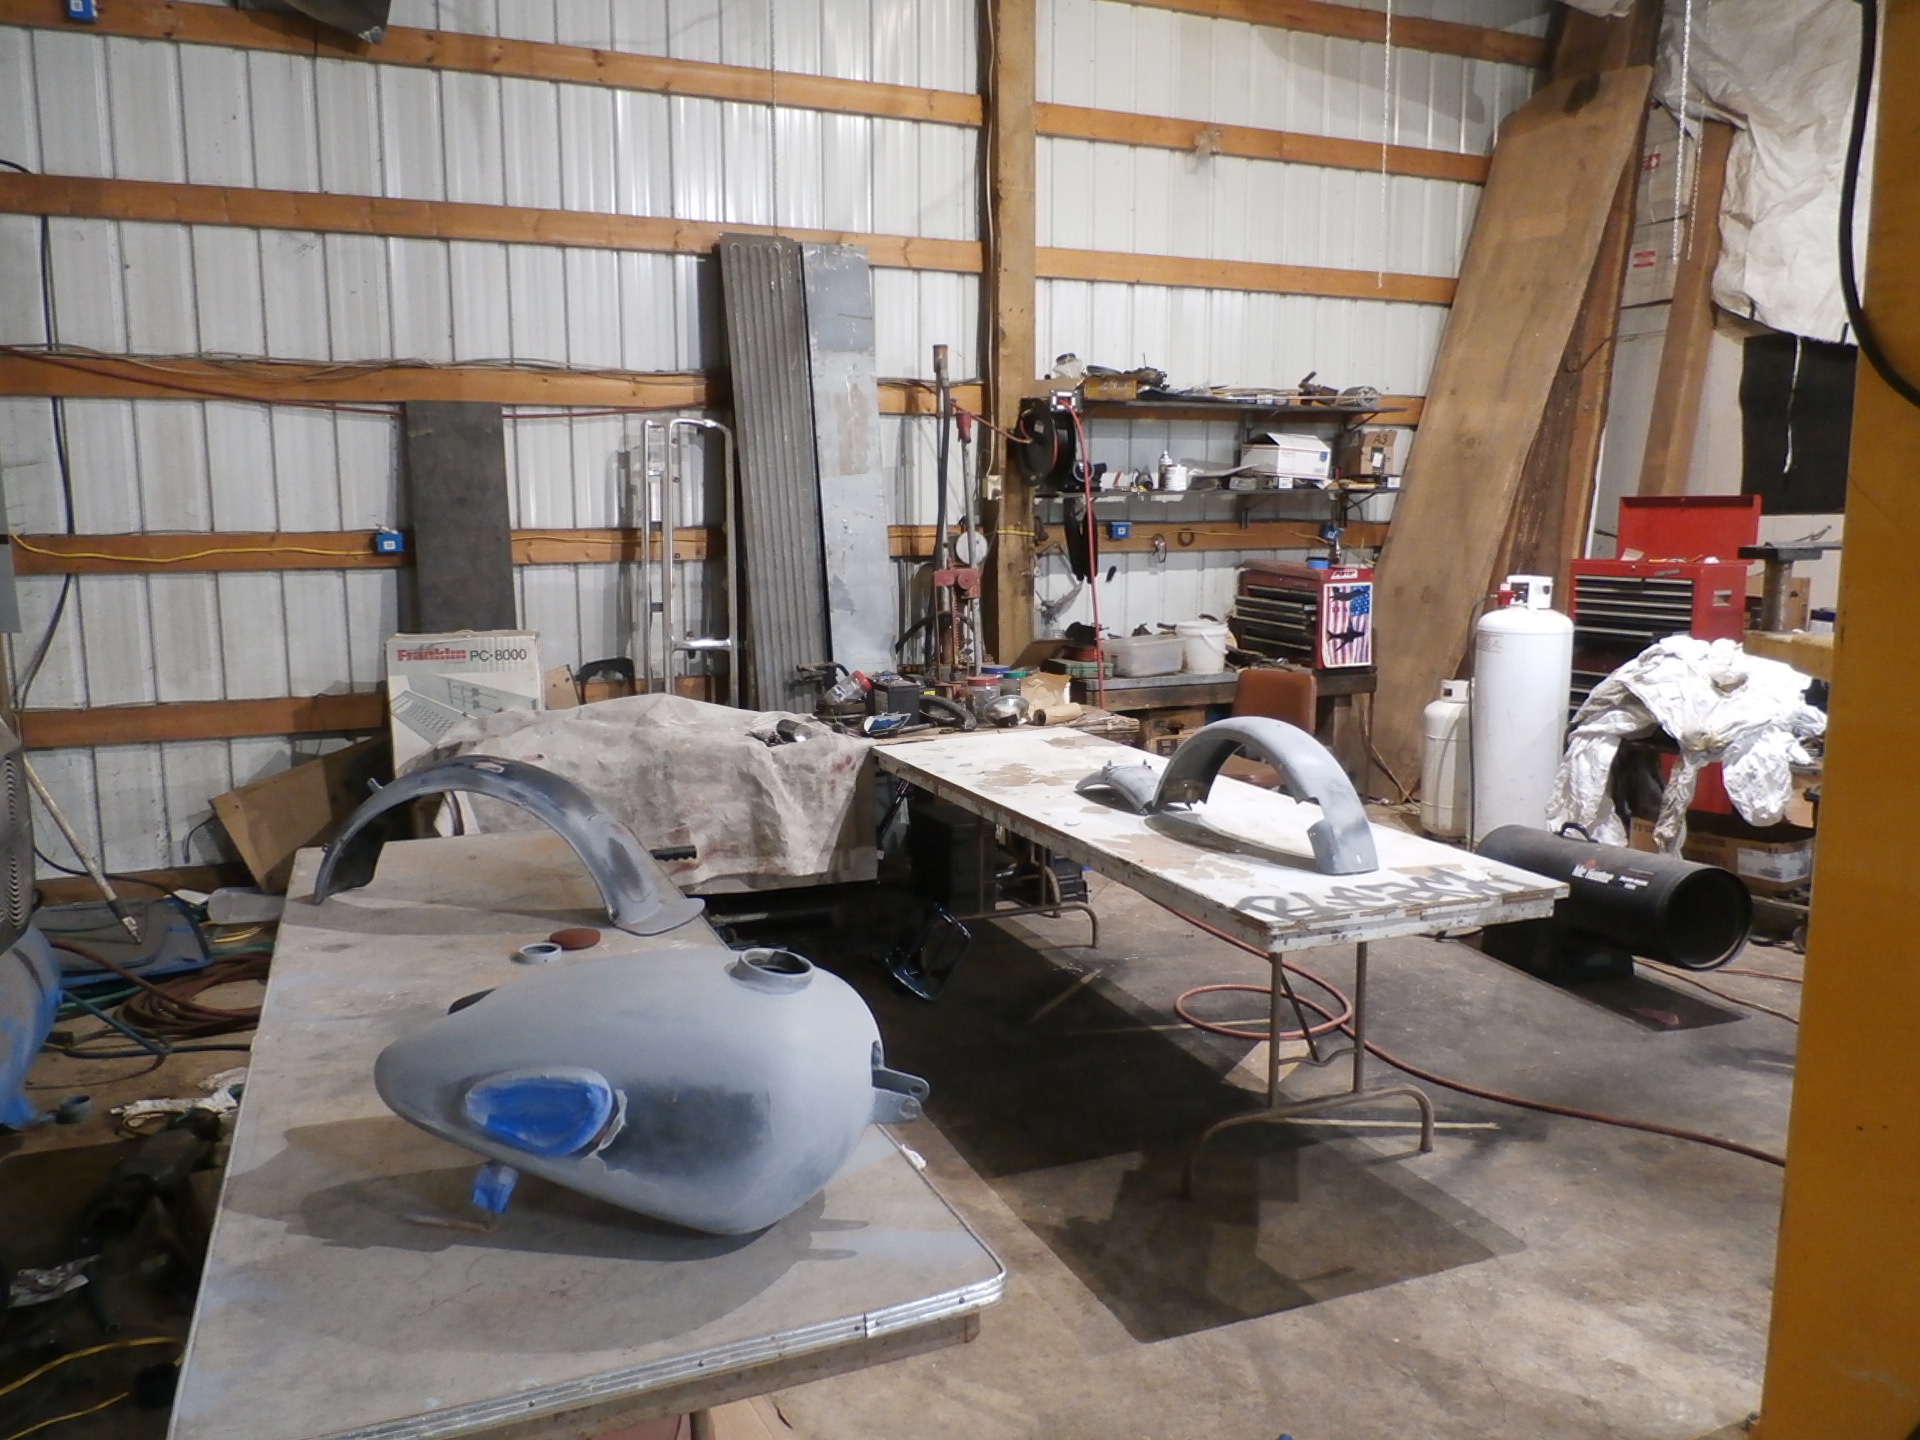
The Side car fender and rear fender are about to get the inside of the wheel well cleaned once more with the wire wheel before final sanding.
The fender in red oxide primer is the one required for our Panzergrau bike, seen here-
This fender took nearly 3 months to arrive from Europe- a shipment that usually would take two weeks prior to Covid-19 changing international shipping. Needless to say, it is VERY appreciated, and seeing it in the shop when I get there in the mornings is a very nice thing.
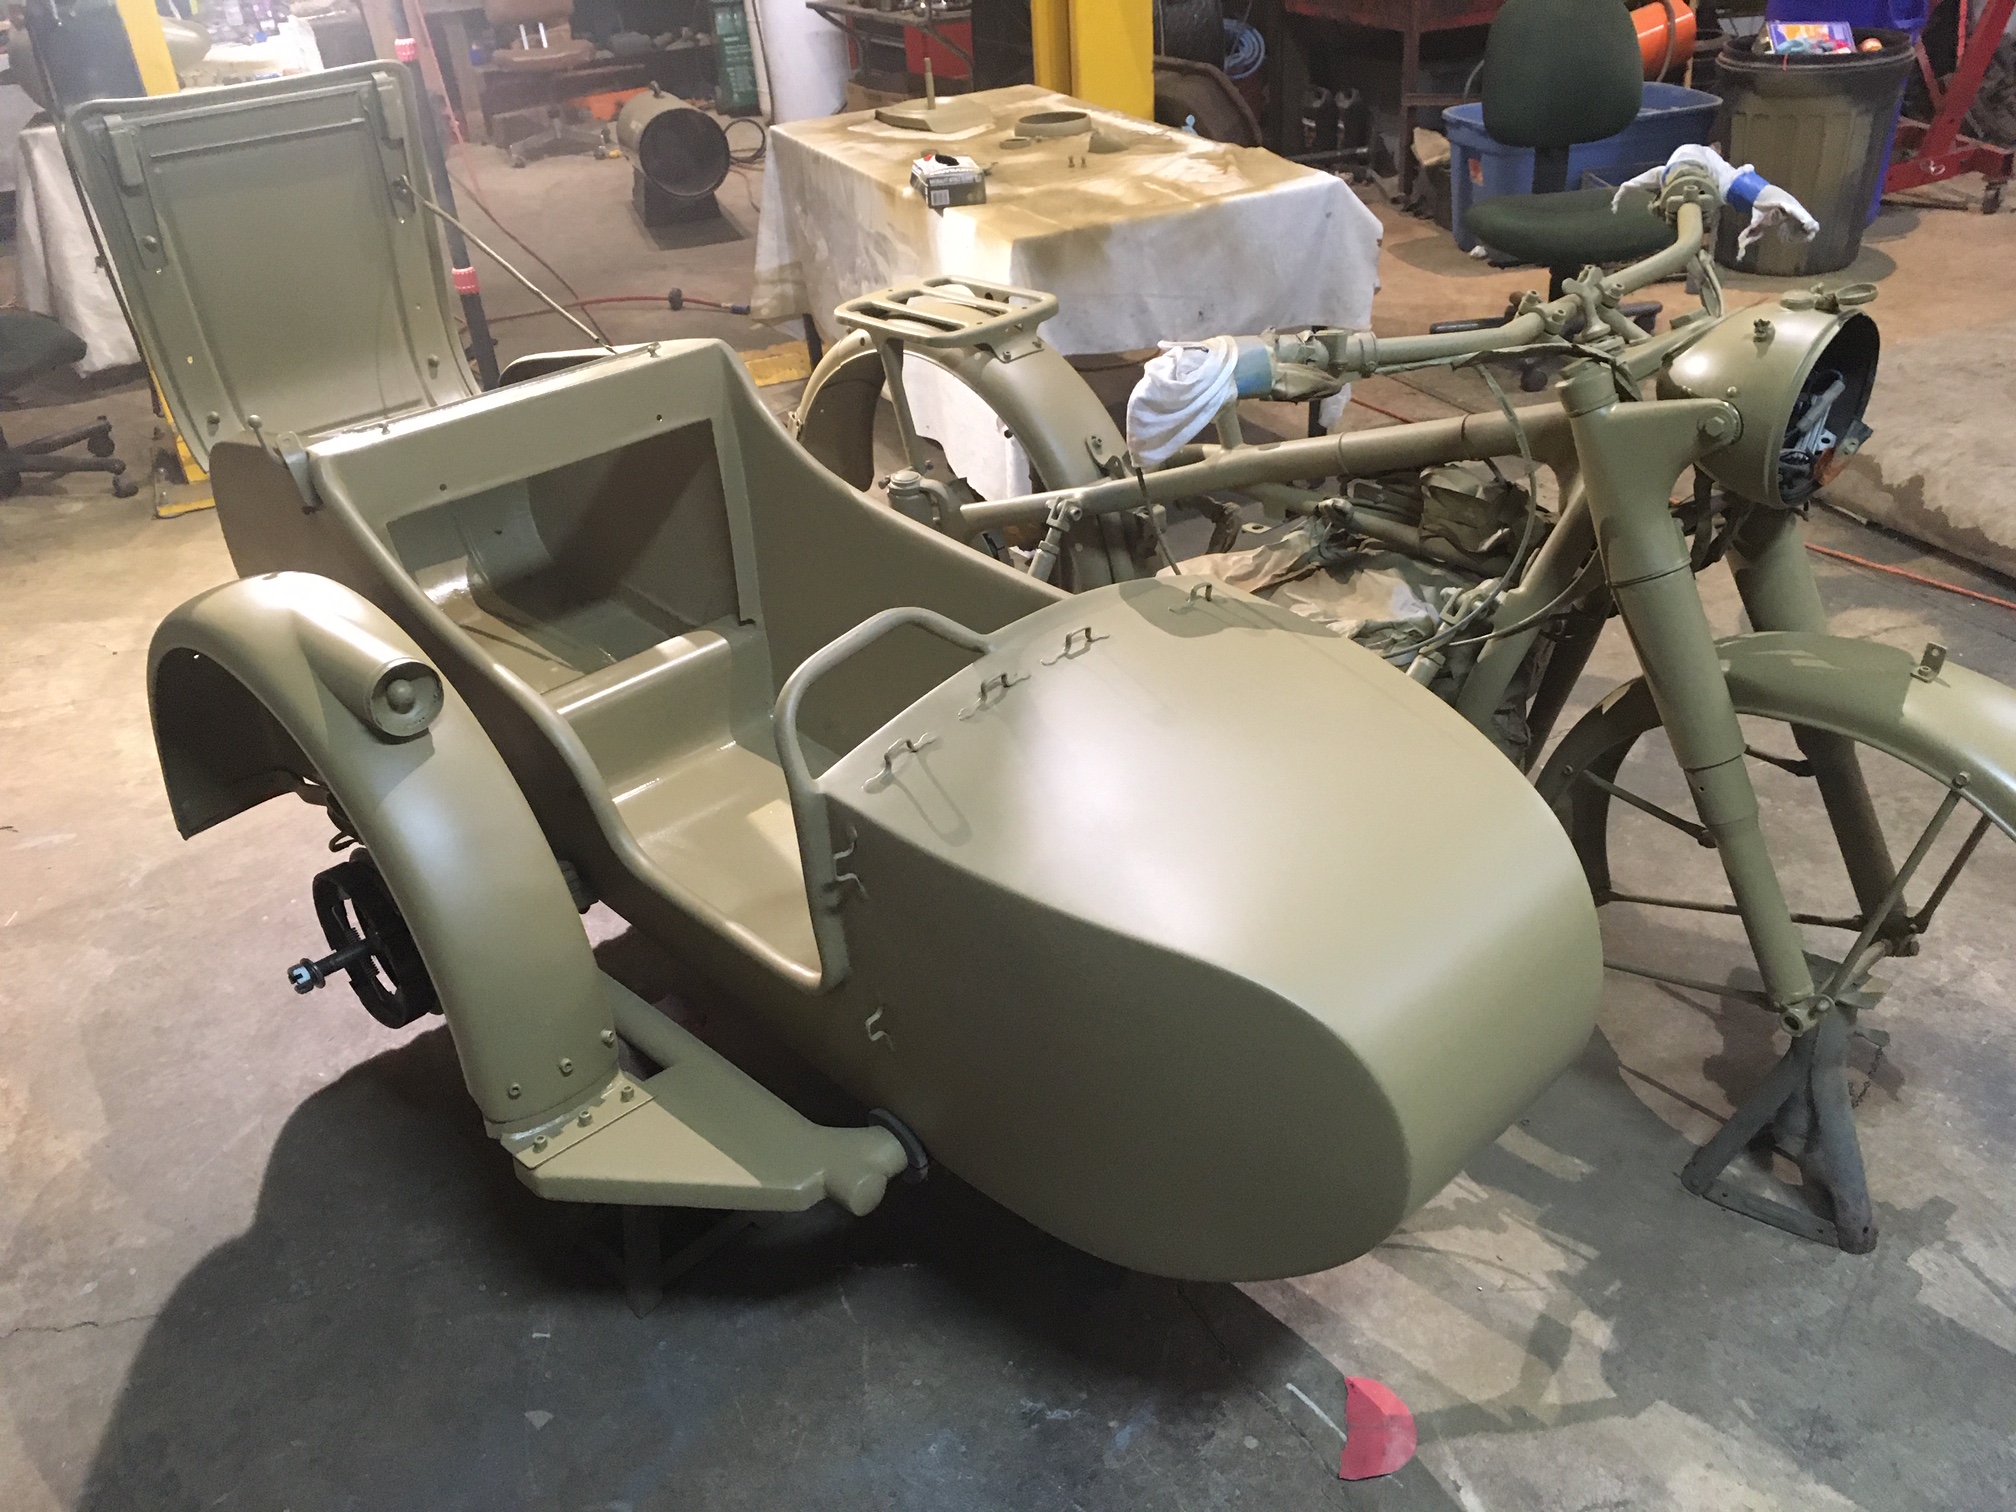
Today, November 23, was paint day.


Paint will cure up a bit over the next two days, and then we will re-assemble the bike and side-car, and then give it a sanding and one more final coat of paint. Then, all of the external parts will be attached.
This is a time that we are able to review the work, and address anything that does not pass muster. The red areas that I am sanding are spots that had very minor blemishes- Sometimes a sanding mark, or just a spot that stands out more visibly in the light color. We add spot putty, which is a very very fine sanding light surface filler, for the very final touch-ups before top-coating the machine.
We have enough extra paint here for this bike that we will likely give it an additional coat of paint than planned, and still be able to send a bit along with the bike to it’s new home, for future touch-ups.


You may notice areas of light sanding, or discoloration in the paint- These are areas that I have sanded with a 220 grit sanding pad to correct any blemishes, with the red areas being spot putty. We will go over everything with a 2,000 watt lamp to illuminate any other needs to correct, and then the entire chassis, tub, and all of the other parts will get final sanding before I re-spray another layer of paint.


We spent this Sunday giving everything another quart of paint.
Tomorrow afternoon, we should have the sidecar chassis mounted to the bike again.


There were a few nicks and scrapes that needed a final bit of spot putty, and primer after we put the bits all back together. Then, we sprayed a 4th quart on the bike, and it really looks super.
We will add the pictures taken during the spray process tomorrow- I seem to have forgotten that camera at the shop-
MORE PICS TO BE ADDED TO THIS SEGMENT THURSDAY- They are visible starting 5 photos below-
Here are the final coat shots, just after the fans were shut down.


There will be many photos of the finished bike loaded tomorrow, as well as the missed photos from spraying today, on the camera left at the shop….Tomorrow morning, we will arrive, and carry on pulling masking, and putting the bike back together. Perhaps even a run video, if I get that far.
Here are the missed photos from the other day-

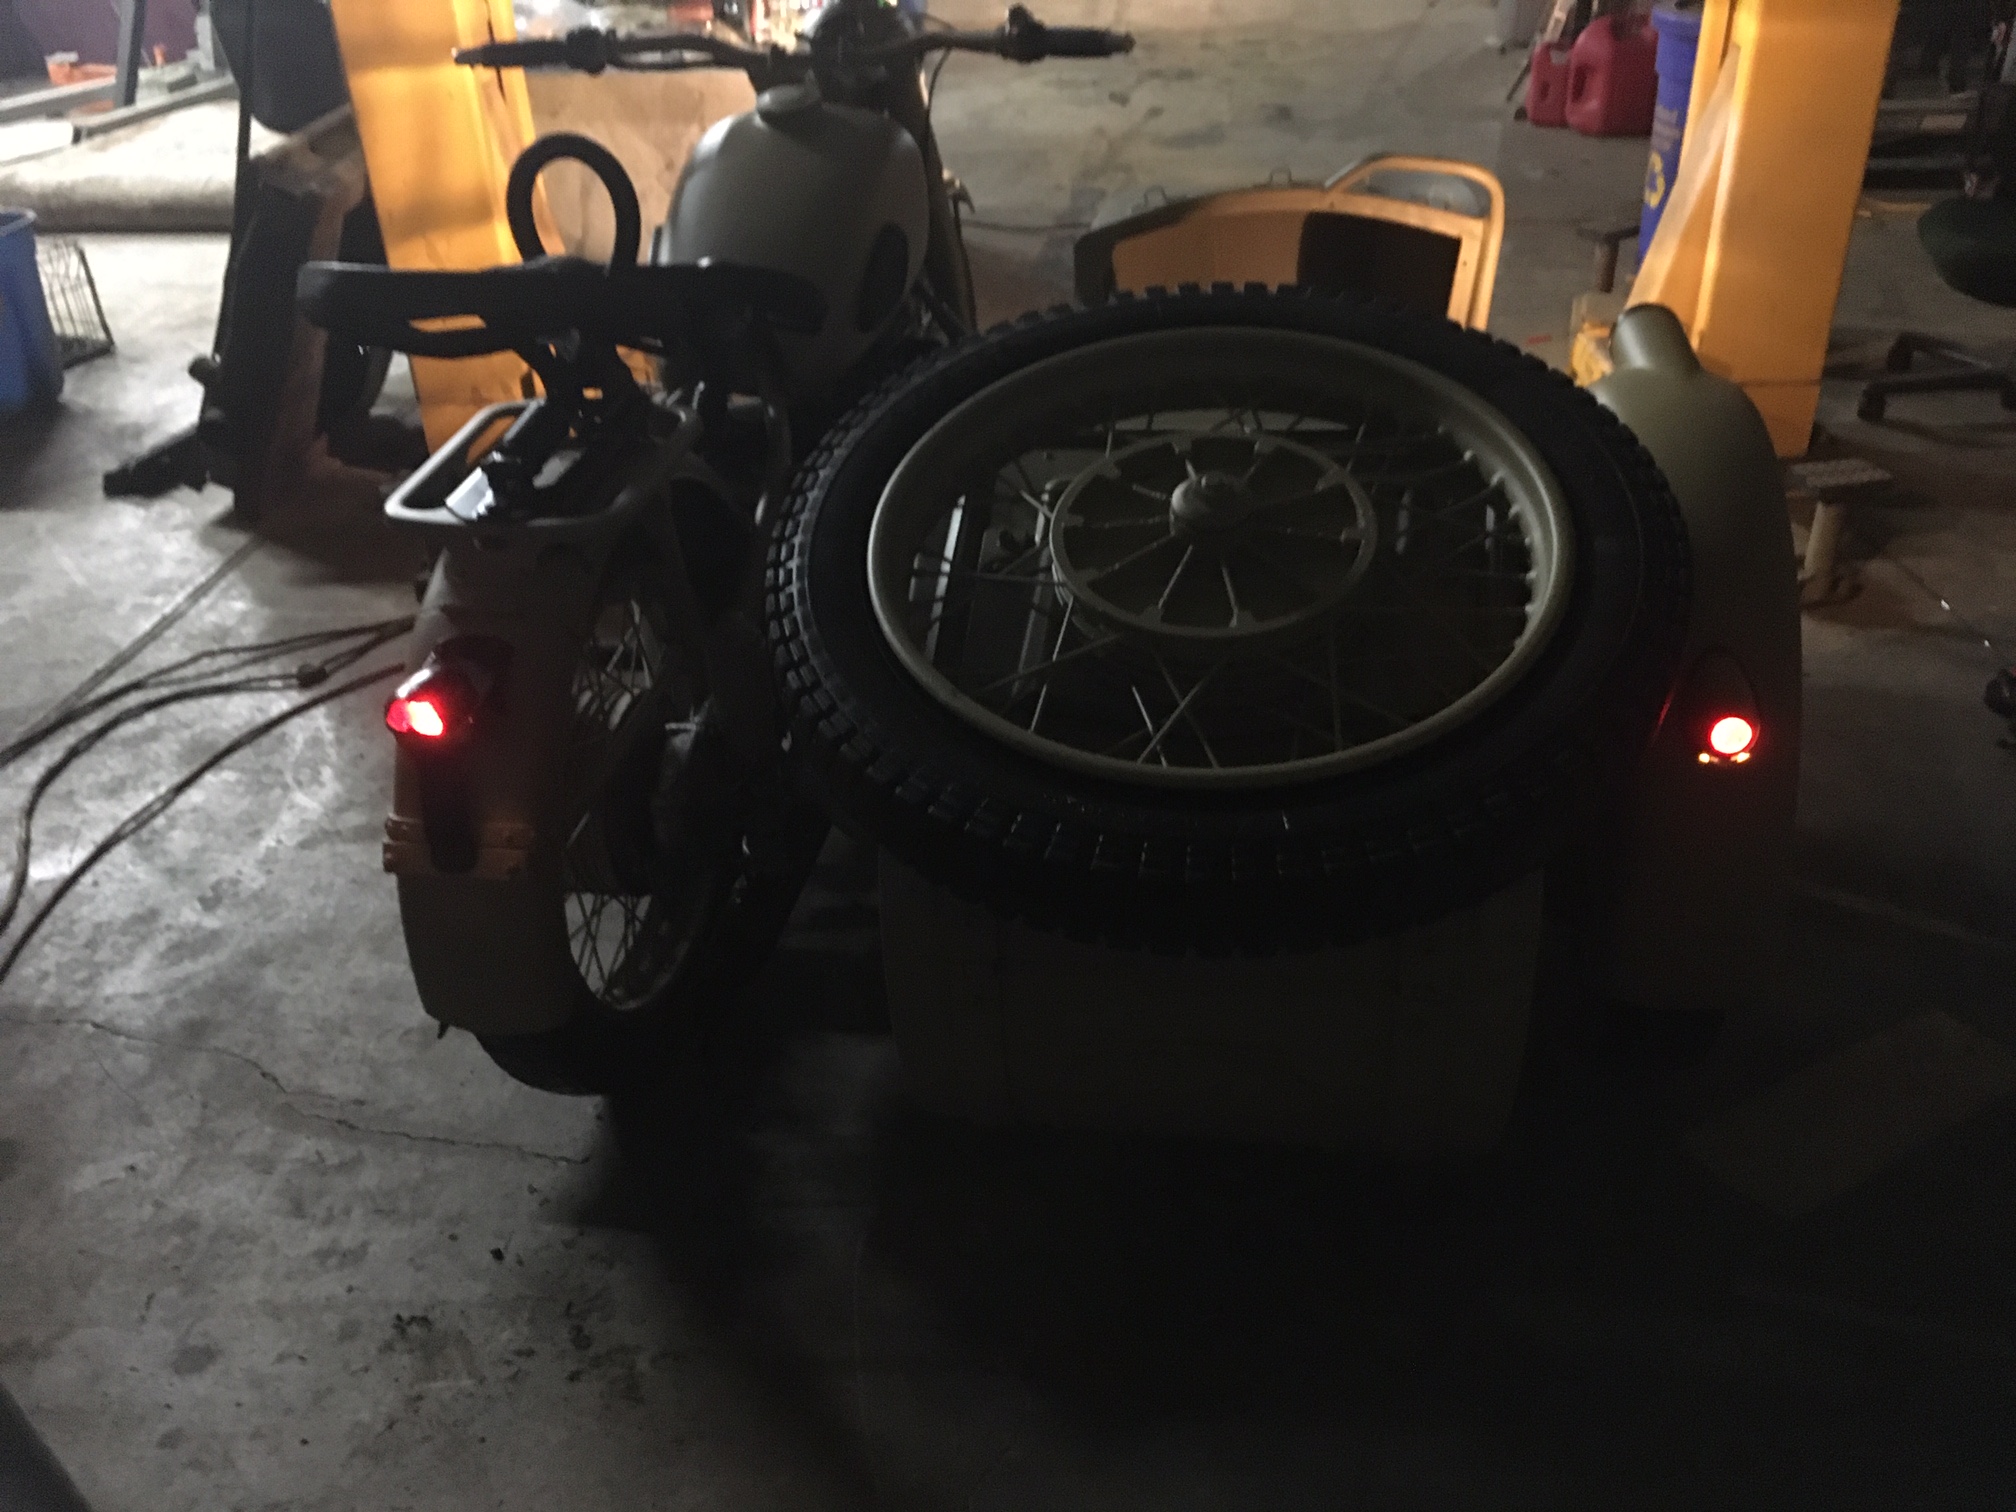
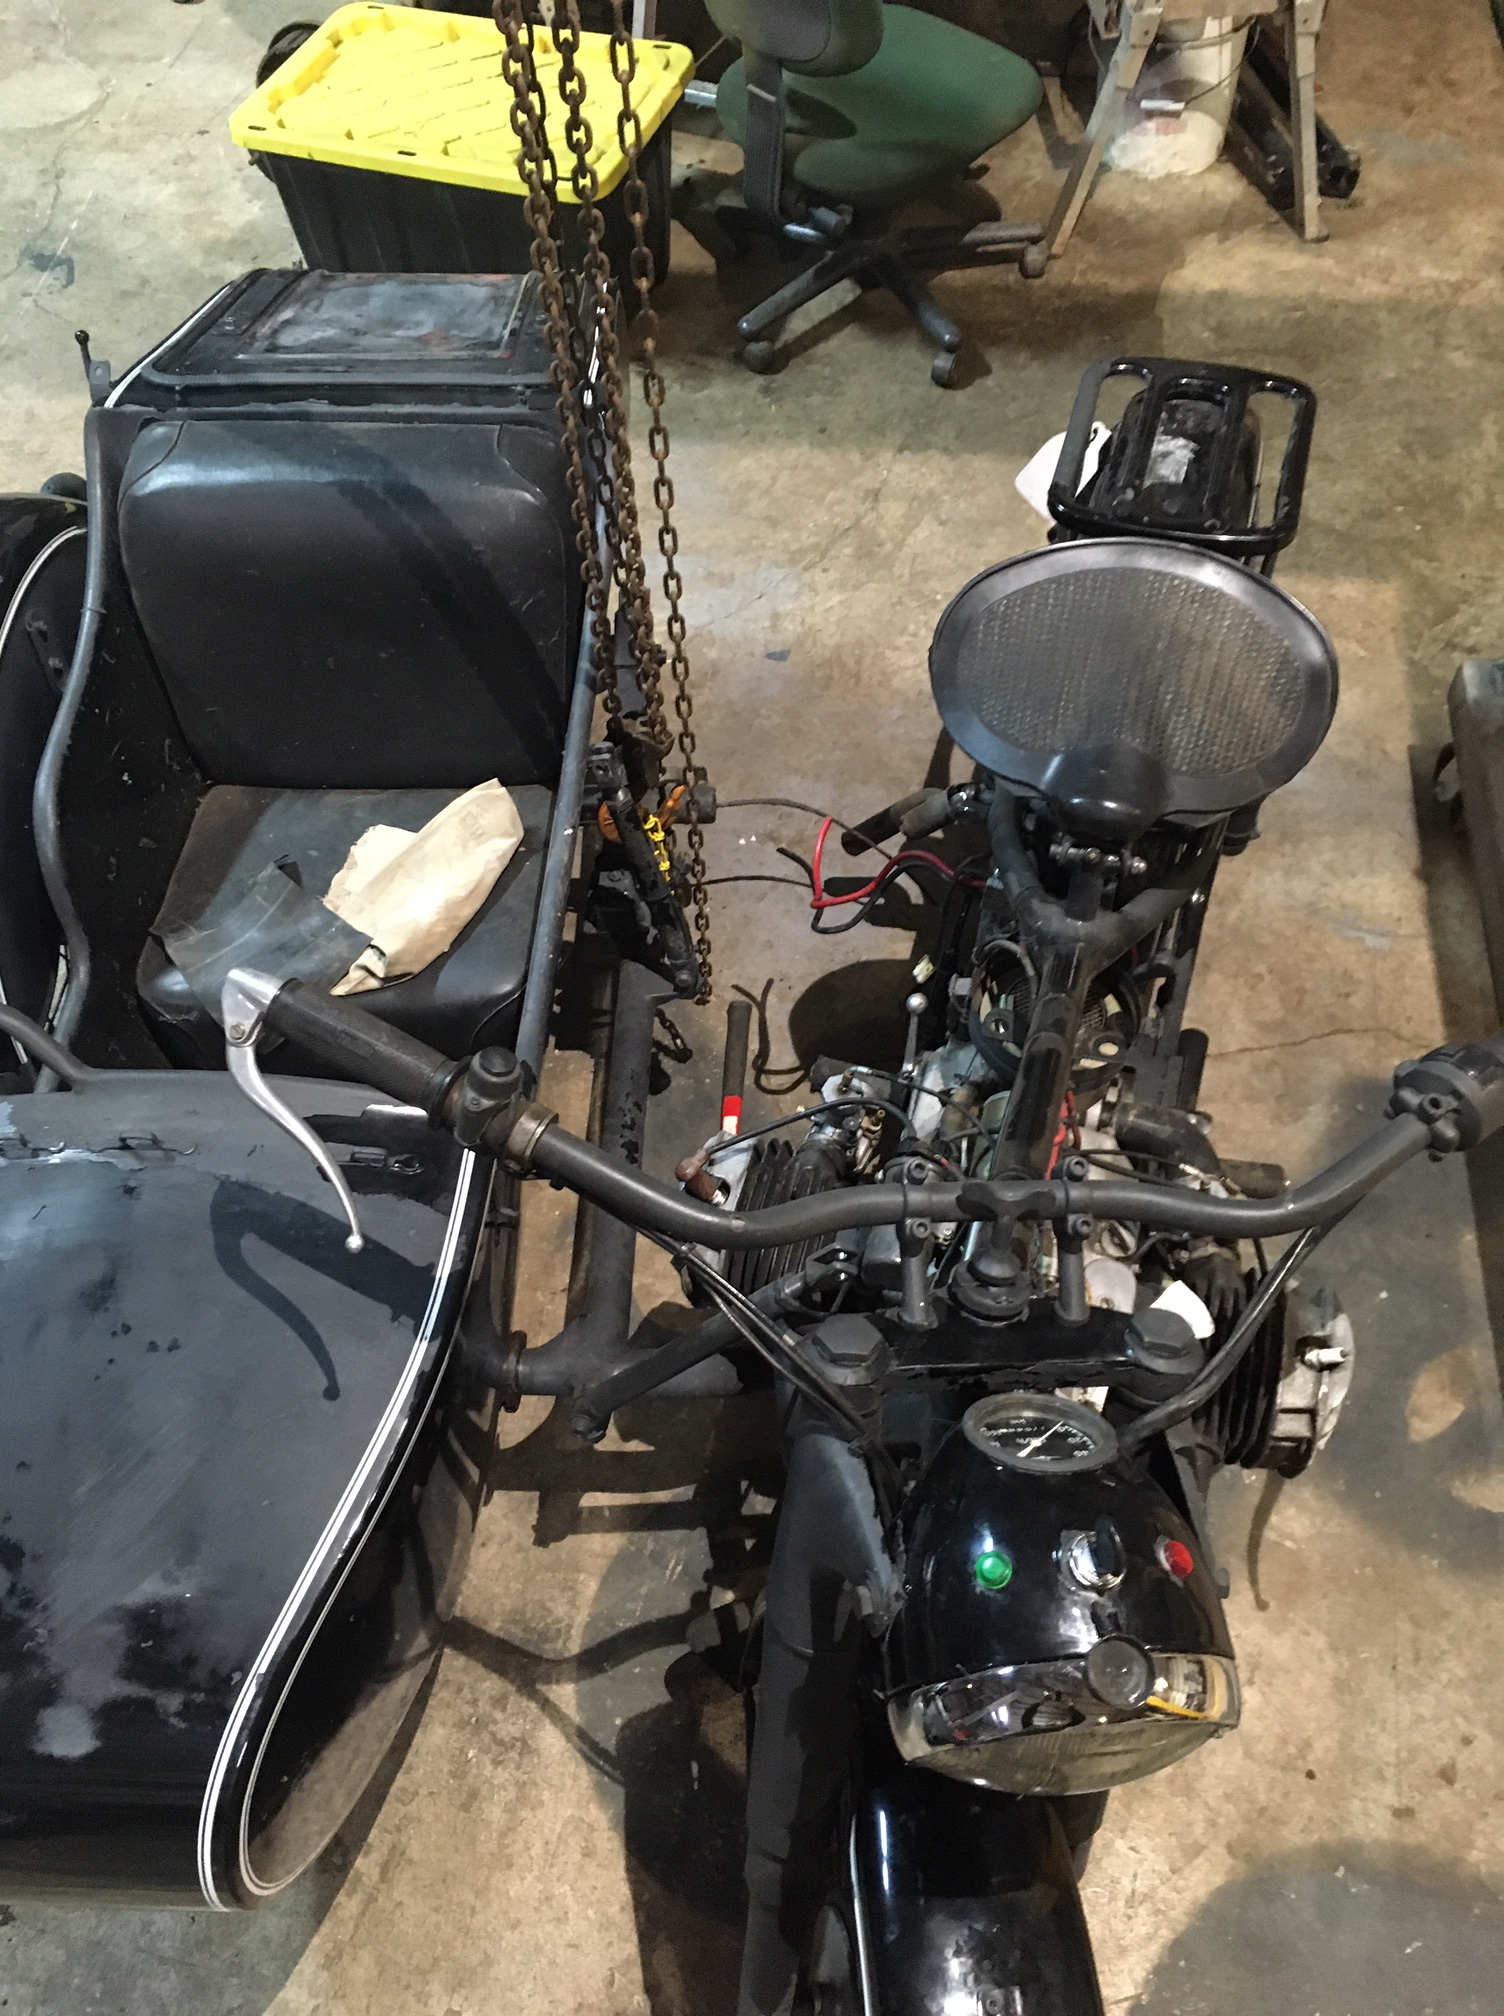
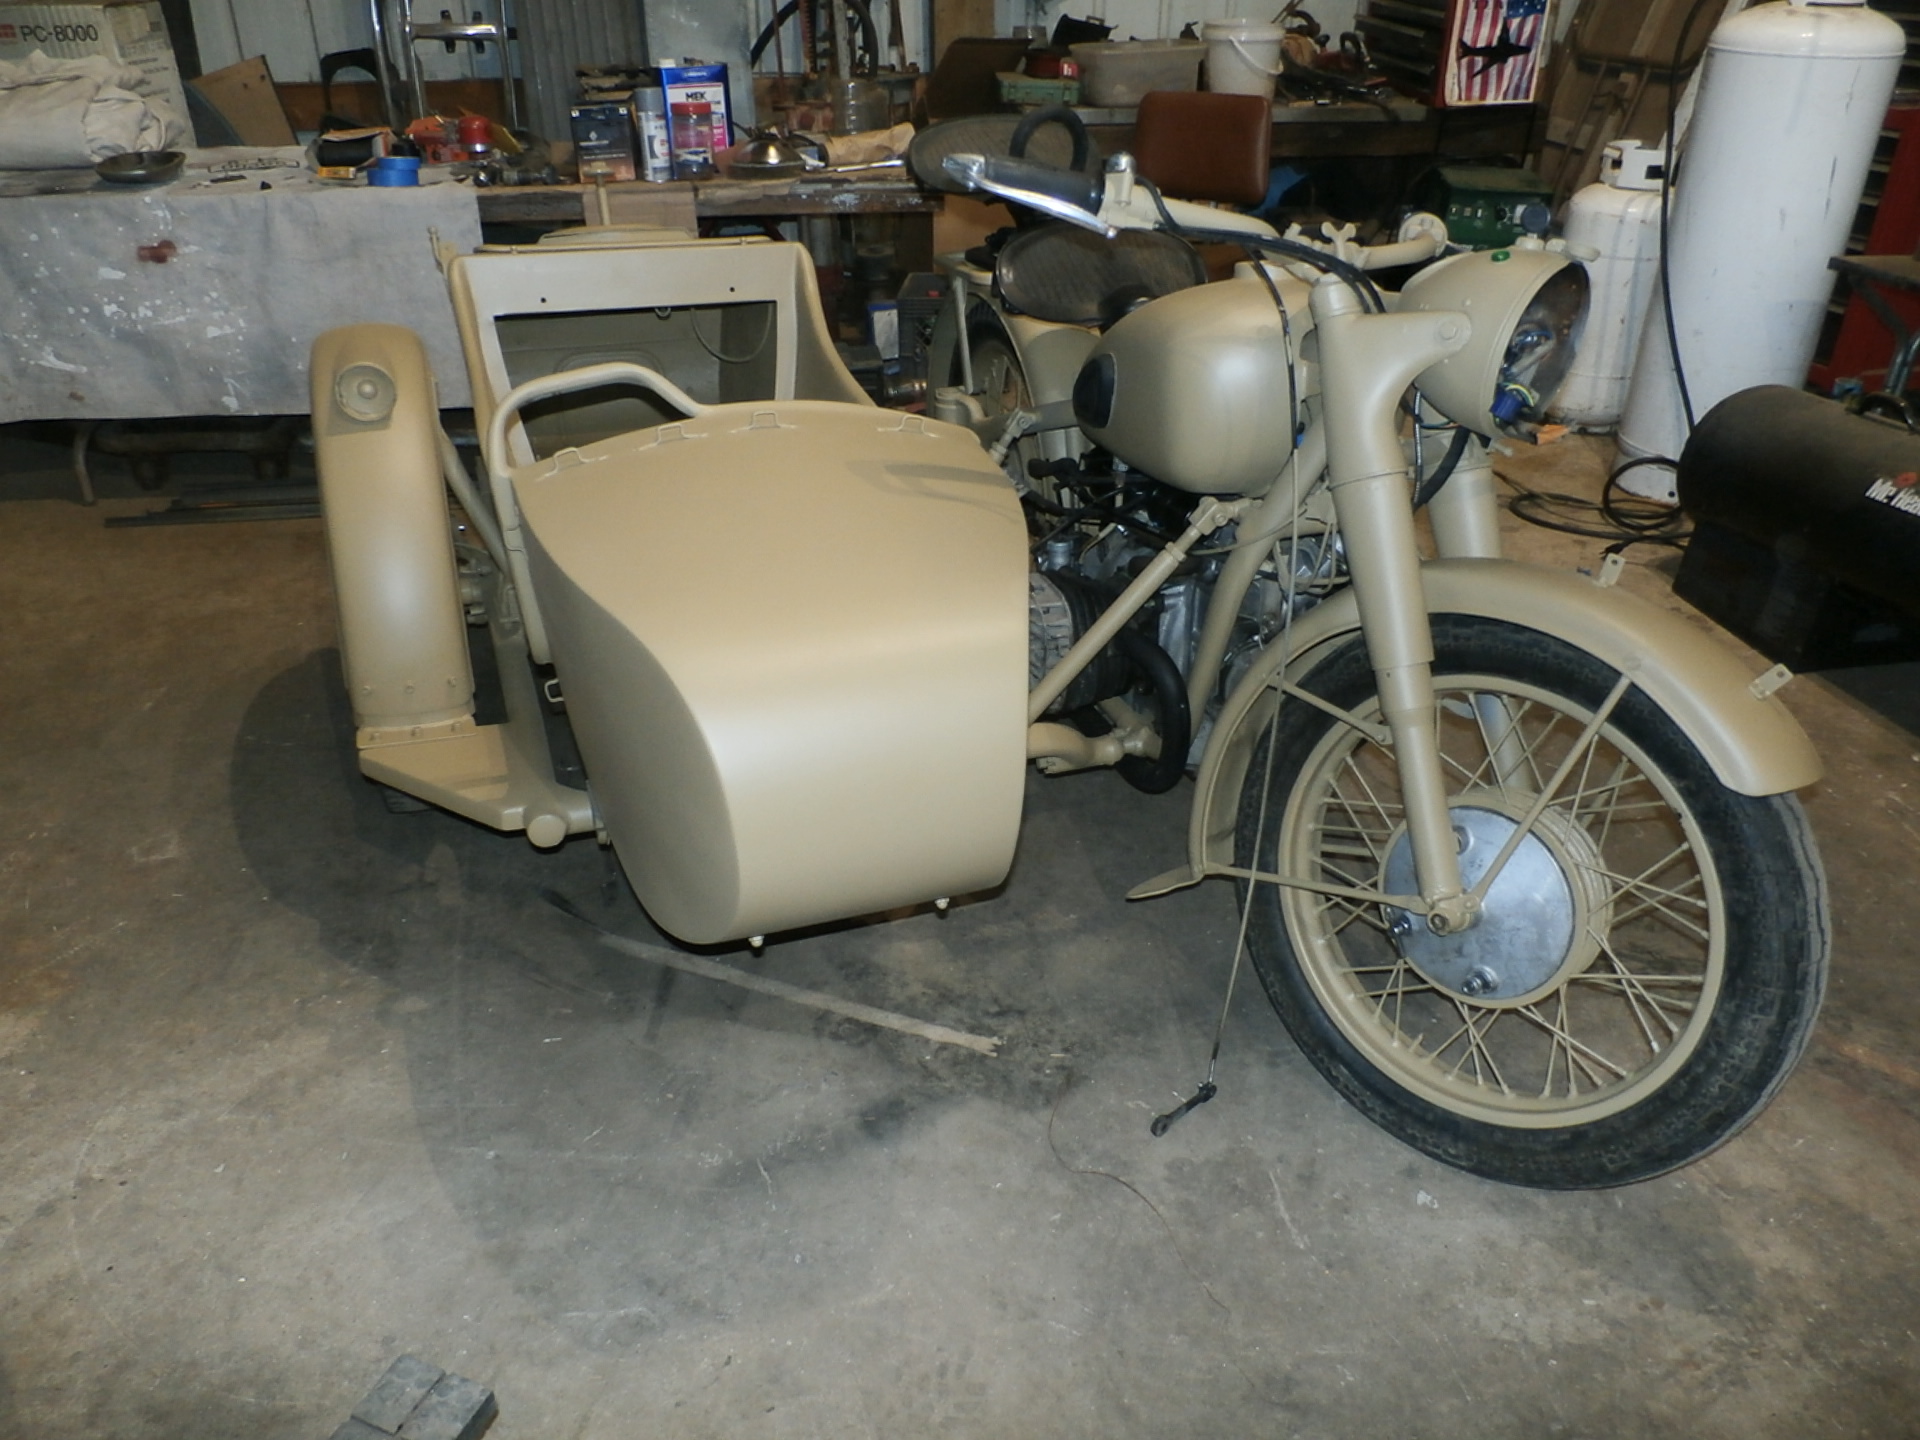
The beginning of the re-assembly has begun, and the process will go quickly, since all of the additional parts were sprayed prior to the main bike bits being painted.
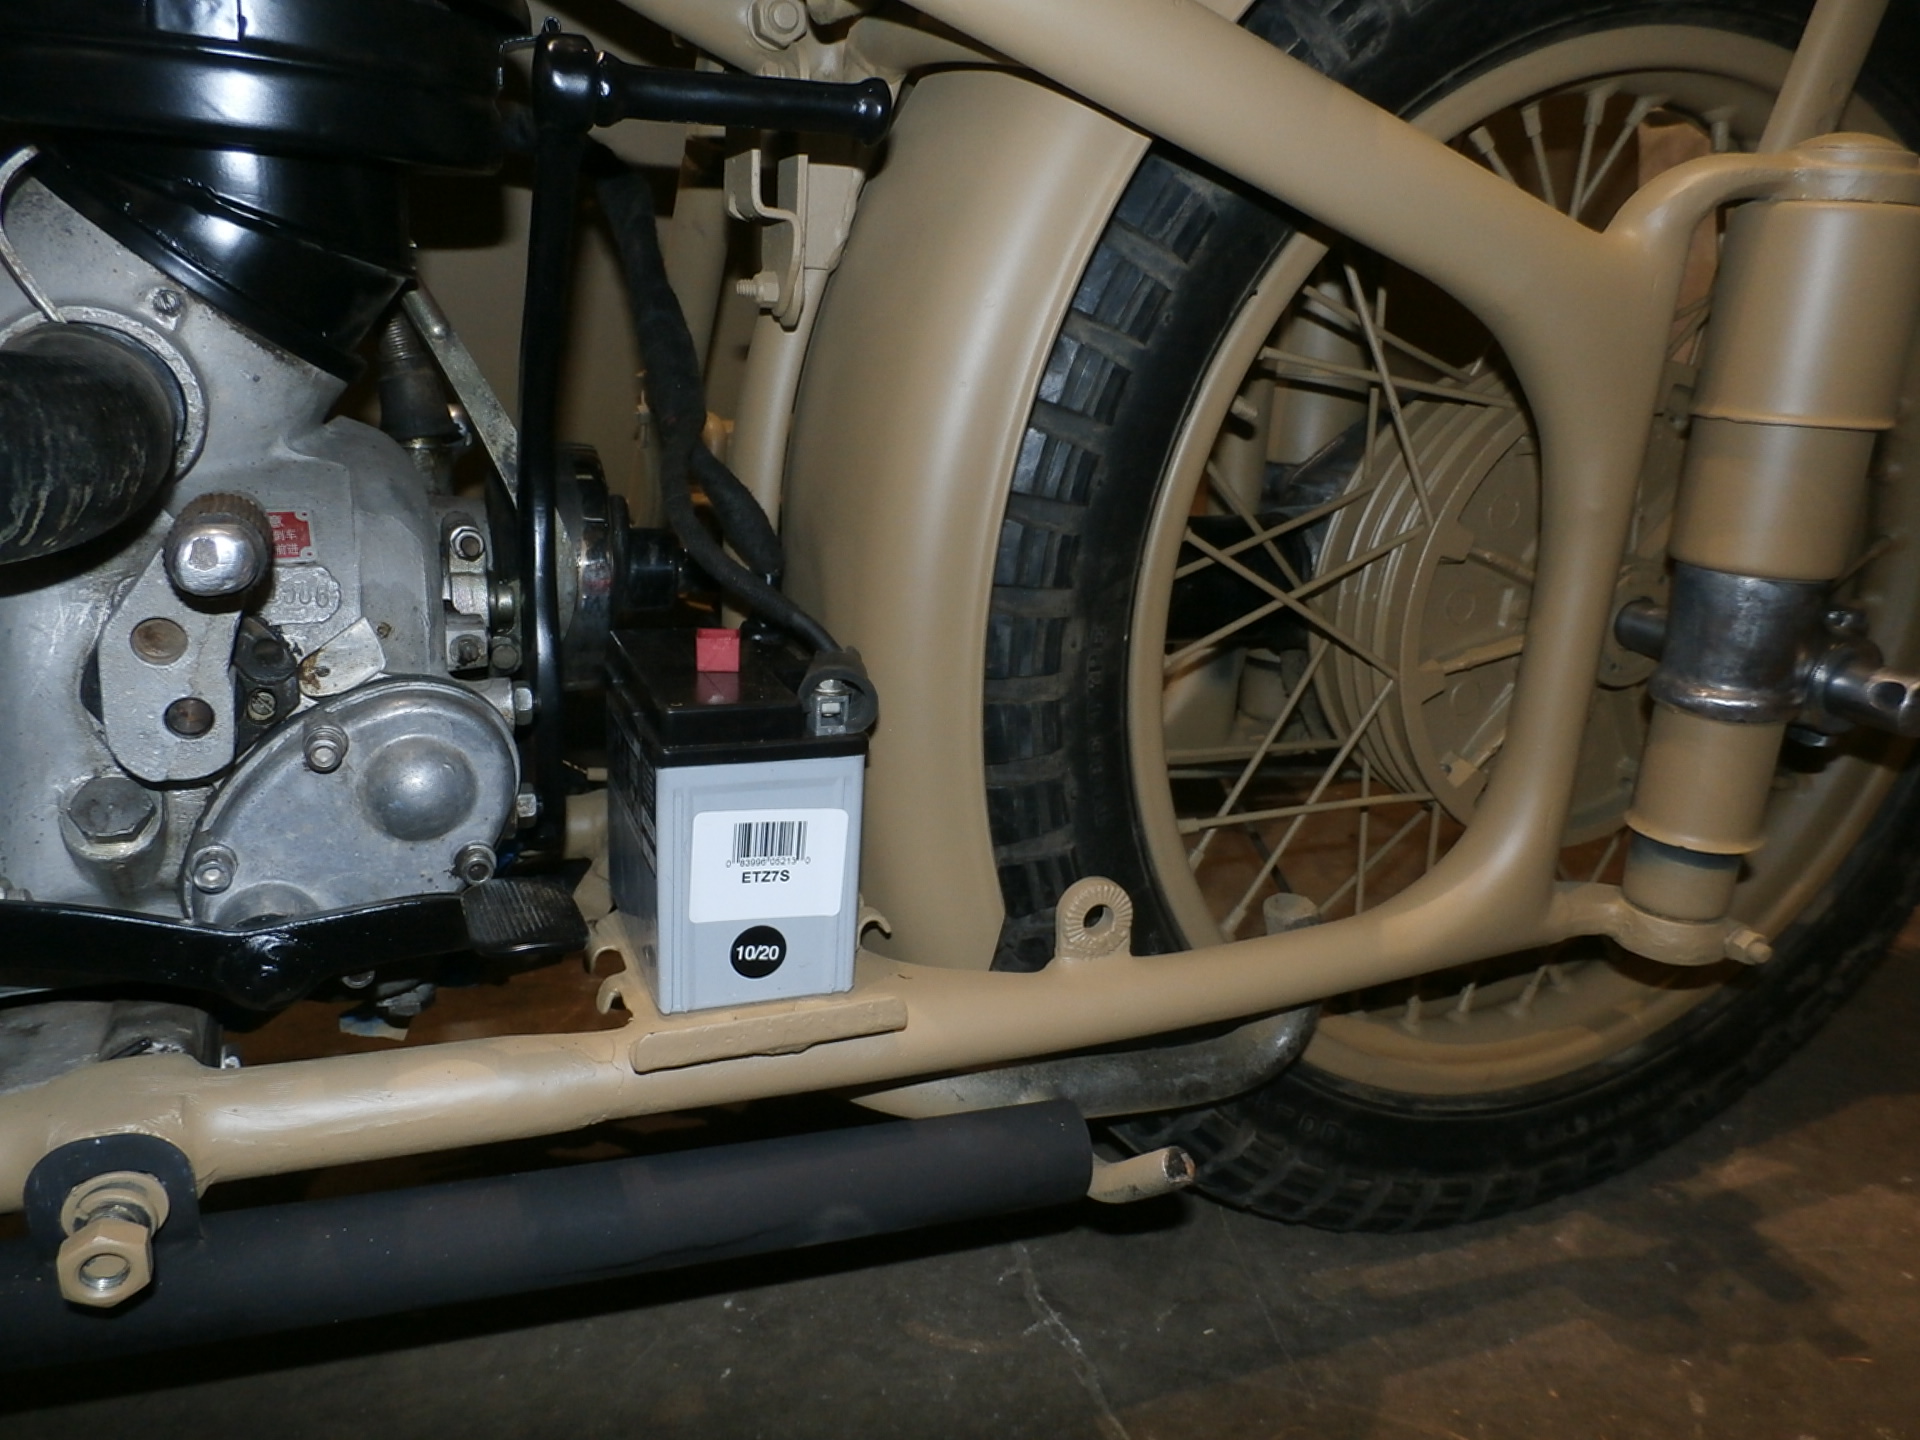
We have the battery located in the correct position on the bike, and this was the first part of getting the electrical system wrapped up in the proper felt tape, versus the plastic sleeve the wires were in prior.


Tomorrow morning, I will be getting some premium fuel and doing the run test, and will make a short video of that.
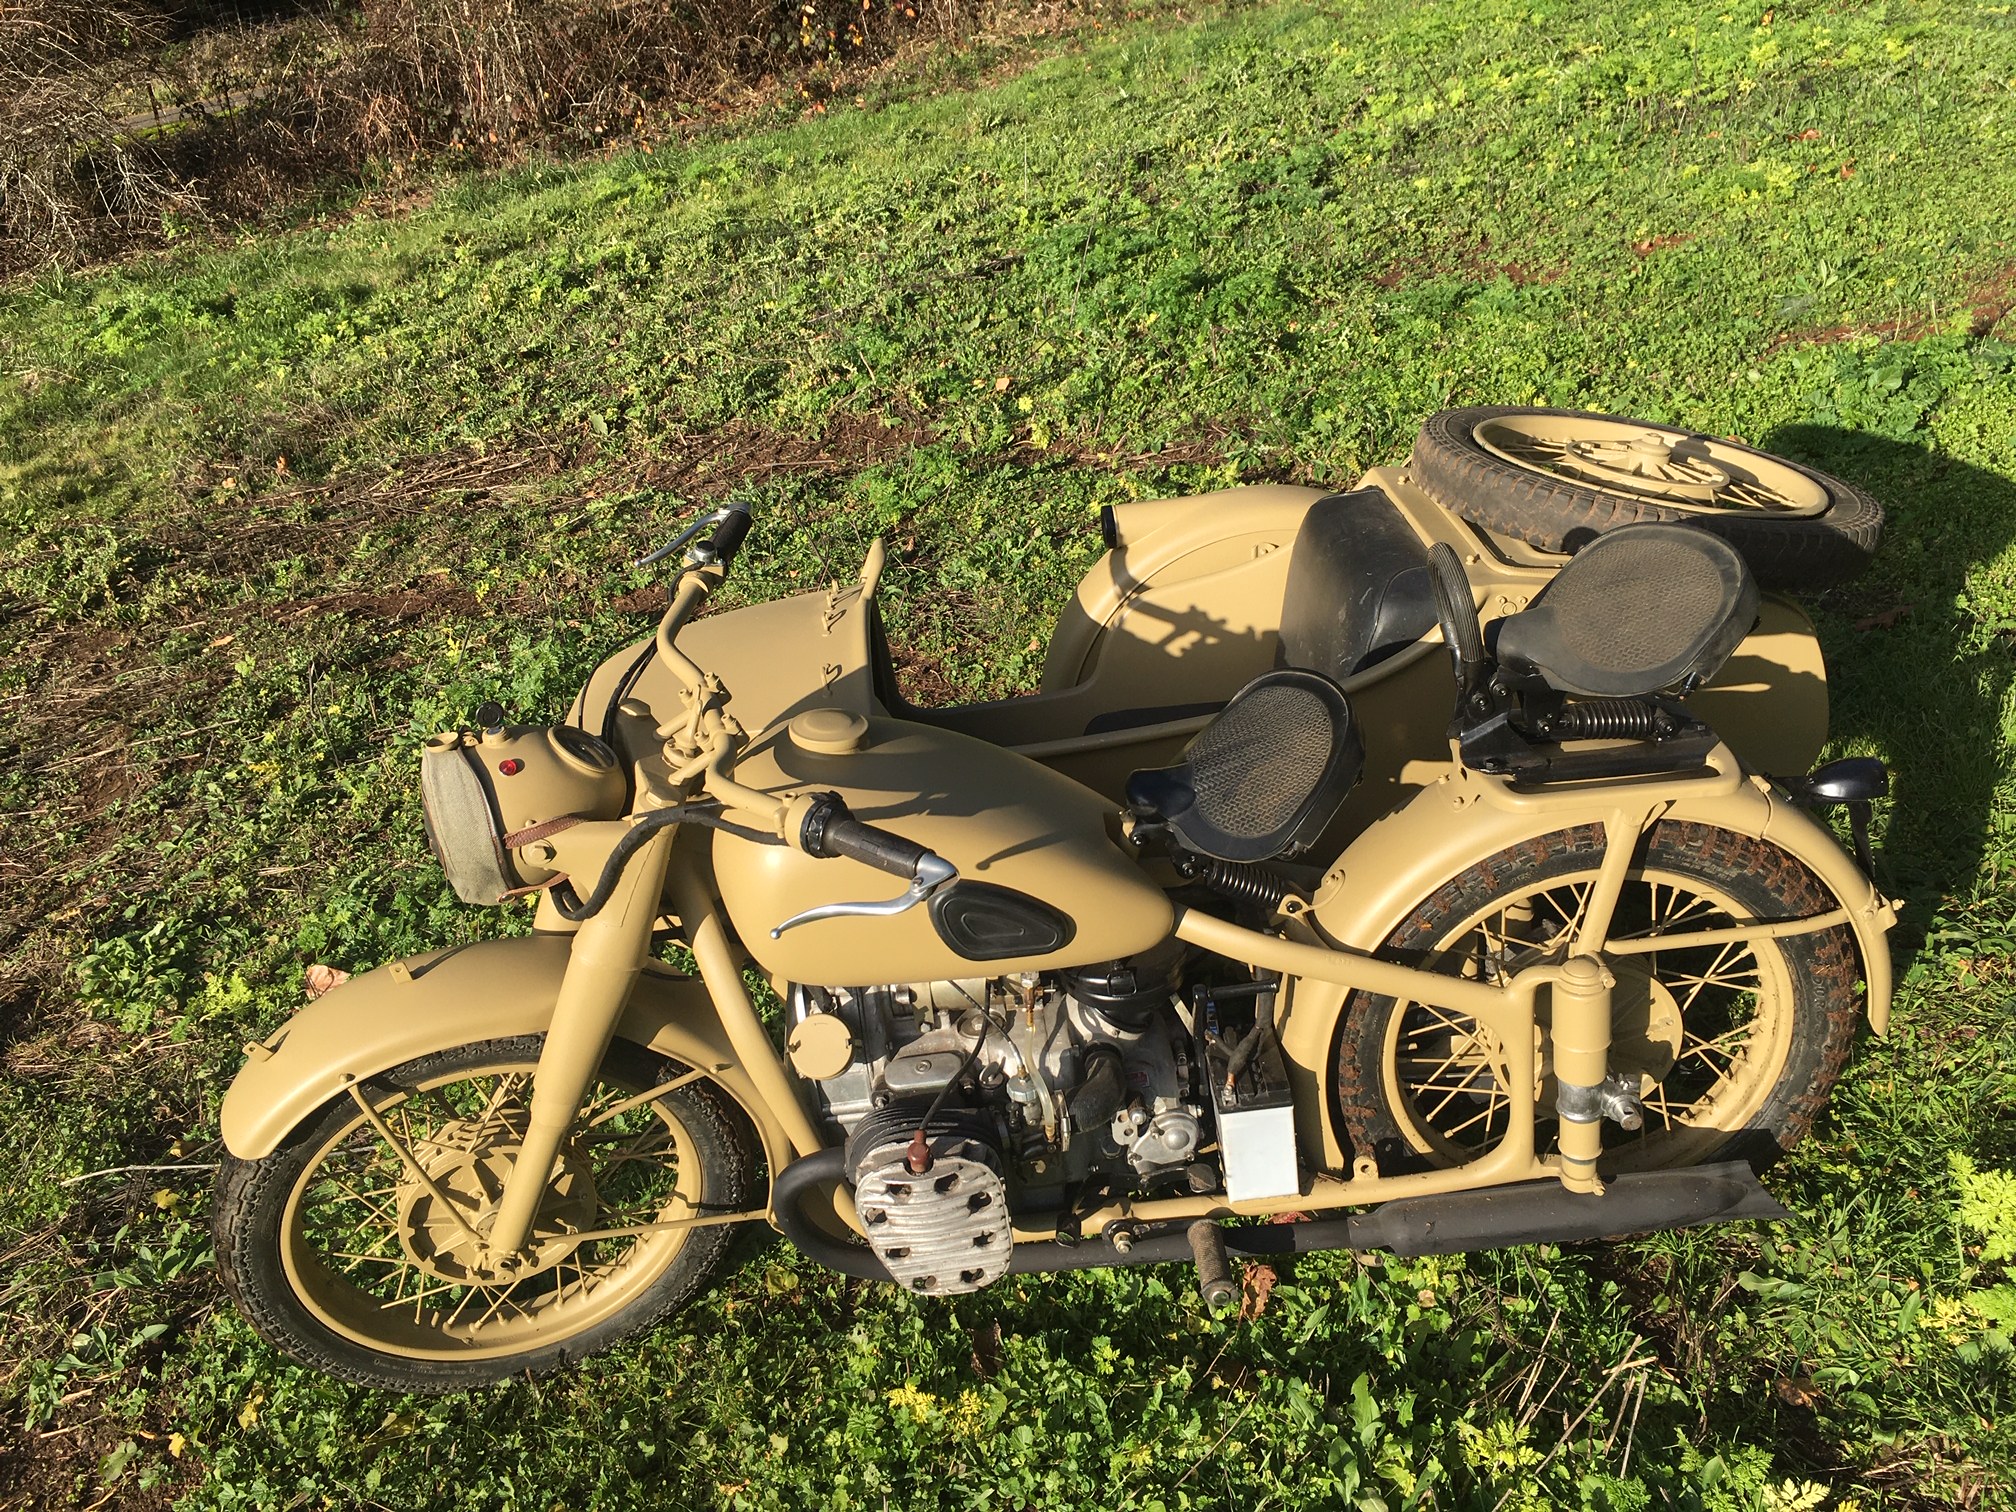
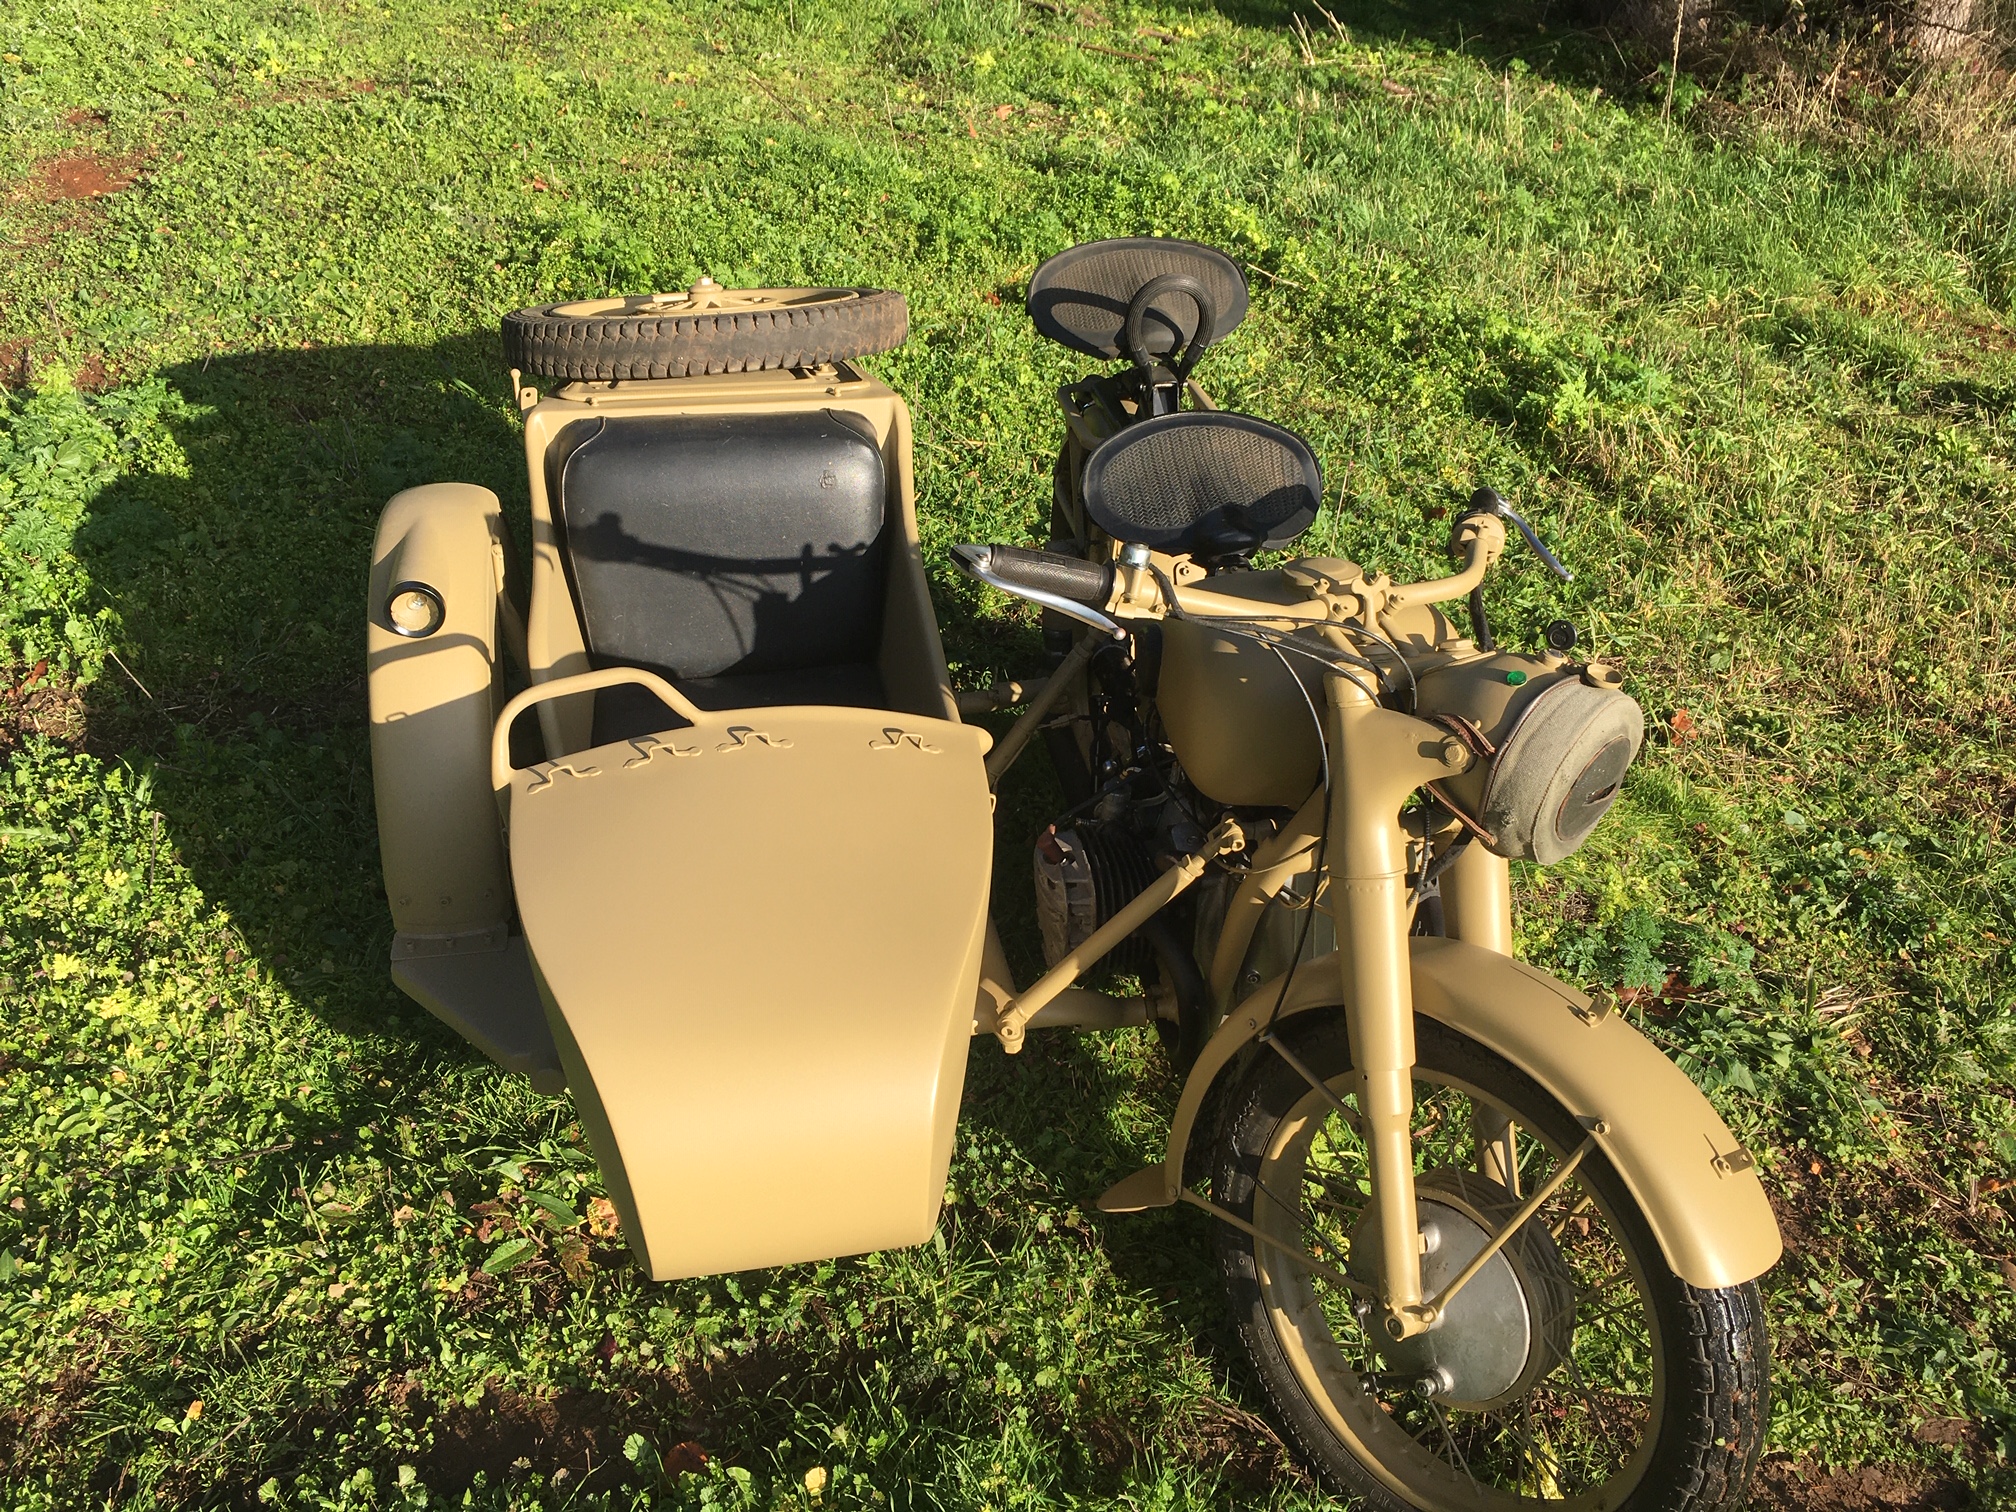
Now that the bike is back together and confirmed in running condition, with all new brakes, we will finish the mounting of the external parts, and will do a small photo shoot outside today, with another running video.
It will be raining the rest of this week, on and off, so today, I took it out for a short road test, and had a very nice run. Tomorrow will be connecting the tail lights, and it is finished.